In this article you will learn how to clean your FPV drone motors in the most effective way.
I have tried quite a number of methods for cleaning RC motors since I first began building models many years ago, and have found this method to be the easiest and most effective.
For those who want the quick answer…
To clean your FPV drone motors, simply take the following steps:
- Using an appropriately sized hex driver, remove the motor screws.
- Lift the motor from the frame and turn it over to reveal the bell screw / circlip.
- Remove the bell screw or circlip and then remove the motor bell.
- Thoroughly clean the motor windings and bearing using rubbing alcohol and a toothbrush.
- Thoroughly clean the motor bell using rubbing alcohol and a toothbrush.
- Use a lint free cloth to wipe dirt and excess alcohol from the motor bell and windings.
- Reassemble the motor and reattach the motor to the frame.
Now we can take a look at each of those steps in a little more detail:
- How To Clean your FPV Quad Motors
- What Tools do I Need To Clean an FPV Drone Motor?
- Cleaning Your Motors in 7 Simple Steps
- STEP 1: Using an appropriately sized hex driver, remove the motor screws.
- STEP 2: Lift the motor from the frame and turn it over to reveal the bell screw / circlip.
- STEP 3: Remove the bell screw or circlip and then remove the motor bell.
- STEP 4: Thoroughly clean the motor windings and bearing using rubbing alcohol and a toothbrush.
- STEP 5: Thoroughly clean the motor bell using rubbing alcohol and a toothbrush.
- STEP 6: Use a lint free cloth to wipe dirt and excess alcohol from the motor bell and windings.
- STEP 7: Reassemble the motor and reattach the motor to the frame.
- Why Is It Important to Clean FPV Drone Motors?
- Can You Wash a Brushless Drone Motor with Water?
- How Do You Get Sand Out of an FPV Drone Motor?
- Can You Oil Drone Motors?
- Conclusion
How To Clean your FPV Quad Motors
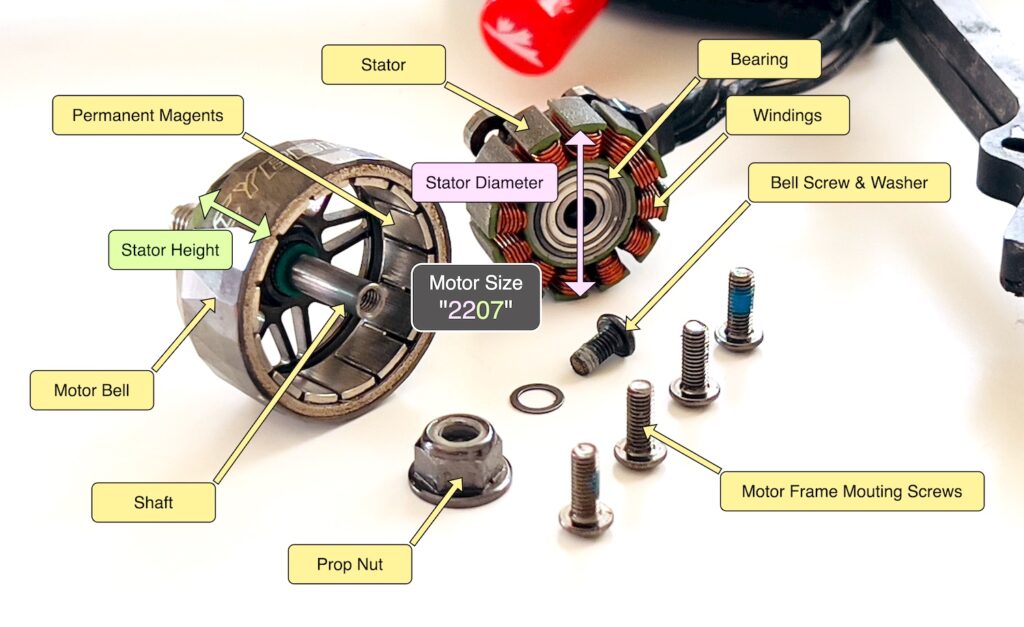
Before we jump in to cleaning our motors, let’s just recap on the anatomy of a motor, so that you don’t get confused by any terminology.
All of the parts referred to by this guide are shown in the following diagram:
Ok, let’s get into it!
In order to clean your motors, there are a few things that you will need…
What Tools do I Need To Clean an FPV Drone Motor?
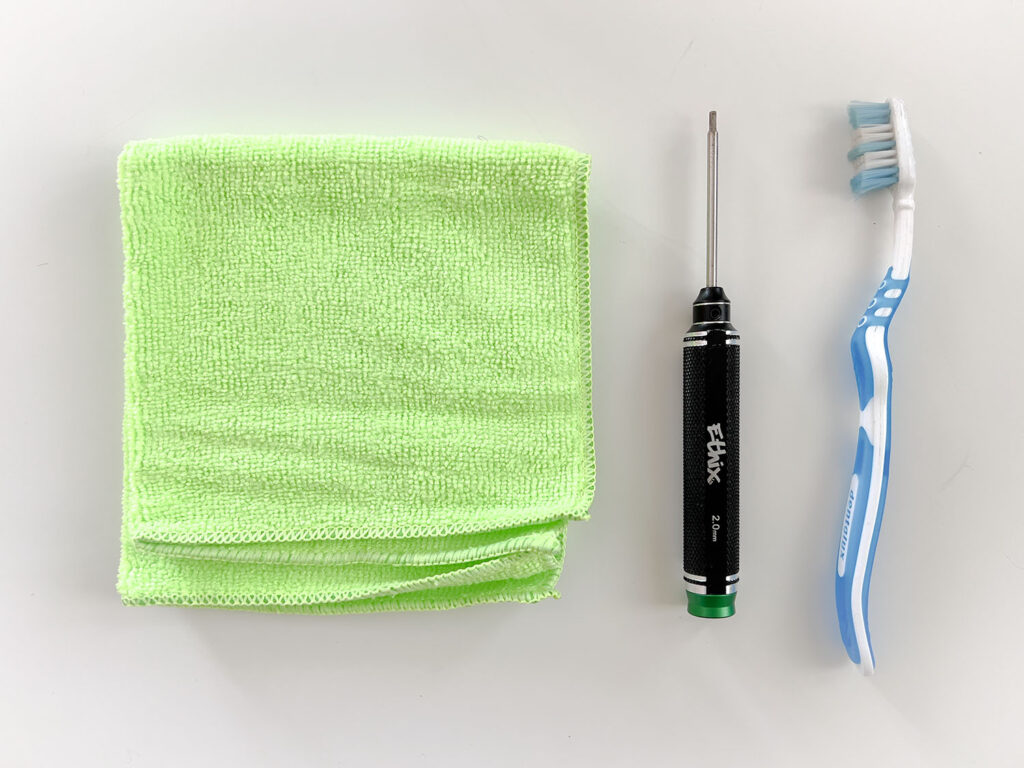
The tools that you will need to clean your FPV drone motors are as follows:
- Appropriately sized hex driver to remove the motor from the frame. Personally I currently use these hex drivers.
- Either a hex driver or circlip pliers to remove the bell.
- A lint free cloth to protect the table and soak up excess alcohol.
- A cheap-ass toothbrush from your local store.
- Rubbing Alcohol / Surgical Spirit / IPA
Cleaning Your Motors in 7 Simple Steps
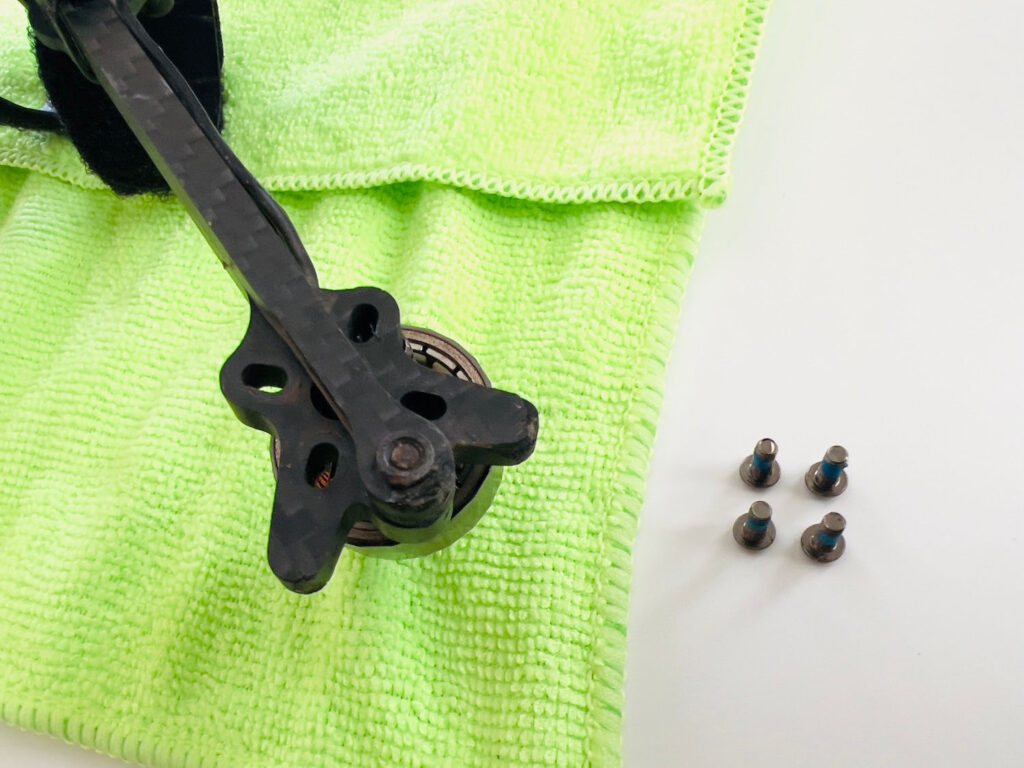
STEP 1: Using an appropriately sized hex driver, remove the motor screws.
PRO TIP: If you can access the bell screw through the frame, removing the motor from the frame is optional.
The first step is simple enough. We need to remove the motors from the frame arms.
Desoldering the motors is completely optional. Personally I would not bother.
Just take care that you don’t damage the wires when the windings are hanging loose.
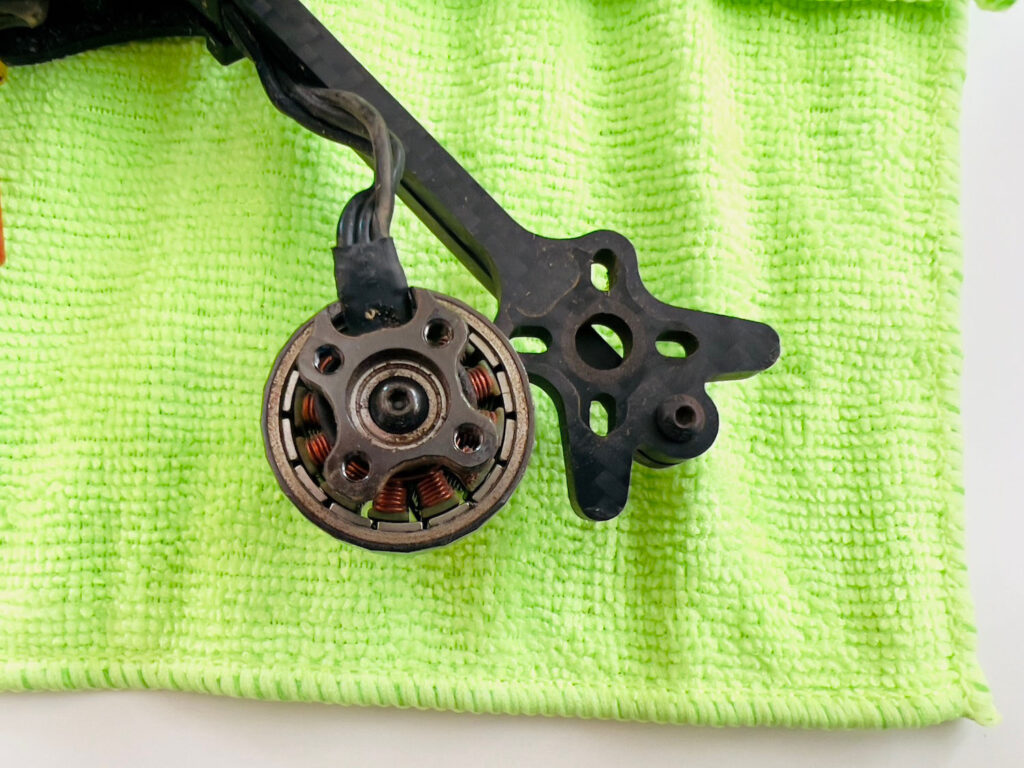
STEP 2: Lift the motor from the frame and turn it over to reveal the bell screw / circlip.
Carefully rotate the motor so that it is upside down, taking care not to stretch the wires too much.
In the center of the motor mounting you should see the bearing, with either a screw or circlip securing the bell in place.
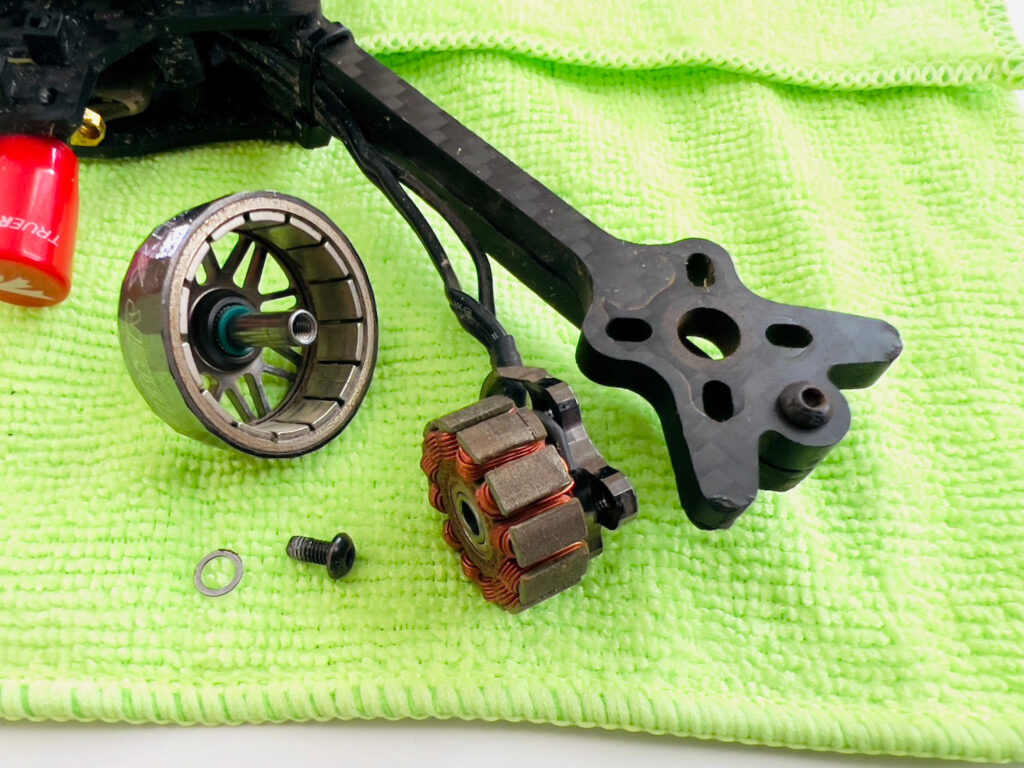
STEP 3: Remove the bell screw or circlip and then remove the motor bell.
FPV drone motors consist of two main parts; the windings and the bell.
In order to properly clean your motors, you will need to completely remove the bell.
The bell is held in place by one of two methods; either a circlip (also known as a c-clip), or a bolt.
Personally, I always buy motors with a bolt where possible. They are far easier to remove.
All you need is an appropriately sized hex driver, often 2.5mm to remove an M3 bolt.
Another advantage is the hex driver used to remove the motor from the frame usually fits the bell bolt, meaning one less tool to worry about!
If your motors do have a circlip, don’t worry!
I would recommend investing in a proper pair of circlip pliers, which will make the clip much easier to remove.
However you can ‘bodge’ it and use something else to pry the clip off, although I would not recommend putting yourself through such frustration! 🙂
What if the bell is stuck in the bearing?
There are two bearings in the stator that hold the bell in place.
Sometimes the positional tolerance of these bearings can be a little off, causing the bell to be stuck inside of the bearings.
My advice here would be to first use a soft mallet to tap around the edges of the bell to see if the vibrations shock it loose.
If that doesn’t work, you can try screwing the propellor nut back onto the shaft and then using a pair of pliers against the nut to pull the bell with a lot more force.
STEP 4: Thoroughly clean the motor windings and bearing using rubbing alcohol and a toothbrush.
There are numerous alcohol products that are great for cleaning motors. Names vary depending on where you are in the world.
Any of the following are suitable:
- Rubbing alcohol (also known as Surgical Spirit)
- Denatured alcohol (also known as Methylated Spirit)
- Isopropyl / IPA
I would recommend soaking a toothbrush in the alcohol and then scrubbing the dirt and contaminants away.
Use a liberal amount of alcohol, the excess will evaporate fairly quickly. Use the lint free cloth to absorb any excess.
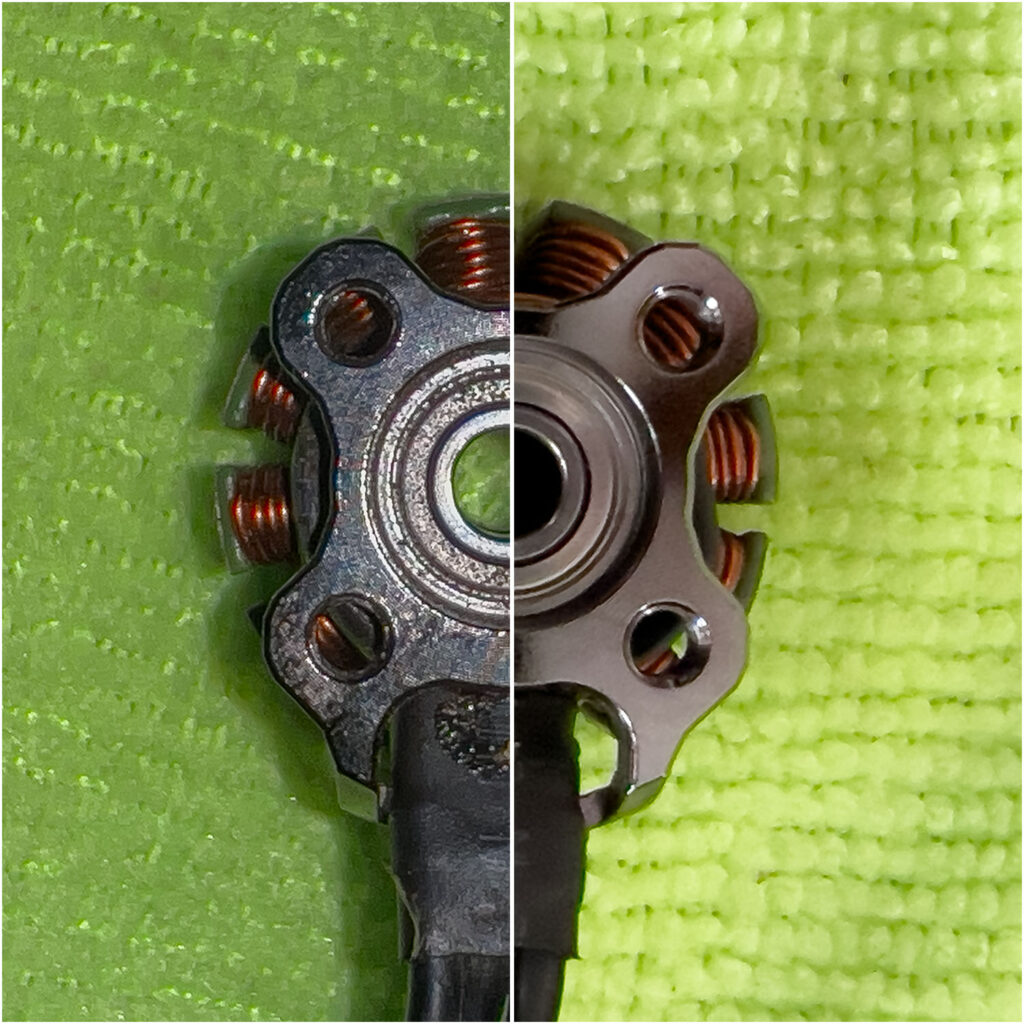
STEP 5: Thoroughly clean the motor bell using rubbing alcohol and a toothbrush.
Repeat the cleaning on the motor bell part, ensuring that all contaminants are removed from the magnets.
Pay particular attention to the gaps between the magnets, any anywhere else that dirt may become lodged.
It is very important that there are no contaminants in the gap between the magnets and the stator.
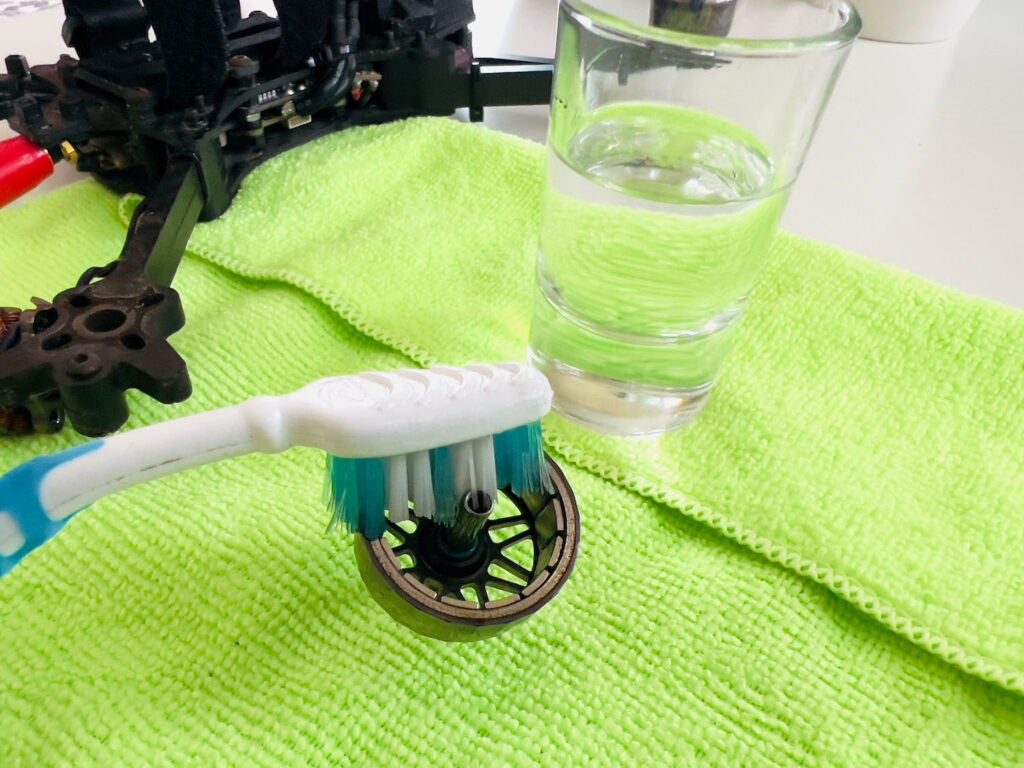
STEP 6: Use a lint free cloth to wipe dirt and excess alcohol from the motor bell and windings.
Ensure that all of the dirt and contaminants have been removed.
You can also soak a corner of the lint free cloth in alcohol and perform a secondary clean of the motor components.
Blotting the windings rather than wiping can help prevent the cloth becoming caught.
STEP 7: Reassemble the motor and reattach the motor to the frame.
Once the motor components are clean and dry, it is time to reassemble the motor!
In order to reassemble the motor, simply repeat the steps in reverse.
Why Is It Important to Clean FPV Drone Motors?
Did you know that your FPV drone motors need more care than most electric brushless motors?
Electric motors are everywhere.
In many applications an electric motor can run for extended periods of time.
For example a washing machine motor is expected to last at least 10 years and as far as I know, never needs to be serviced.
So why do we need to regularly service our FPV drone motors?
Dirt.
You have probably noticed that FPV drone motors have minimal protection.
You can clearly see the motor windings from beneath and above the motor.
So why don’t we better protect the motors?
- Weight – we strive to make lighter motors for better performance, both in terms of responsiveness and also the overall weight added to the drone.
- Heat – adequate airflow is required in order to keep the motors cool.
Therefore it is very easy to get dirt and other contaminants stuck inside the motor, especially when flying in locations such as sandy beaches.
You absolutely do not want dirt stuck inside your motor, otherwise it could get damaged!
How Do I Know if my Drone Motor is Damaged?
Sometimes it is obvious when something electrical has failed.
If there is smoke billowing from your motors, or even worse if they are on fire, you got a problem!
Sometimes it is obvious that you have a problem, but it is not always obvious where the problem lies.
One of the most obvious signs of electrical failure is the smell of electrical burning.
If you have never experienced the smell of electrical burning, believe me you will know it if you smell it!
Use your nose to give those motors a sniff, it will be very obvious is one of them is burning. Just be careful not to burn yourself!
In terms of mechanical damage, if your motor feels stiff or has a roughness when you turn it by hand, even after you have completed the cleaning procedure in this article, you got a problem!
Any kind of rubbing or noise is also not normal.
The motor should rotate freely and smoothly, just with a subtle bumpy feeling as the bell rotates past the alternating magnets.
If your motor smells or looks burnt, highly likely you will need to replace it.
If you have a mechanical problem, you may be able to replace either the bell, bearings or both, saving the cost of a new motor.
Can You Wash a Brushless Drone Motor with Water?
Yes, you can was a brushless drone motor with water.
However, if you do wish to wash a drone motor with water then I would advise using deionised water.
This type of water is purified and has the minerals and other contaminants removed.
You can use tap water if you do not have any deionised water, it is not likely to cause an immediate problem.
I have washed drone motors and other parts with water when my drone was covered in mud.
However I would recommend using tap water only when necessary, such as if your drone is covered in a lot of mud.
Then follow my standard cleaning procedure using alcohol.
One final note. If you do use water to wash your drone, make sure it is bone dry before you power it up.
Yes, the motors are technically waterproof.
However, the flight controller and ESCs, along with the other electronics are not and they will fry if there is just a drop of water there, so take care!
Are FPV Drone Motors Waterproof?
Yes, FPV motors are technically waterproof by definition.
Waterproof
– Wiktionary
Resistant to the effects of water.
The motor windings are coated with an dielectric coating, usually enamel.
This means that although the windings look like bare copper, they are in fact electrically insulated. This is to prevent the windings shorting on themselves.
However this also means that an FPV drone motor will remain fully operational, even when wet!
Don’t believe me?
You can also watch Stinger Swarm flying about in a the rain, and through a fountain!
Note that his quad does die after a while, but not because of a motor failure.
The other electronics, such as the ESC and flight controller are not waterproof and must be coated with a water resistant coating.
Unfortunately he must have missed a bit!
With all of that said, just because your motors are waterproof by definition, it does not mean you should fly them in the wet!
Water is not pure and contains many other minerals, which could end up depositing on the internals of your motors.
The bearings are also unlikely to be watertight. Although the bearings will work just fine when wet, water is likely to disrupt the lubricant.
Both of these facts could shorten the life of your motors to some unknown degree.
If you do happen to get your motors wet, my advice would be to follow the cleaning procedure in this article but in addition, you should apply bearing lubricant to the beatings.
How Do You Get Sand Out of an FPV Drone Motor?
In order to remove sand from an FPV drone motor, I would recommend following my standard cleaning procedure.
You may want to take a little more time than normal cleaning the motor bell, ensuring that no grains remain stuck there.
You can also use a piece of tape to help remove the sand.
Stick the tape over the magnets, then peel it off. The sand will stick to the tape and be removed.
Sand can sometimes be magnetic, therefore it can sometimes be a little stubborn to remove!
Hopefully with these tips, you will have shiny and clean motors again in no time!
Can You Oil Drone Motors?
Yes, you can oil drone motors, or more specifically the motor bearings.
Usually a thin oil is applied to the bearing seal using a dispenser that features a needle.
You can usually find it at your local hobby store. It is also available on Amazon, check it out here.
I would not recommend using anything too thick or sticky, as dirt and other contaminants can become stuck to it.
Conclusion
If you read the whole article, then congratulations!
That is one large chunk of motor care information to take onboard!
If you still have motors on the mind, I have a whole section dedicated to them, check it out right here!

