If you are looking to use the SpeedyBee V3 in your next build, but you are wondering if it is right for you, this article will give you the insight that you are looking for!
I recently finished a medium-long range build and took me a while to choose from the available flight stack options, not made any easier by the fact that I am an advocate of Kiss for freestyle builds.
I chose the SpeedyBee V3 flight stack for my latest build and I am going to tell you why.
In my seemingly never ending quest to achieve my long range dreams, I wanted to build something that was compatible with both Betaflight and INAV.
I wanted to pick the best components throughout, with a great build quality and packed with useful features.
As of now I have been flying my medium-long range build with Betaflight and there are some features of the SpeedyBee V3 that have been an absolute godsend.
SpeedyBee V3 Resources
Sold already? Check the latest prices here on Amazon.
If you need the manual, you can download it here.
If you need the SpeedyBee app, you can download it here.
The SpeedyBee V3 Flight Stack
The SpeedBee V3 flight controller is a popular choice for racing and freestyle quadcopters due to its lightweight design, advanced features, and competitive price point.
The stack is fully compatible with the SpeedyBee app, negating the need for a laptop for the entire configuration. This is one of the best features of the SpeedyBee.
It features the usual integrated OSD (On-Screen Display) system, which allows pilots to see important flight data in real-time on their video feed, such as battery voltage, flight mode, and RSSI signal strength.
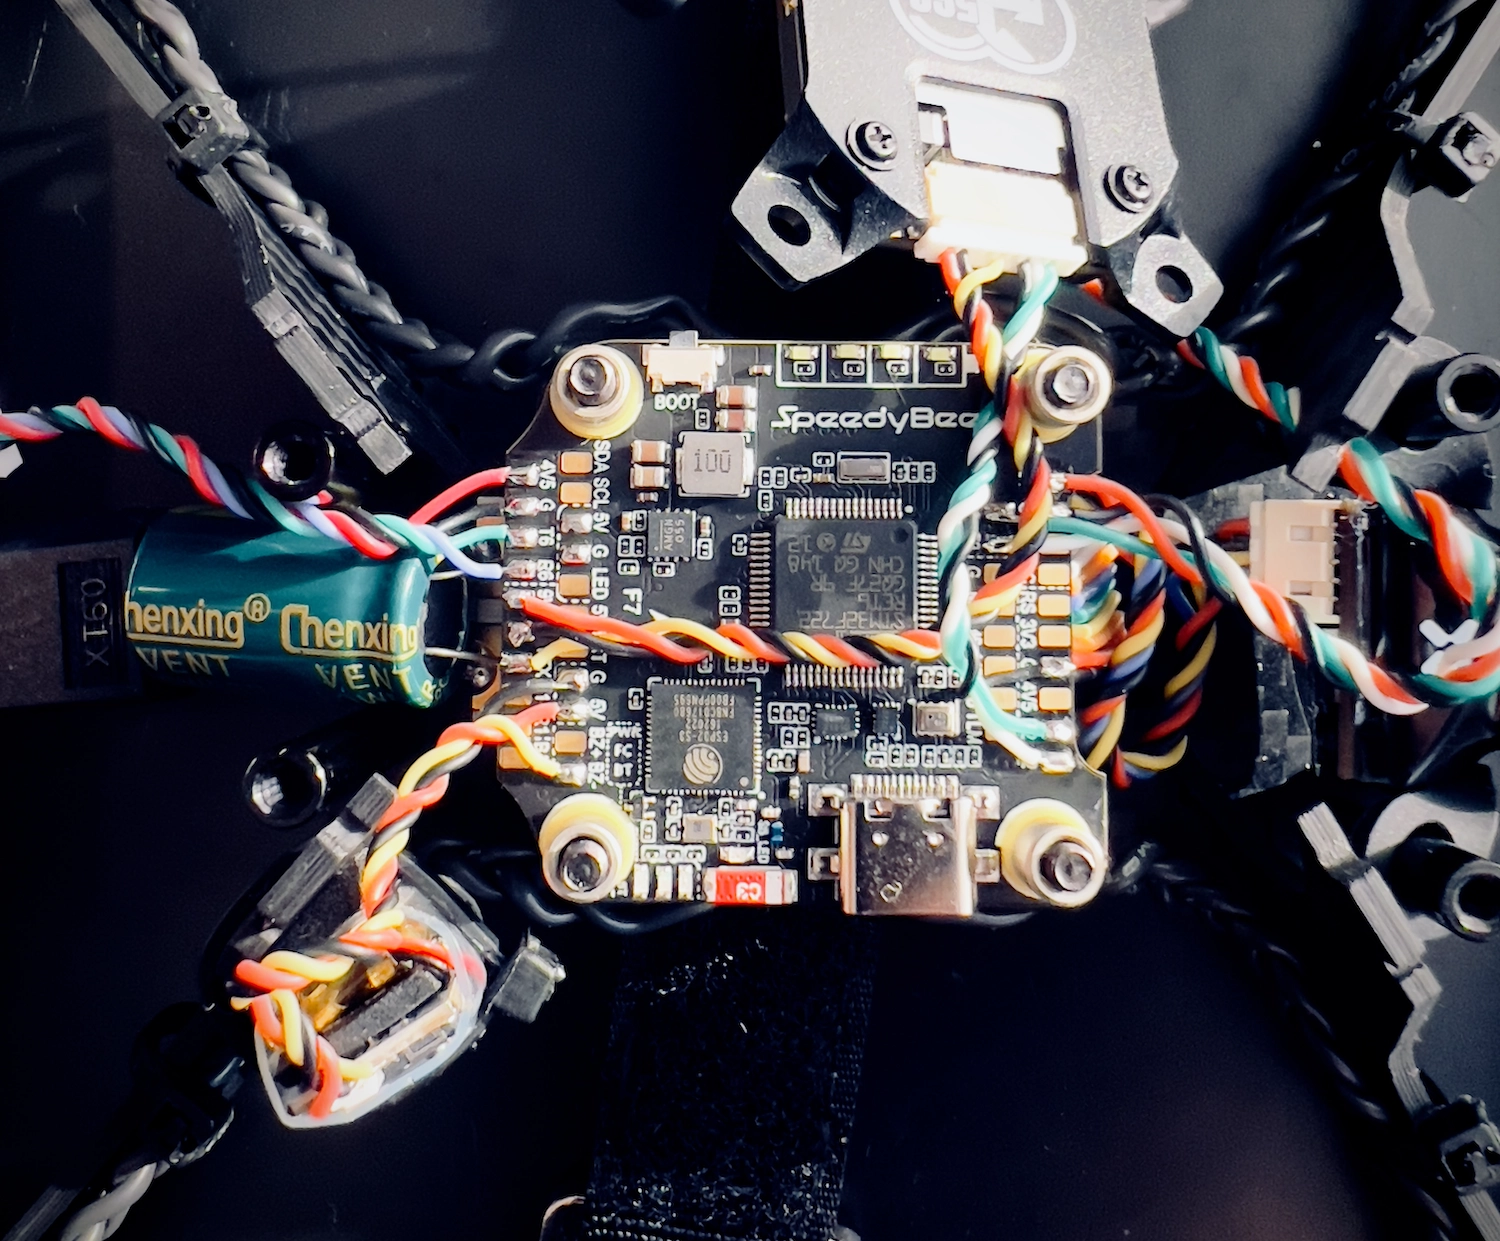
In terms of hardware, the SpeedBee V3 boasts a powerful STM32F405 processor and an MPU6000 gyro/accelerometer, which allows for fast and responsive flight control. It also has a built-in barometer
It includes a 5V/3A BEC (Battery Eliminator Circuit) and supports up to 6S LiPo batteries. A 4.5V pad can deliver power to the receiver when powered only from USB.
The SpeedBee V3 is also designed with durability in mind, with a 4-layer PCB and a protective case to guard against damage from crashes and vibrations.
Overall, the SpeedBee V3 flight controller offers a compelling combination of performance, features, and value for drone enthusiasts.
It is a solid choice for both beginners and experienced pilots looking to upgrade their equipment.
- Lightweight design for racing, freestyle and long range quadcopters
- Integrated OSD system for real-time flight data display
- Supports Betaflight firmware for advanced tuning options
- Supports INAV firmware for autonomous flight and missions
- Powerful STM32F722 processor and BMI270 gyro/accelerometer for fast and responsive flight control
- Includes BMP280 barometer for precise altitude hold
- 5V/3A BEC (Battery Eliminator Circuit) for powering peripherals
- Supports up to 6S LiPo batteries
- Dimensions: 40.0mm x 45.6mm x 17.8mm
- Weight: 29.9g
- Built-in RGB LED for visual status indication
The SpeedyBee F7 V3 Flight Controller Specification
| Product Name | SpeedyBee F7 V3 Flight Controller |
| MCU | STM32F722 |
| IMU(Gyro) | BMI270 |
| USB Port Type | Type-C |
| Barometer | BMP280 |
| OSD Chip | AT7456E chip |
| BLE Bluetooth | Supported. Used for Flight Controller configuration |
| Flash FC Firmware Wirelessly | Supported. Please enter MENU > FC Firmware Flasher |
| Download/Analyze Blackbox | Supported.Please enter MENU > Blackbox Analyzer |
| DJI Air Unit Connection Way | Two ways supported: 6-pin connector or direct soldering. |
| 6-pin DJI Air Unit Plug | Supported. Completely compatible with DJI O3/RunCam Link/Caddx Vista/DJI Air Unit V1, no wire is needed to be changed. |
| Flash(for BlackBox) | 500MB |
| BetaFlight Camera Control Pad | Yes(CC pad on the front side) |
| Power Input | 3S – 6S Lipo |
| 5V Output | 10 groups of 5V output, three +5V pads and 1 BZ+ pad( used for Buzzer) on front side, and 6 +5V output included in the connectors on bottom side. The total current load is 2A. |
| 9V Output | 2 groups of 9V output, one +9V pad on front side and other included in a connector on bottom side. The total current load is 4A. |
| 3.3V Output | Supported. Designed for 3.3V-input receivers. Up to 500mA current load. |
| 4.5V Output | Supported. Designed for receiver and GPS module even when the FC is powered through the USB port. Up to 1A current load. |
| ESC Signal Pads | M1 – M4 on bottom side and M5-M8 on front side. |
| UART | 5 sets(UART1, UART2, UART3, UART4(For ESC Telemetry), UART6) |
| ESC Telemetry UART | R4(UART4) |
| I2C | Supported. SDA & SCL pads on front side. Used for magnetometer, sonar, etc. |
| LED Pad | Used for WS2812 LED controlled by Betaflight firmware. |
| Buzzer | BZ+ and BZ- pad used for 5V Buzzer |
| BOOT Button | Supported. [A]. Press and hold BOOT button and power the FC on at the same time will force the FC to enter DFU mode, this is for firmware flashing when the FC gets bricked. [B]. When the FC is powered on and in standby mode, the BOOT button can be used to controller the LED strips connected to LED1-LED4 connectors on the bottom side. By default, short-press the BOOT button to cycle the LED displaying mode. Long-press the BOOT button to switch between SpeedyBee-LED mode and BF-LED mode. Under BF-LED mode, all the LED1-LED4 strips will be controlled by Betaflight firmware. |
| RSSI Input | Supported. Named as RS on the front side. |
| SmartPort | Use any TX pad of UART for the SmartPort feature. |
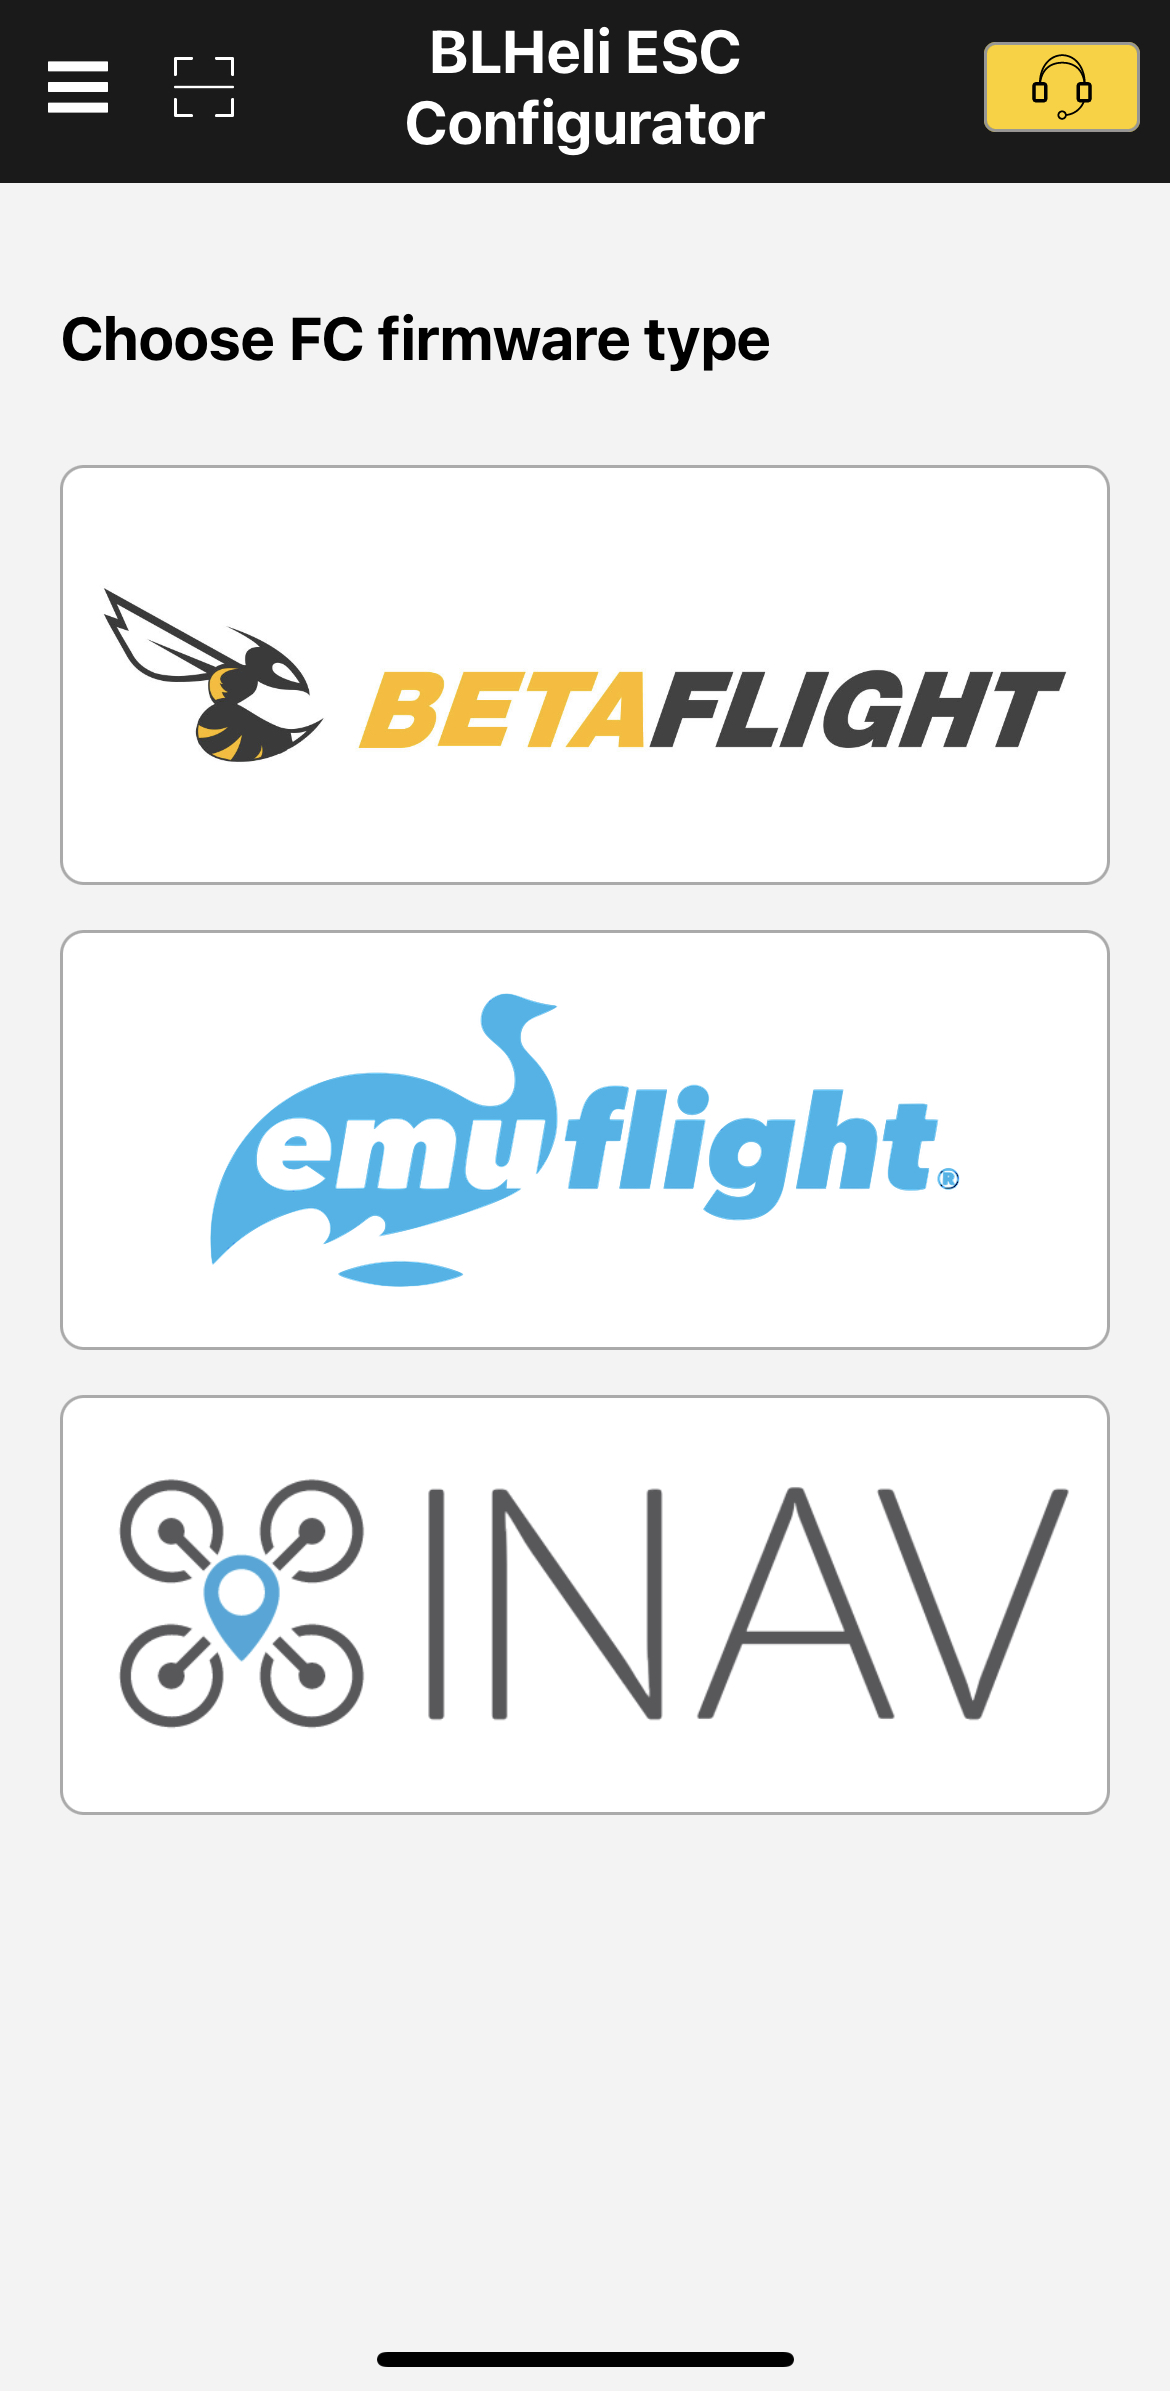
| Supported Flight Controller Firmware | BetaFlight(Default), EMUFlight, INAV |
| Firmware Target Name | SPEEDYBEEF7V3 |
| Mounting | 30.5 x 30.5mm( 4mm hole diameter) |
| Dimension | 41(L) x 38(W) x 8.1(H)mm |
| Weight | 10.7g |
The SpeedyBee V3 4-in-1 ESC Specification
| Product Name | SpeedyBee BL32 50A 4-in-1 ESC |
| Firmware | SpeedyBee BL32 50A |
| Configurator Download Link | http://github.com/bitdump/BLHeli/releases |
| Continuous Current | 50A * 4 |
| Burst Current | 55A(5seconds) |
| TVS Protective diode | Yes |
| Heat Sink | Yes |
| External Capacitor | 1000uF Low ESR Capacitor(In the package) |
| ESC Protocol | DSHOT300/600 |
| PWM Frequency Range | 16KHz-128KHz |
| Power Input | 3-6S LiPo |
| Power Output | VBAT |
| Current Sensor | Support (Scale=490 Offset=0) |
| ESC Telemetry | Not supported |
| Mounting | 30.5 x 30.5mm( 4mm hole diameter) |
| Dimension | 45.6(L) * 40(W) * 8.8mm(H) |
| Weight | 19.2g with heat sink |
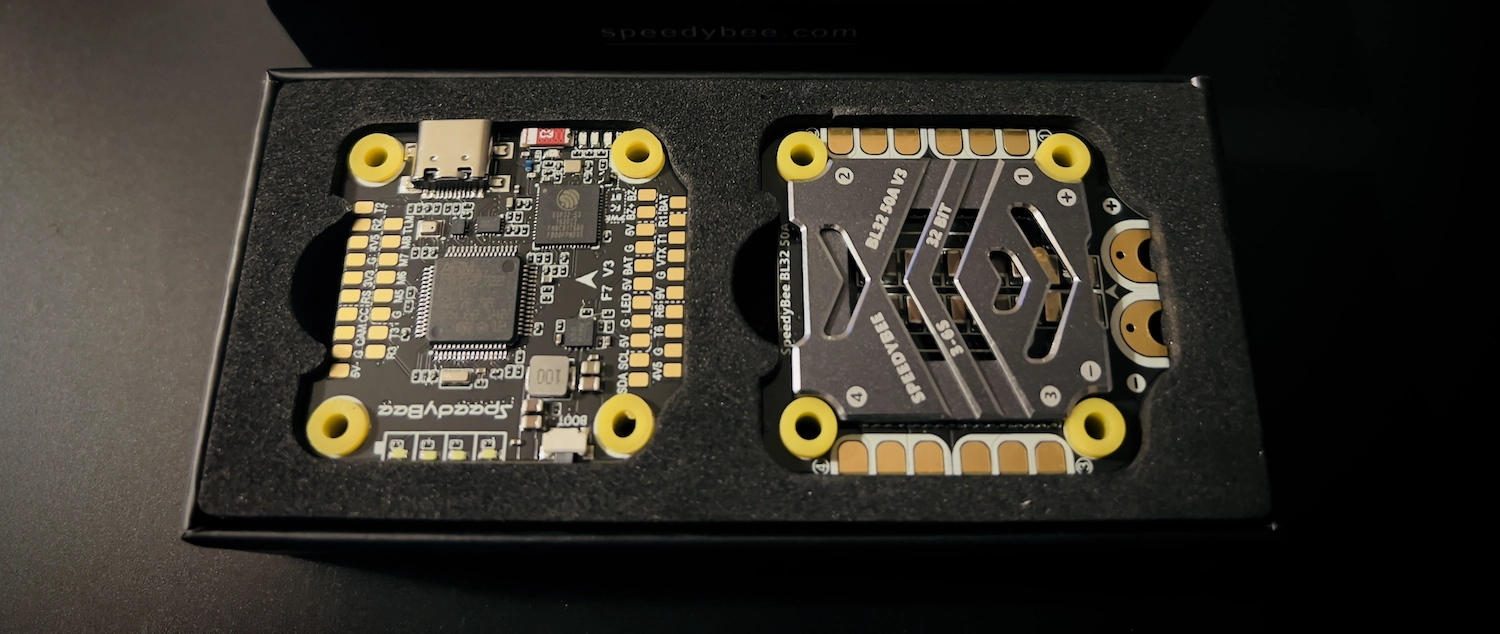
SpeedyBee V3 Unboxing
I already knew the build quality of the SpeedyBee V3 was going to be excellent at the point of receiving the product and seeing the box/packaging.
I purchased the flight stack (flight controller + ESC) and both came packaged together in a sleek looking black box with some quality protective foam.
The box lid slides off slowly… very much an Apple-esque experience!
The next pleasant surprise comes as you lift the foam from the base of the box. SpeedyBee have made sure that you have every possible cable needed for your build!
In addition to the cables, there is also a package containing the hardware for building the stack as well as a capacitor. There is also a QR code for accessing the manual.
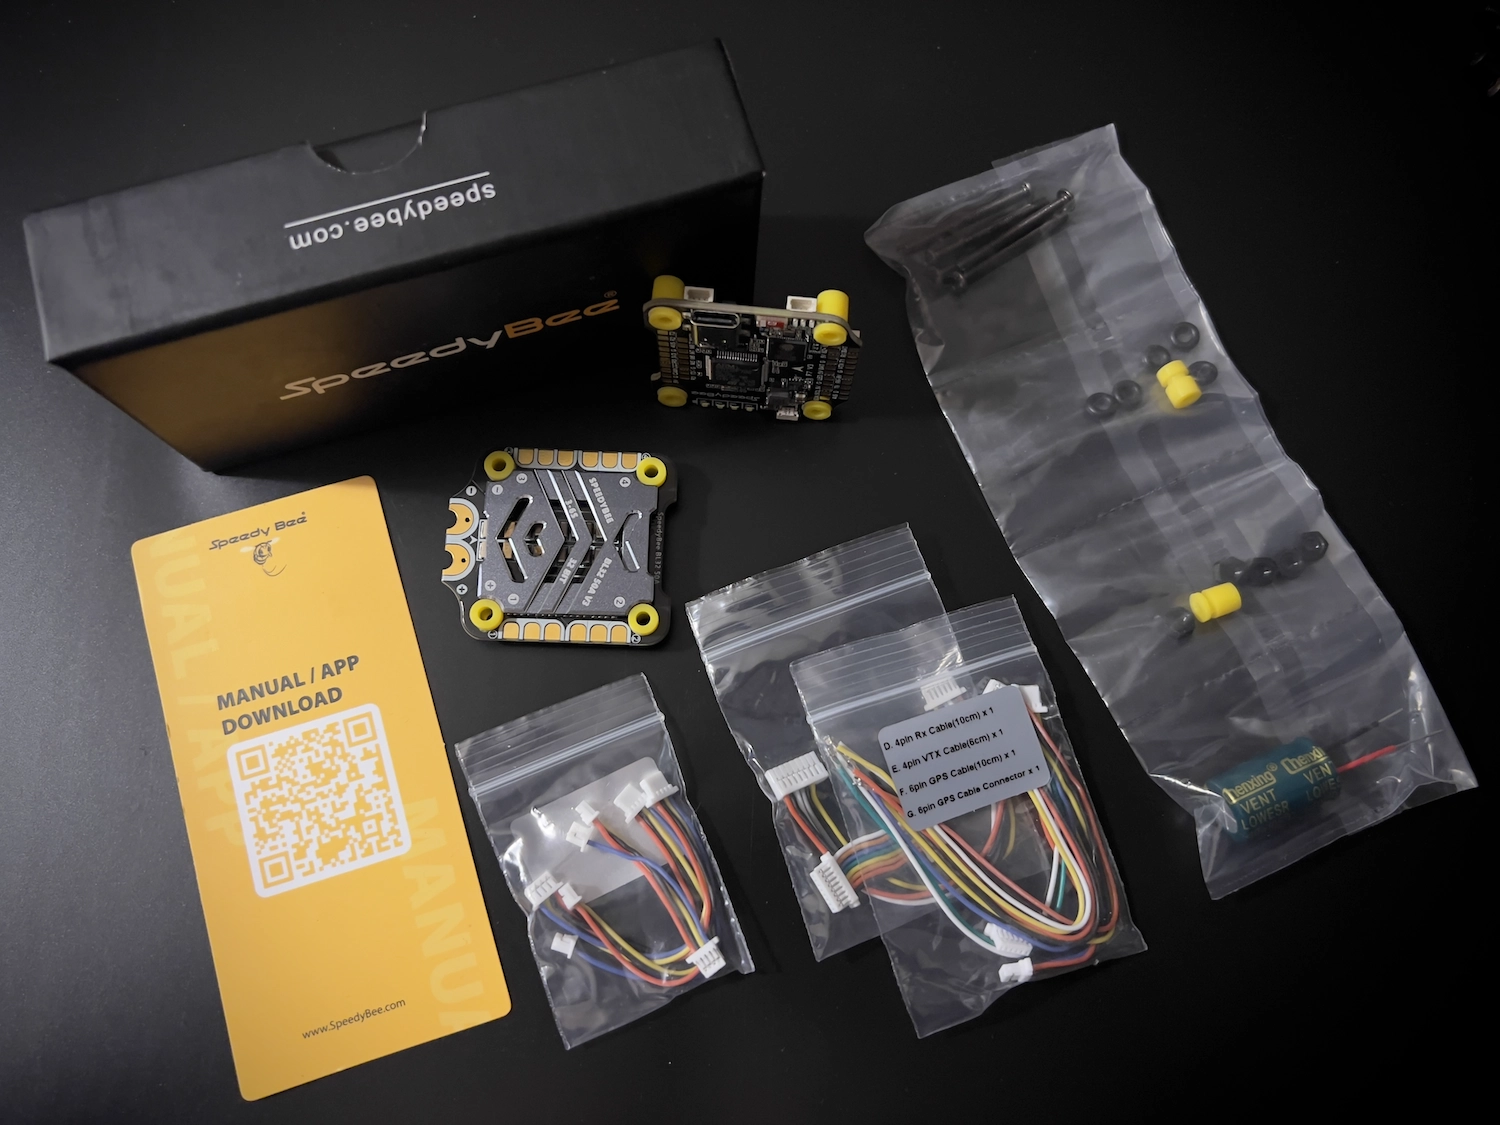
The SpeedyBee V3 features the option of either connectors or solder pads, meaning that those who prefer to avoid soldering need only solder the motor wires, XT60 connector and capacitor.
The included cables come pre-crimped and housed, ready to just plug in.
SpeedyBee have made building quads accessible to many more people.
SpeedyBee have made building quads accessible to many more people. Any company who can open up the hobby to more people in this way are nothing short of a superhero in my eyes!
With that said, soldering has its benefits. Personally I prefer to solder everything where possible as it creates an arguably more secure connection.
Simply trim off the connectors from the included harnesses and use the wires as you prefer.
SpeedyBee V3 Box Contents List Summary
- SpeedyBee V3 Flight Controller: A compact and lightweight flight controller with integrated OSD and advanced firmware support
- 4-in-1 ESC: A 4-in-1 electronic speed controller: compatible with the SpeedyBee V3 and can handle the high power demands of racing and freestyle quads
- Wiring harness: A set of cables and connectors to connect the SpeedyBee V3 and 4-in-1 ESC together
- Capacitor: A capacitor to reduce electrical noise and improve the performance of the ESCs
- XT60 power connector: A standard connector used to connect the quadcopter to the LiPo battery
- Mounting hardware: Screws, standoffs, and other hardware needed to mount the SpeedyBee V3 and 4-in-1 ESC to the frame of the quadcopter
- User manual: A guide to help users install and configure the SpeedyBee V3 Flight Stack for their specific quadcopter
Speedy Bee V3 Contents List Detailed
- SpeedyBee F7 V3 Flight Controller x 1
- SpeedyBee BL32 50A 4-in-1 ESC x 1
- DJI 6pin Cable(80mm) x 1
- SH 1.0mm 15mm-length 8pin Cable(for FC-ESC connection) x 1
- M38mm Silicone Grommets(for FC) x 5 M38.1mm Silicone Grommets(for ESC) x 5
- M3*30mm Iner-hexagon Screws x 5
- M3 silicone O Ring x 5
- M3 Nylon Nut x 5
- 35V 1000uF Low ESR Capacitor x 1
- XT60 Power Cable(70mm) x 1
- 4pin SH1.0 to 3+2pin JST1.25 FPV Cam Cable(30mm) x 1
- 4pin SH1.0 to 3+2pin JST1.25 FPV Cam Cable(60mm) x 1
- 4pin SH1.0 to 4pin JST1.25 FPV Cam Cable(60mm) x 1
- 4pin SH1.0 Radio Receiver Cable(100mm) x 1
- 4pin SH1.0 to 4pin SH1.0 Analog VTX Cable x 1
- 6pin SH1.0 GPS Module Cable without Connector on another e
SpeedyBee V3 Installation & Build
SpeedyBee have really thought about the end user with regards to the build. Whether you have the soldering skills or not, you are going to have what you need to complete your build.
There is a comprehensive range of diagrams available for every type of build, you can check them out on the official page.
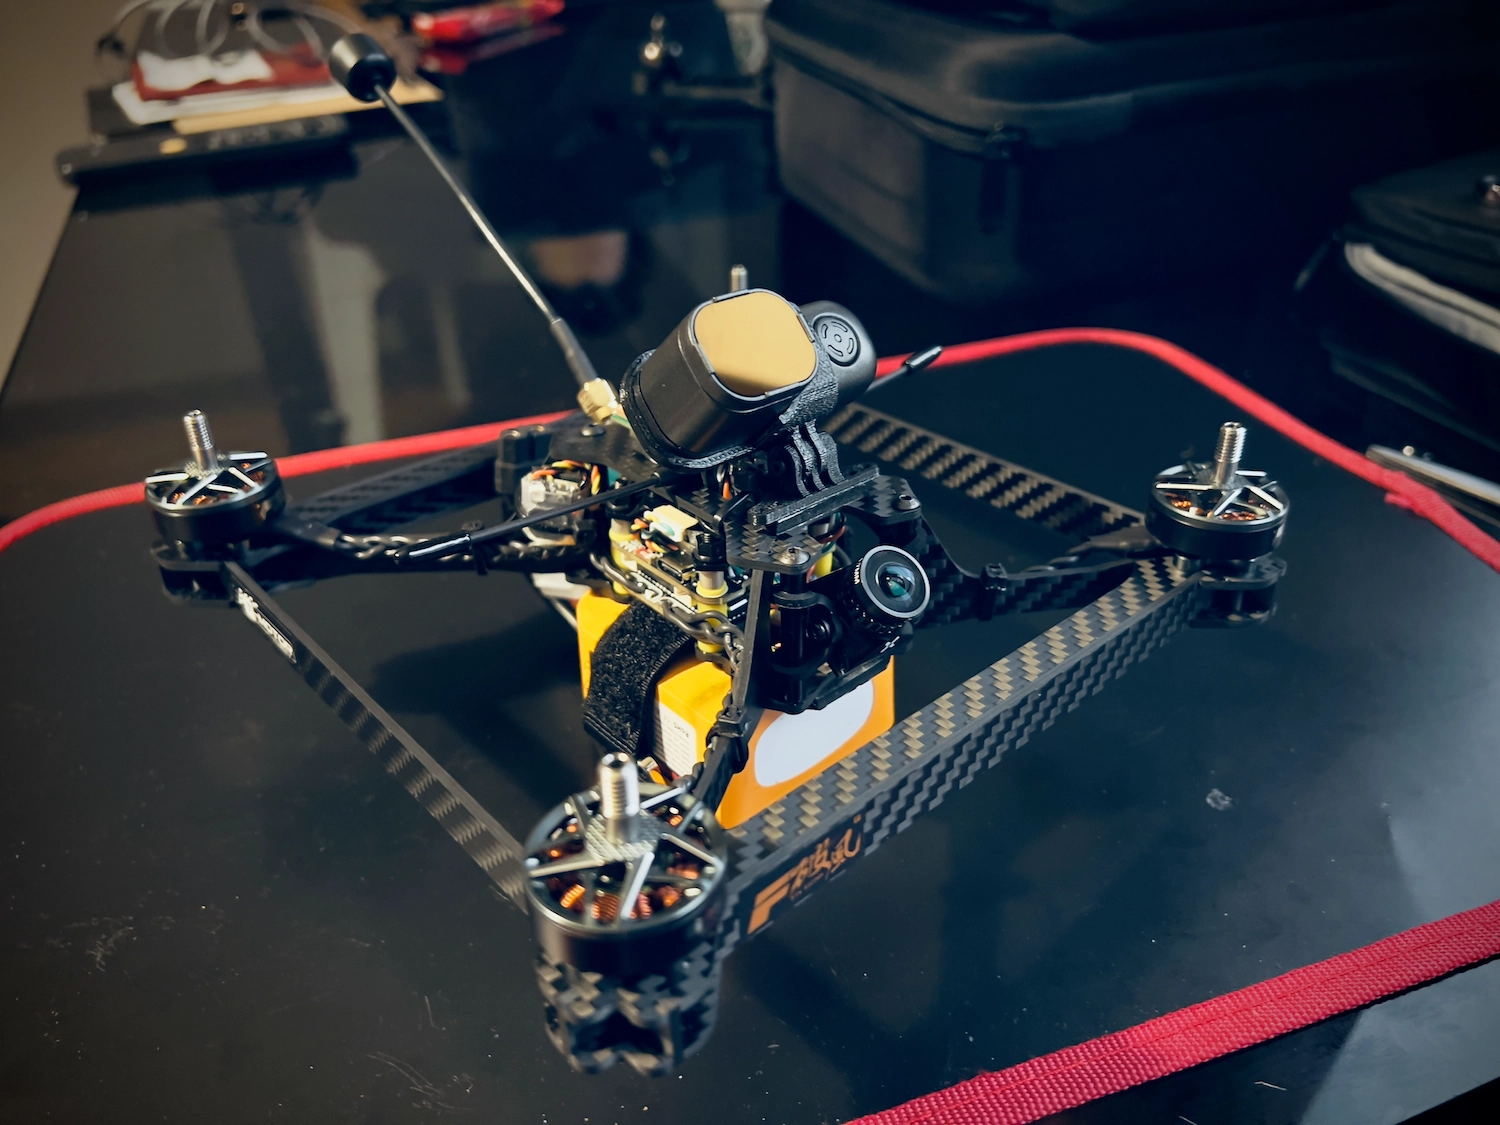
I built my medium-long range quad in Turkey whilst travelling, using only my travel toolkit and travel soldering iron.
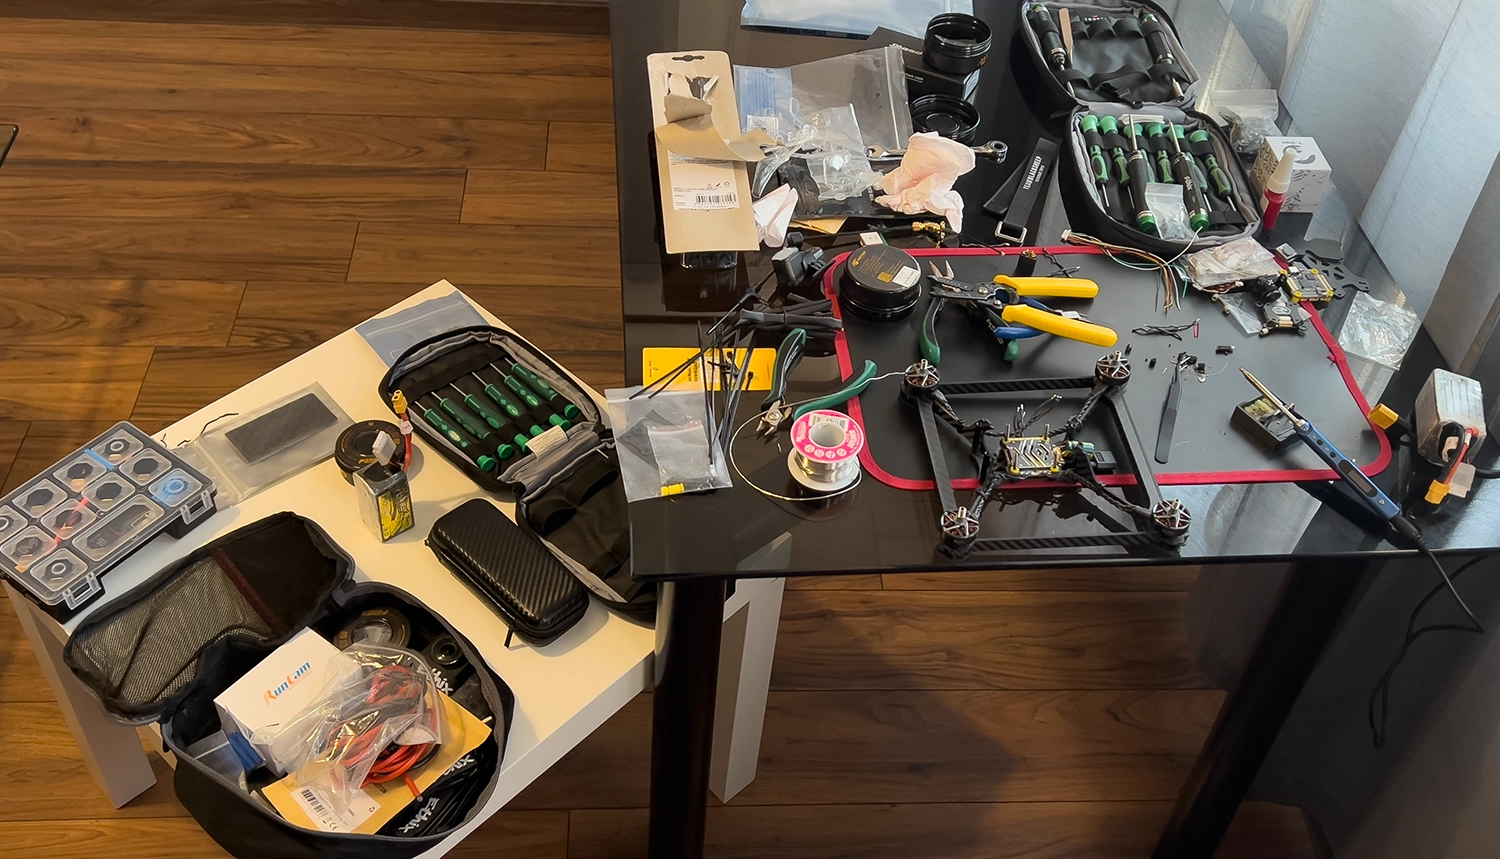
I took minimal spare parts and had no problem completing my build, as the SpeedyBee V3 had everything that I needed in the box.
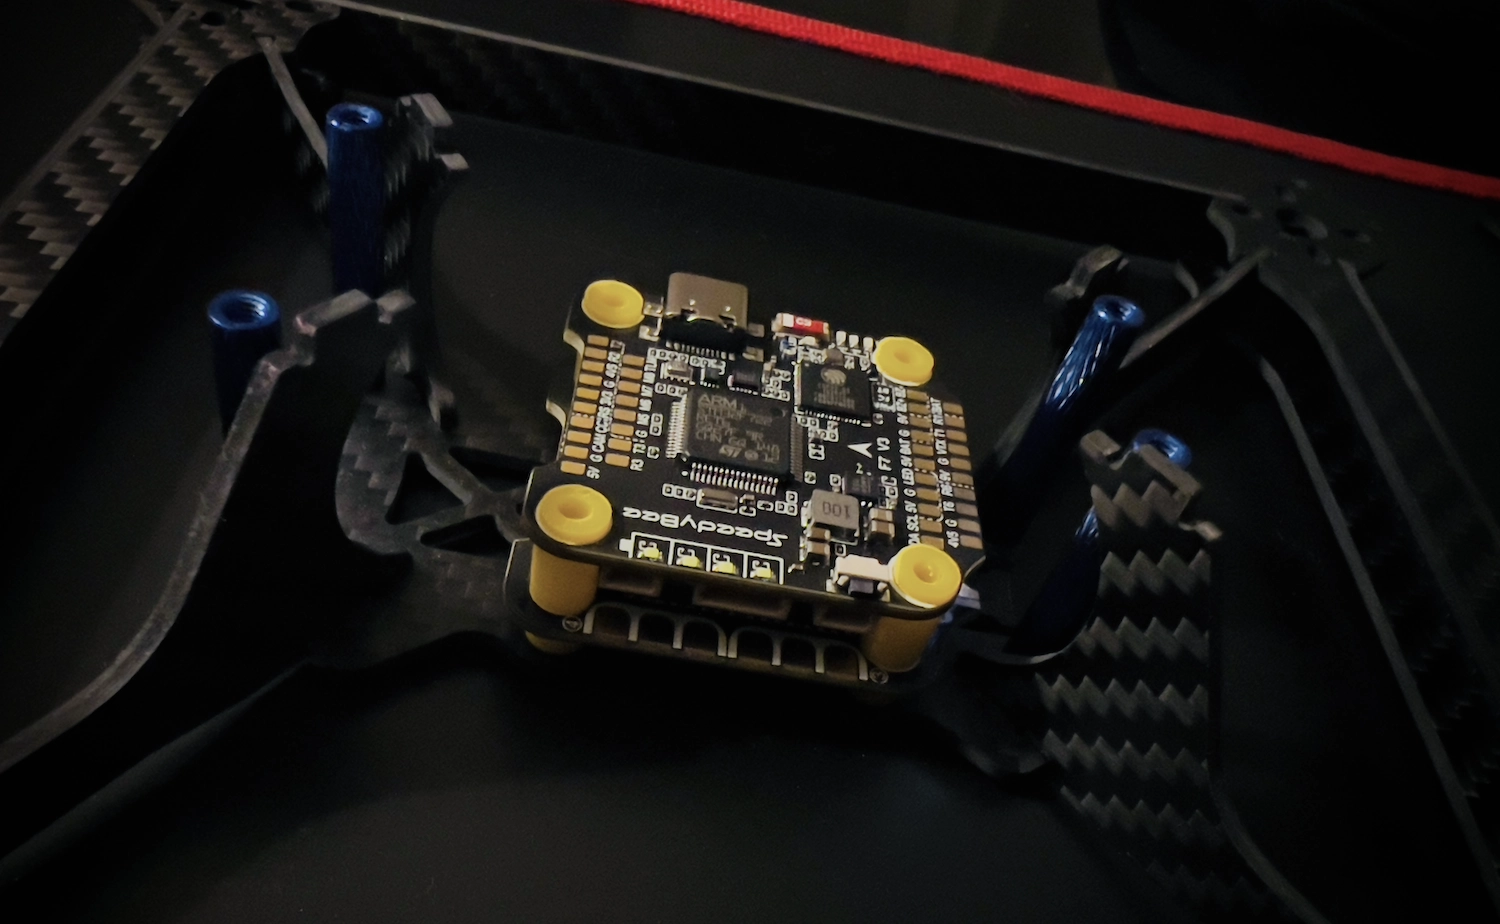
First I decided “dry mounted” the stack in order to decide how everything should fit in the TBS Source V frame.
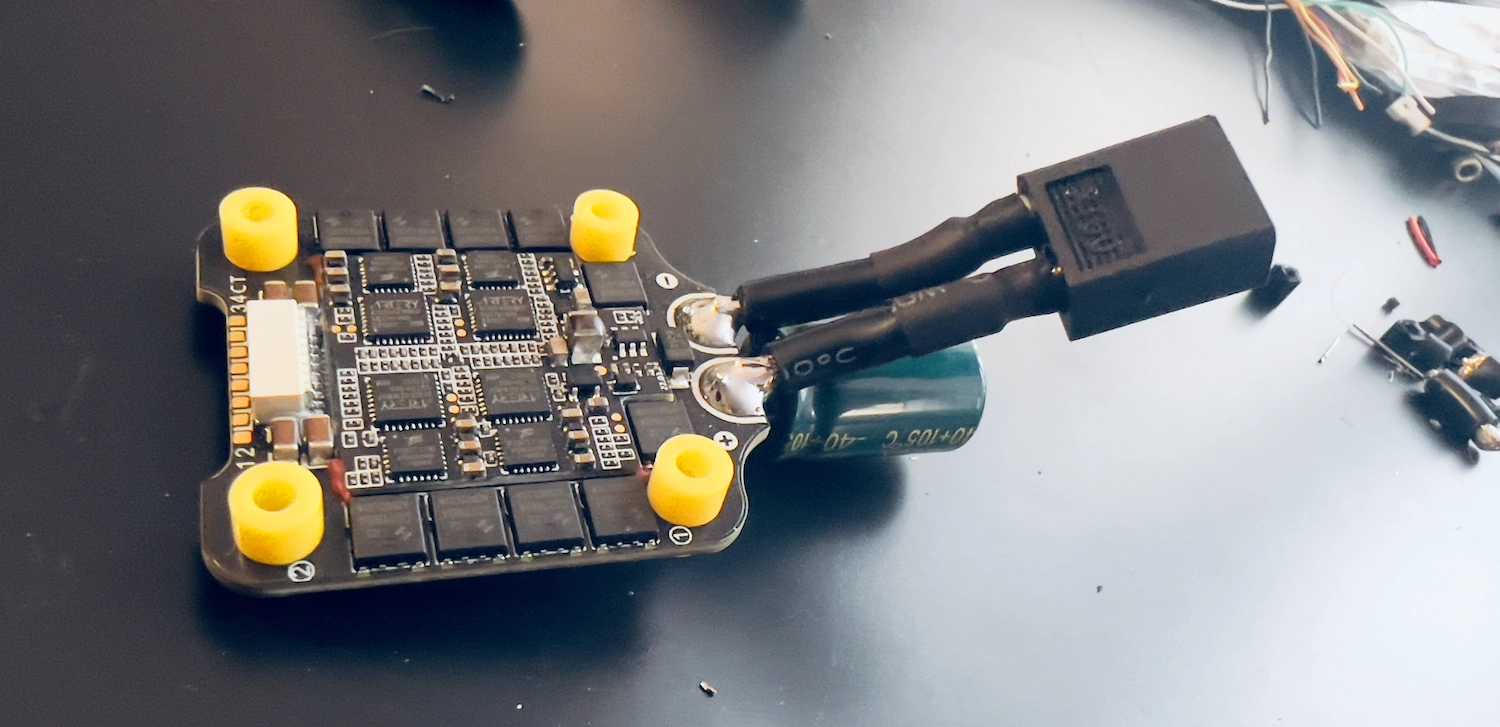
Once I had decided on the layout, I soldered an XT60 pigtail and the capacitor to the ESC board.
I opted not to use the included XT60, instead building my own using a black XT60 and black wire. Just a personal preference… because you know… NoirFPV for a reason, I prefer the black color 🙂
Next, I platted the motor wires so that they looked all girly and beautiful, then I slotted the ESC back on to the stack screws and soldered the motor wires to the ESC.
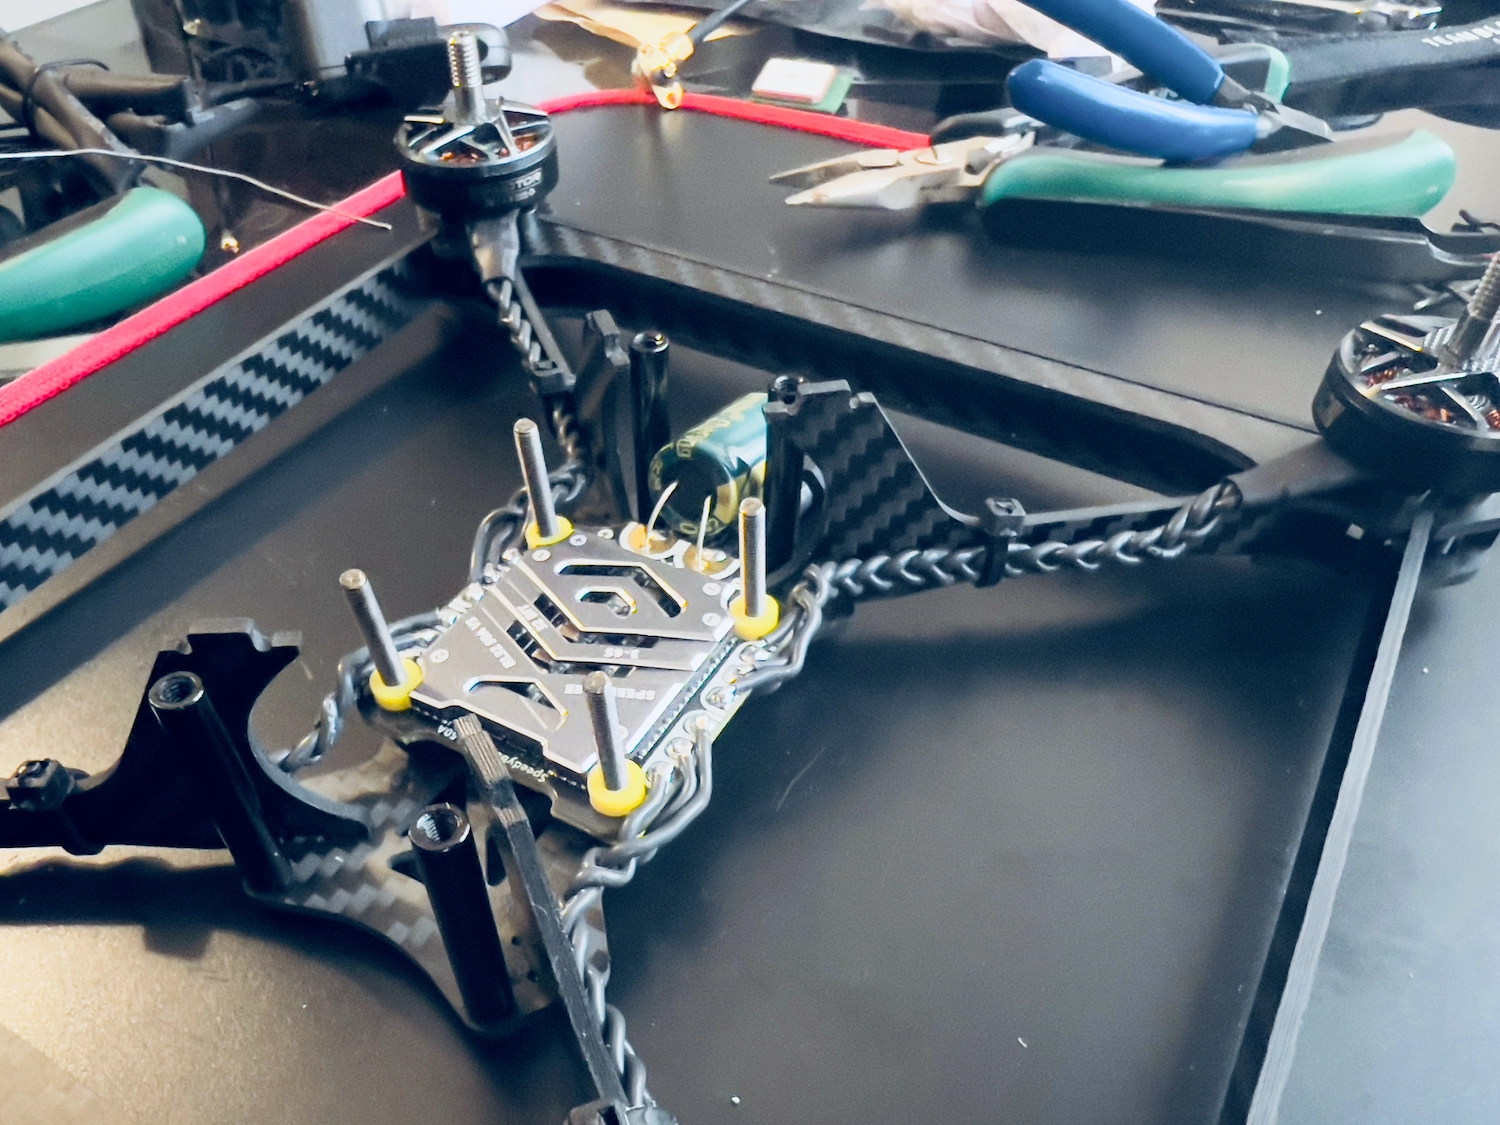
Once the ESC had been installed, I connected the ESC to flight controller harness and the camera harness to the two connectors on the bottom of the board.
I opted not to solder these as in both cases the harnesses could simply be connected without modification. I then placed the flight controller on the stack and connected it to the ESC.
With the flight controller in place, I soldered all of the +5V, GND and signal cables and connected them as necessary.
Lastly, I placed the TBS Sixty9 Rx/VTx on top to complete the stack and I must say, I was very pleased with how it turned out!
Using the SpeedyBee: Notable Features
So what’s the SpeedyBee V3 like in the real world? How did I find using it over the last three months since I complete this build?
Fantastic!
The SpeedyBee V3 runs Betaflight smoothly and the experience is the same as with any Betaflight flight controller, so I won’t go into too much detail there.
There are however some notable features worth mentioning, that you won’t find on competitor products.
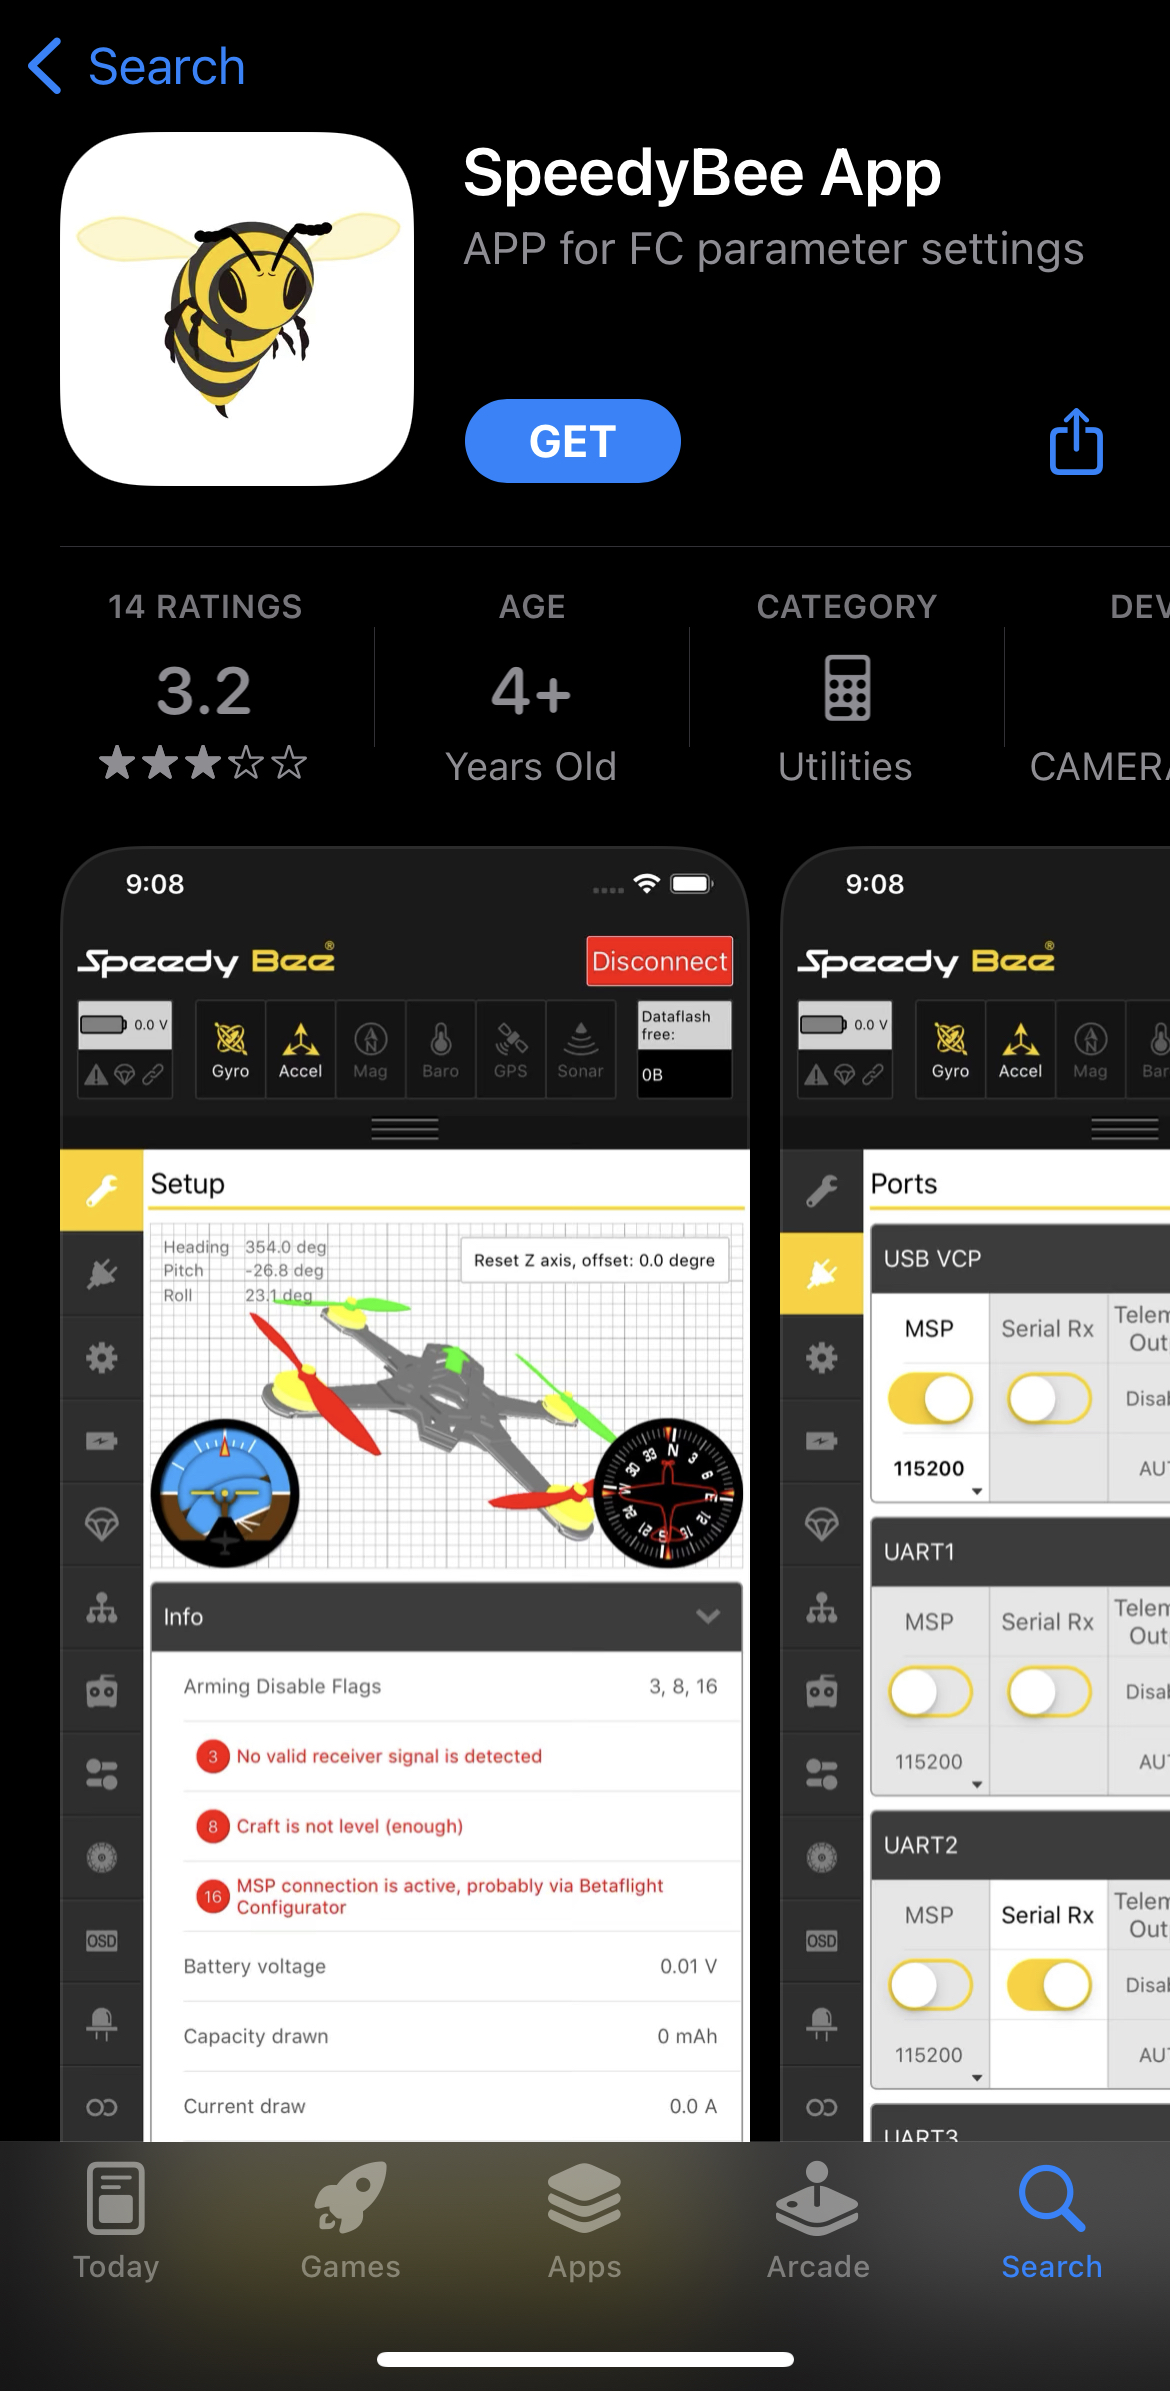
The SpeedyBee App
The SpeedyBee app and wireless connectivity is extremely useful with this kind of build, especially for monitoring GPS in the field.
Being able to access the entire range of Betaflight options from a mobile phone is awesome! As there are many additional features on my long range quad, it needed a lot more tweaking.
I have been using the SpeedyBee App to tweak the modes, switching functions around such as rescue mode, the beeper and beep satellites, until it felt comfortable.
If you fly freestyle or you are in to racing, and you are the type of person who likes to obsessively tweak their PIDs and rates, you are also going to love the convenience of the SpeedyBee App for sure!
LiPo Voltage Reading
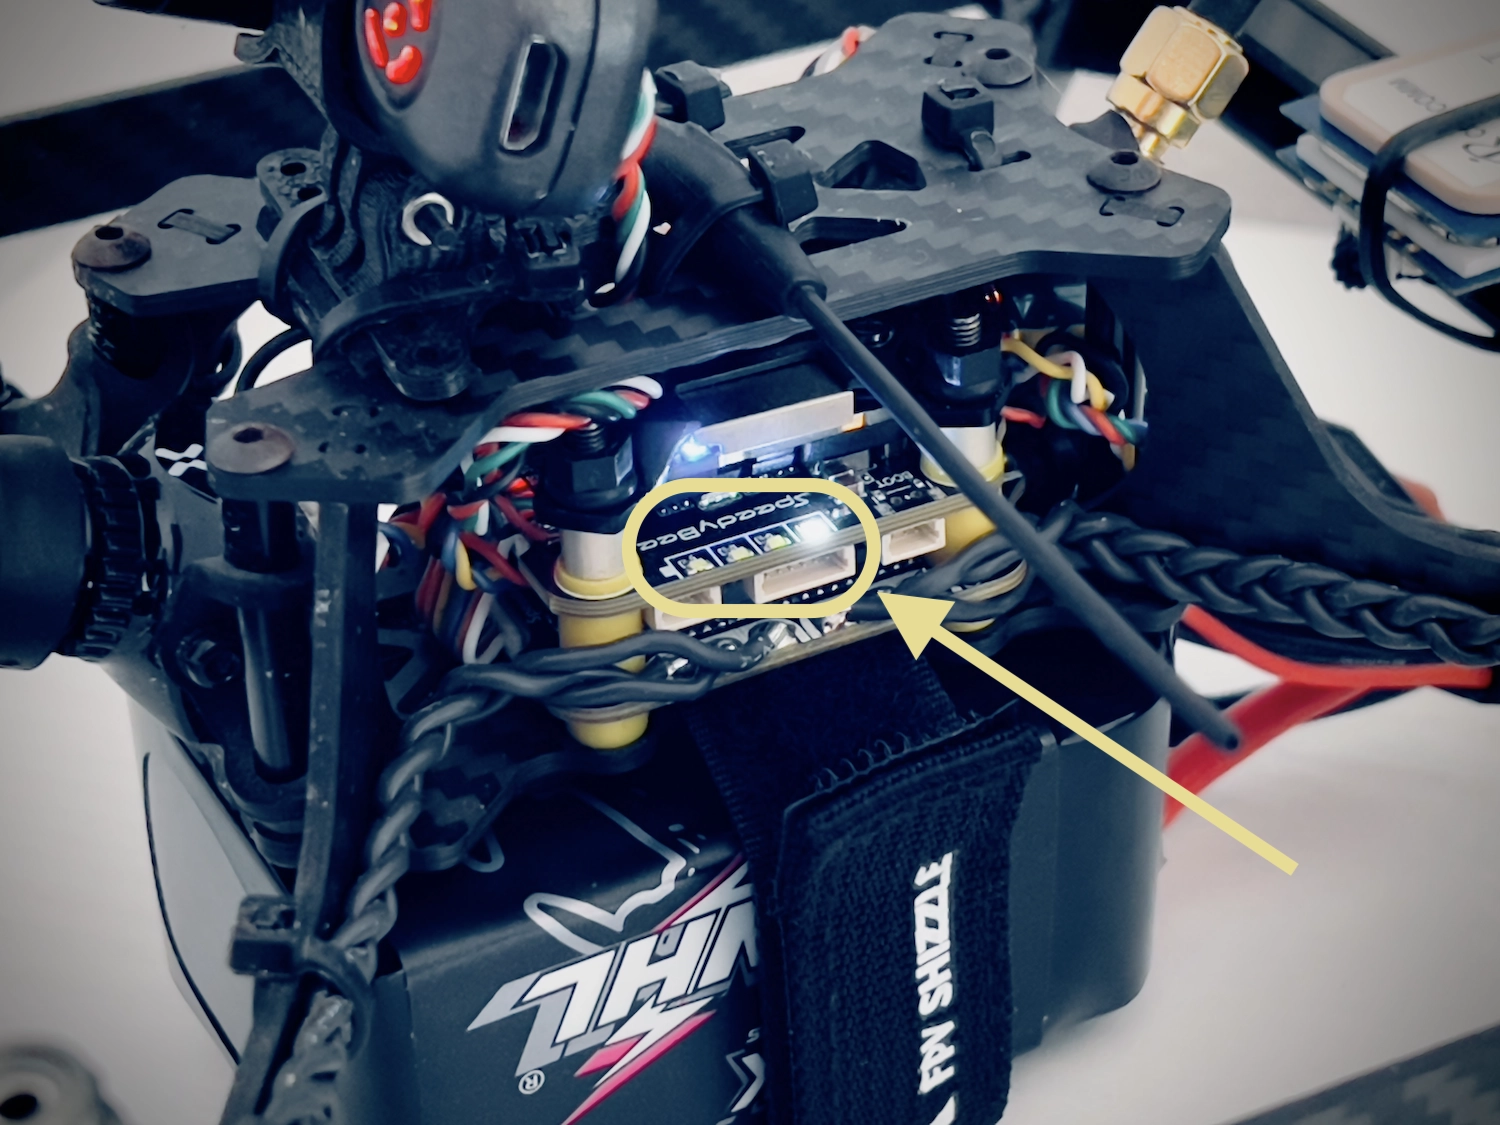
Another very useful feature unique to the SpeedyBee V3 is the LiPo meter on the side of the flight stack.
When I first discovered this feature, I thought why doesn’t every FC have a feature like this! There are 4 white LEDs on the side of the FC that indicate how much power your LiPo battery has remaining.
Ok, it isn’t going to replace your battery meter that can measure down to millivolts, but it does serve as an extra check to ensure that you don’t accidently begin a flight using a spent pack!
This feature not only could save you from nuking a battery, it could also save your entire quad, especially if you plan to fly some distance or in an area when it would be possible to easily lose the quad.
SpeedyBee V3 Problems
I have talked very positively about the SpeedyBee V3 in this article. At this stage you may be wondering if there is anything bad about this flight stack?
Well, it can be said that nothing is perfect.
SpeedyBee offer a fantastic blackbox feature, whereby you can easily examine the black box data using the mobile app.
The SpeedyBee V3 flight controller has built-in memory for saving black box logs, which appear to Betaflight as an external SD card.
Note that the SpeedyBee V3 does not have an external micro SD card. This in itself is a disadvantage.
I am going to go out on a limb here and upset the anti-soldering advocates. I am firmly on side with the choice to add connectors to the bottom of the PCB to minimise the amount of soldering required.
However if I could make myself “the perfect flight controller,” I would take the SpeedyBee V3, remove all of the ports (so it is solder pad only) and then use the PCB real estate to add a real Micro SD card slot.
However this is not the issue I wish to discuss. The main problem is the SpeedyBee V3 is just not writing logs to the internal SD memory.
I have tried formatting it with no success. Therefore I have yet to be able to test and use any of the black box logging features.
It is worth noting that I am an Apple Mac OS user and therefore may be struggling to correctly format the memory with the tools available in Mac OS.
Plus I have recently learned about a tool that SpeedyBee recommend for formatting the onboard memory. I plan to have another go at getting it to work and will update this article if there are any developments!
With that said, I would still absolutely recommend the SpeedyBee V3.
Should I Buy the SpeedyBee V3 Flight Stack?
The SpeedyBee V3 is a great choice for both beginners and advanced pilots who wish to build their own quad.
It is not completely free of soldering as the motor wires and pigtail must be attached, but the arguably more difficult job of soldering the tiny wires to the FC has been negated by the inclusion of PCB mounted connectors.
This makes the SpeedyBee V3 an ideal choice for novice and advanced builders alike.
The SpeedyBee V3 is packed with features and therefore is priced accordingly, towards the upper end of the range.
This might put some people off, but if you are looking to use the best quality of product in your build, you can’t go wrong with the SpeedyBee V3!
Check the latest prices here on Amazon.
If you need the manual, you can download it here.
If you need the SpeedyBee app, you can download it here.