If you are like me, a total Team Black Sheep fanboy, it is likely that you opted for the TBS Fusion as your video receiver of choice.
Great choice! You will be very impressed with the Fusion experience, especially if you are going to engage the secret weapon…
This is a complete guide to the Team Black Sheep Fusion video receiver module, including the installation into Fatshark, Orqa and DJI goggles, the power supply mod guide and synchronization with Crossfire/Tracer.
Make sure you check out the second part of the guide where I explain how to link your TBS Fusion receiver to a TBS Crossfire/Tracer system so that you can unlock some very cool features!
- Prerequisite
- What Is TBS Fusion?
- How To Install TBS Fusion In FPV Goggles
- How To Use TBS Fusion
- How To Link TBS Fusion With TBS Crossfire, Tracer or Tango
- Conclusion
Prerequisite
This guide assumes that you already have a TBS Fusion module and compatible goggles.
If you haven’t got a TBS Fusion yet, they are available on Amazon so go ahead and check the latest price here.
If you have already installed your Fusion into the goggles, you can skip the installation section.
If you have already installed your Fusion and just want to know how to connect it to Crossfire/Tracer, you can skip ahead to this part of the guide.
What Is TBS Fusion?
The TBS Fusion is a video receiver module designed to be mounted inside the receiver module bay of compatible FPV goggles.
If you were not already aware, the TBS Fusion is named as such due to it being a combination, or ‘fusion,’ of three things:
- Image processing developed by BrainFPV.
- The OSD and UI (menu system) developed by Achilles.
- The hardware developed by Team Black Sheep.
Personally I have been very impressed with the performance of the TBS Fusion module! I find the video very reliable and a vast improvement over the standard module.
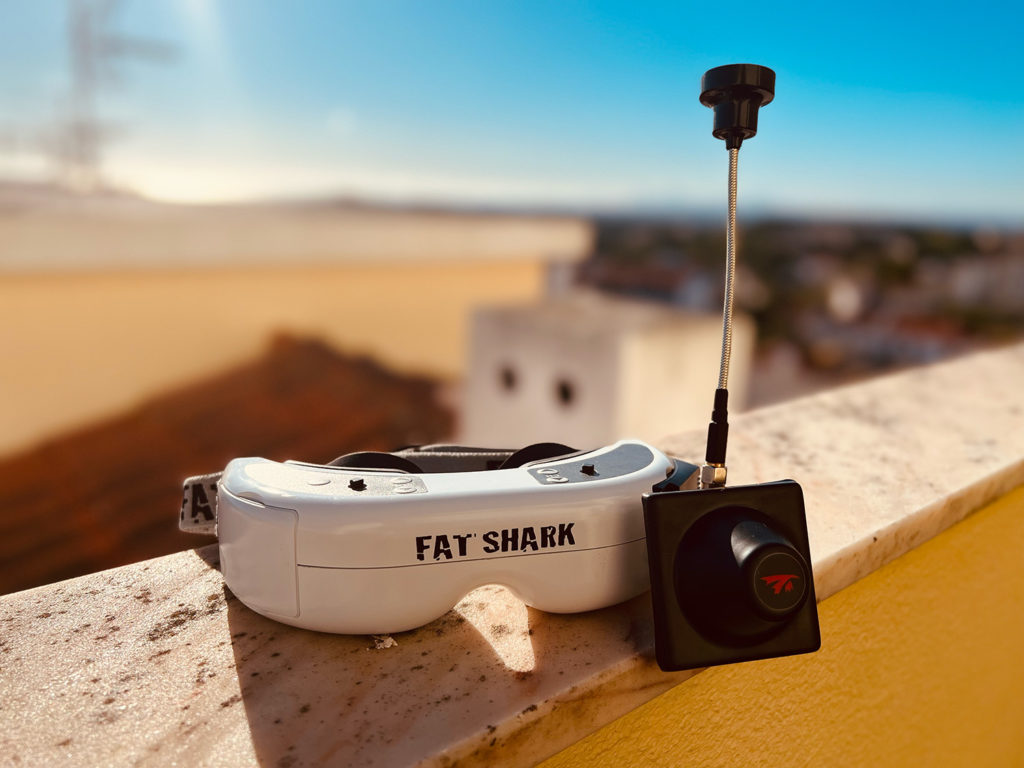
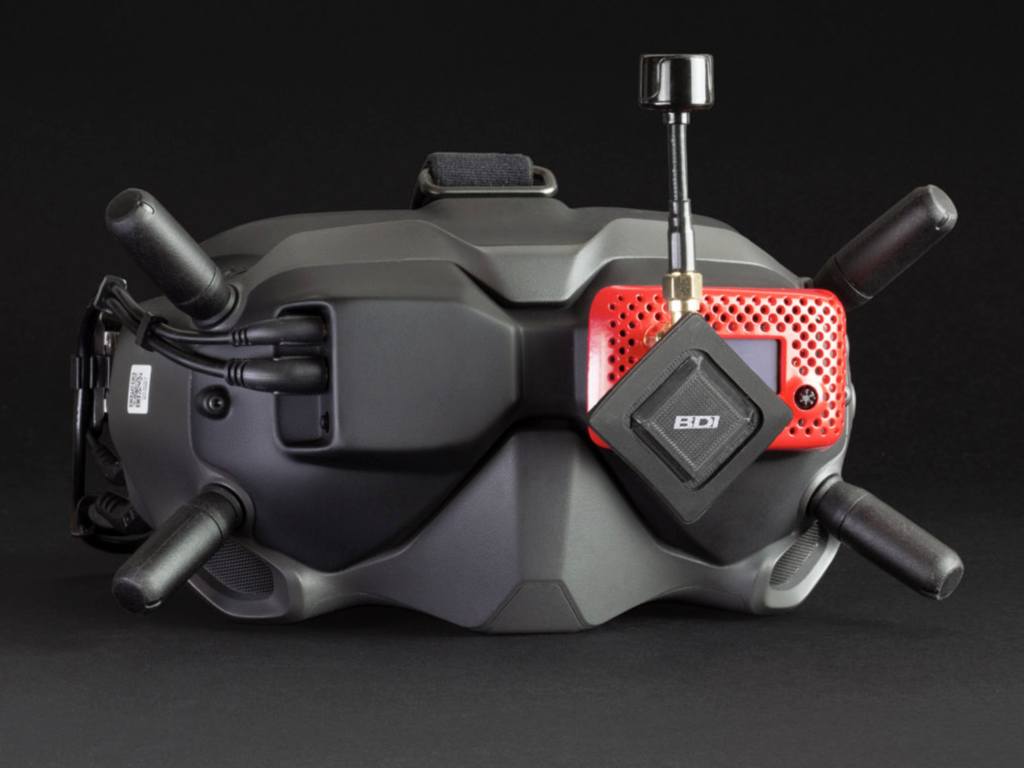
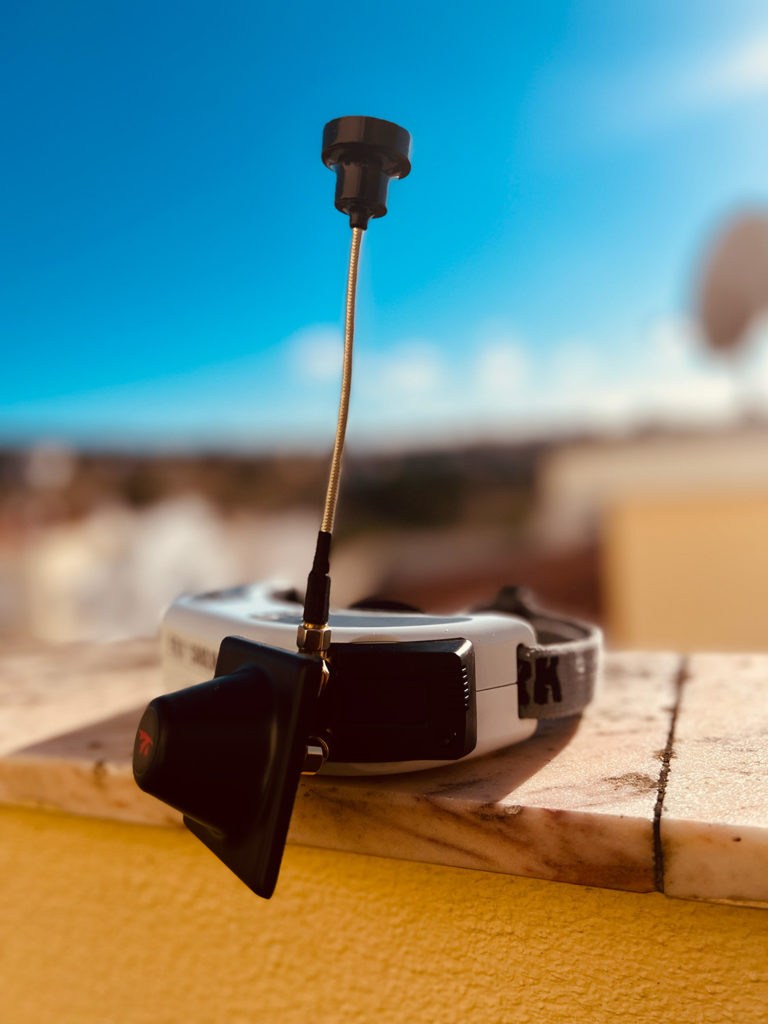
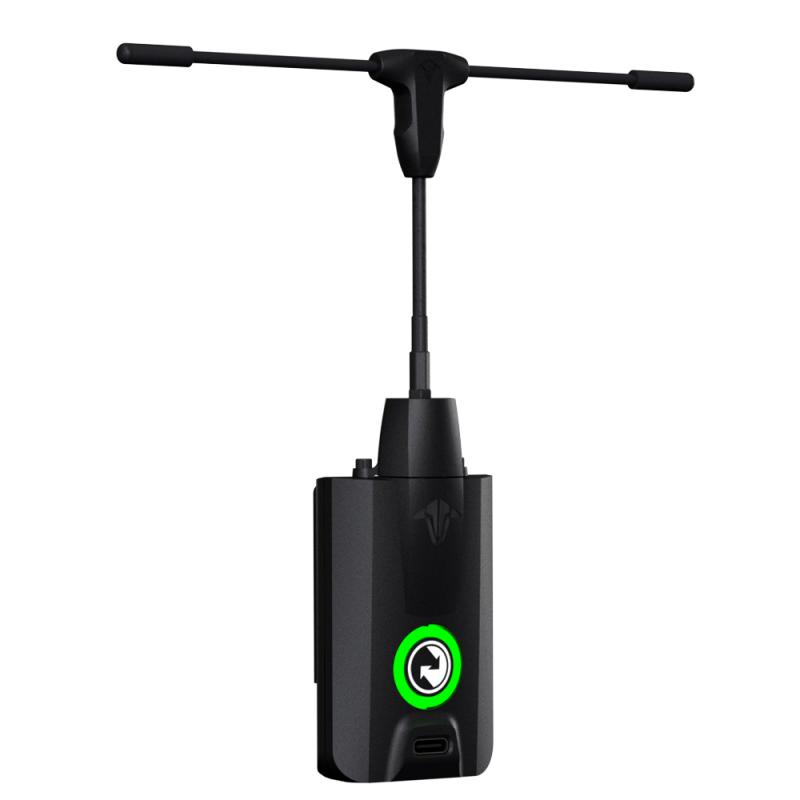
I have been running my TBS Fusion with a a Menace Periscope Pagoda and TrueRC Sniper II for omnidirectional coverage plus longer range 120 degrees in front of me.
I really like that the Menace periscope has such a long flexible-rigid mast. It remains firmly in position and above the head to give 360 degree line of sight, as you can see in the following image.


How To Install TBS Fusion In FPV Goggles
In most cases it is pretty easy to install the TBS Fusion into your goggles. This guide covers the following:
How To Install TBS Fusion In Orqa Goggles
It is super-easy to install the TBS Fusion in the Orqa. You simply plug the module into the module bay.
However you will need the TBS Fusion cover for the Orqa goggles in order to expose the SMA connectors, OLED display and joystick, as it does not come in the box.
If you do not have the cover you can get it from Team Black Sheep, Orqa or alternatively you can 3D print it yourself.
How To Install TBS Fusion In Fatshark Goggles
Installing the TBS Fusion in to Fatshark goggles has two degrees of difficulty, depending on whether your goggles are older than HDO2s.
For additional clarification as to whether you need to take the extra steps to install the power mod, see the power mod section in the Fusion manual.
Installing TBS Fusion into Fatshark HDO2
If you have the HDO2 goggles then you are in luck! The receiver bay can power the TBS Fusion without modification.
Simply insert the Fusion module and afix in place with the included Fatshark cover and you are good to go!
Installing TBS Fusion into other Fatshark Models
However for previous models of Fatshark goggles the receiver bay does not have enough power to run the video receiver and onboard WiFi module.
TBS have included a solution to this problem; a small module with an additional power regulator that plugs into the connector behind the mysterious expansion bay cover on the other side of the goggles, you know, the one that you never opened…
For most people this expansion connector will be empty and it will be no problem to insert the power module.
However you may have another module installed here like the trinity head tracker. In which case simply remove that module and replace it with the power supply module supplied with the Fusion.
How To Install the TBS Fusion Power Module
You will read various horror stories online where drilling and melting plastic is required in order to feed the small flex cable through from the power module to the Fusion module.
You will also see another approach, whereby the flex runs across the front of the goggles and is taped in place or covered by stickers. I am not a fan of this approach at all as it is somewhat of a bodge job.
From my own experience, you do not need to melt holes or drill the plastic of your goggles nor do you need to run the flex cable externally.
I will explain how to install the mod easily and without mutilating the case. You will need:
- 1x small phillips head screwdriver to remove 3x philips head screws from the case. If you need some precision screwdrivers, I would recommend getting a set from Proskit, they last forever.
- Some decent precision tweezers.
- A couple of strips of electrical tape (optional but recommended).
Note that I performed this mod on my Dominator HD V1s so millage may vary, although for other Fatshark goggles the process should be very similar, if not identical.
- First remove both covers from the two module bays and remove the video receiver if you have one installed.
- Next remove the (x3) mounting screws from the bottom of the goggles.
- If you have a faceplate, remove the screw in the bridge area to remove the faceplate. If you have older goggles, pry the rubber eyepieces gently off the frame.
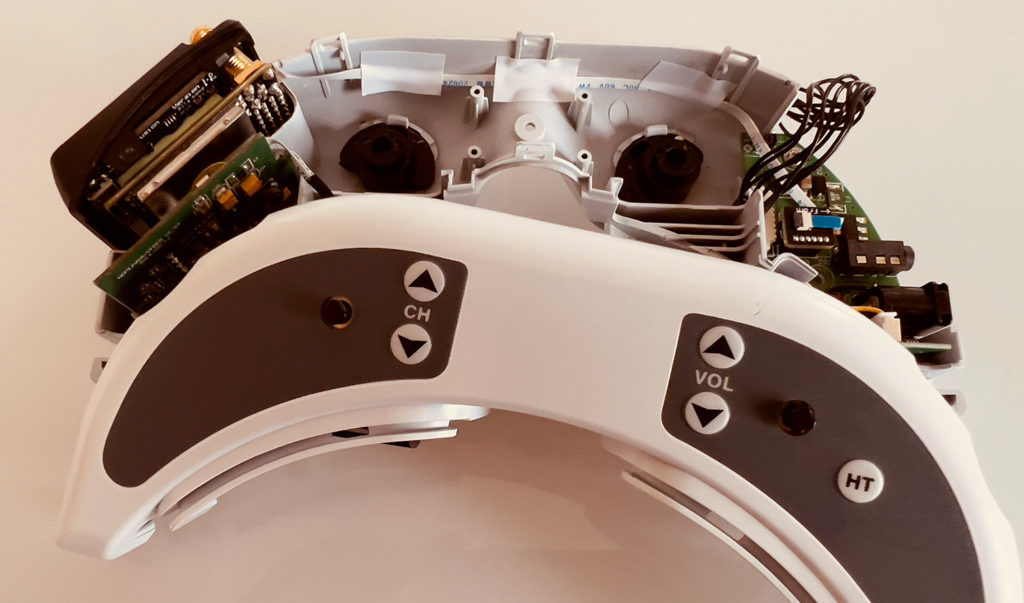
- Pry open the goggles case, taking care not to use too much force. When you seperate the two pieces, take extra care of the cables at either side of the goggles, which connect the top and bottom halves.
Check out this video from Propwashed to see a great walkthrough of the process. His video details the installation of a different video module (La Forge) but the disassembly process is relevant.
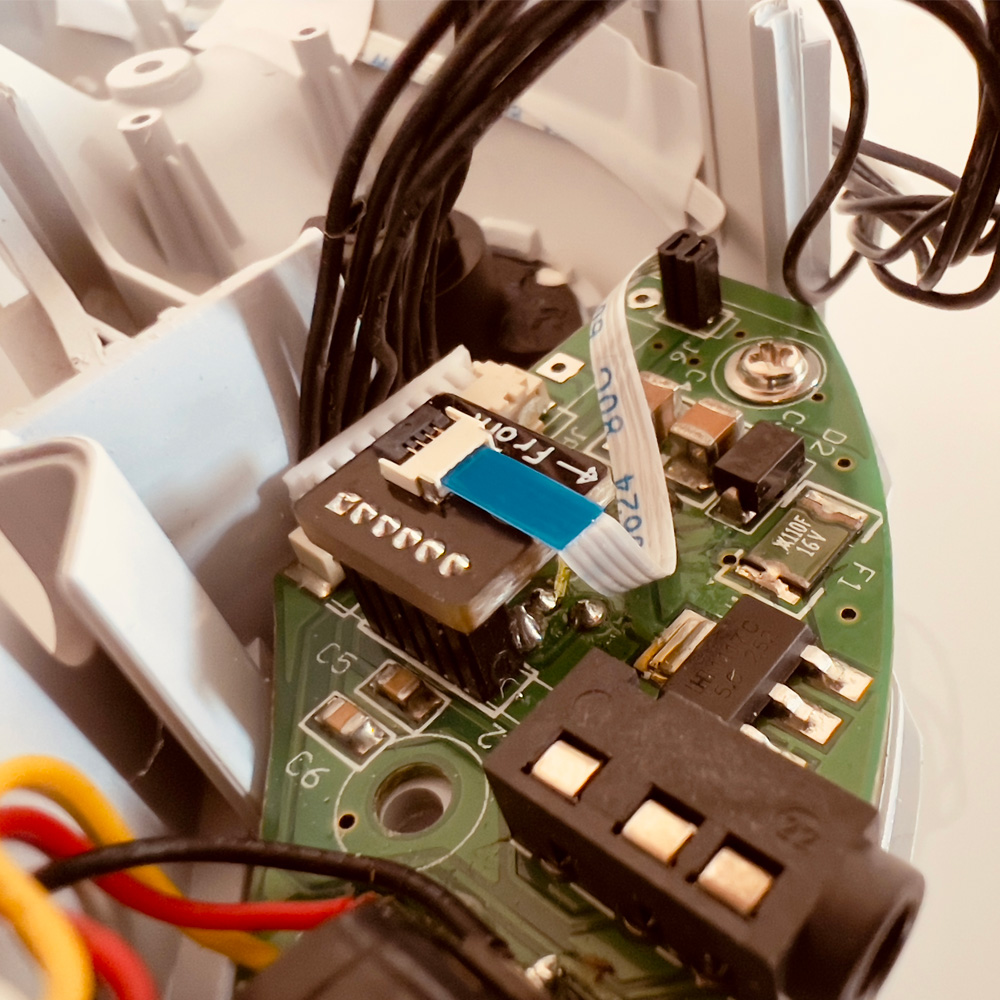
Once you have opened up the goggles, the first thing to do is install the tiny power regulator board into the expansion bay next to the power jack.
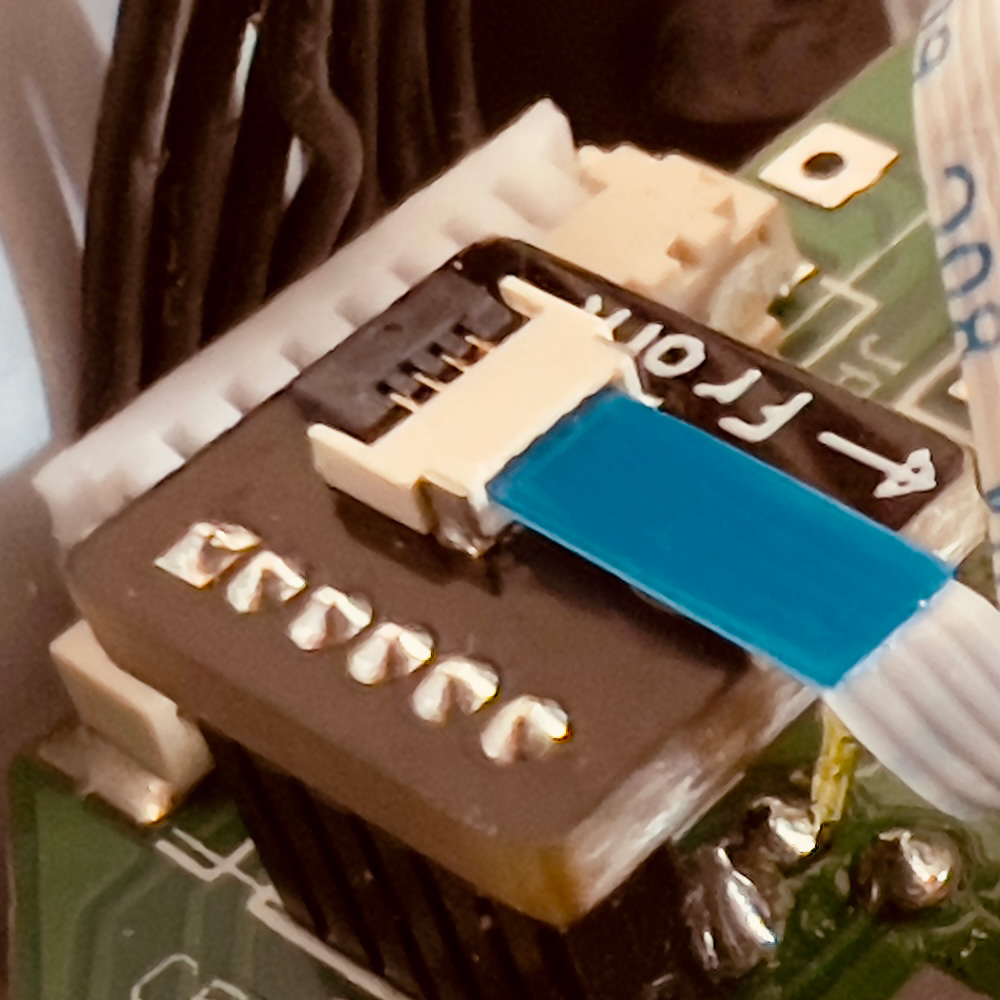
First connect the supplied ribbon cable to the power module. If you haven’t done this before the ZIF connector can fool you so be careful!
Note that it is much easier to flip open the ZIF socket on the PCB and insert the ribbon using precision tweezers.
First make sure the small brown flex clamp is in the raised position, then gently insert the flex cable with the blue stiffener facing upwards.
Then gently lower the flex clamp to secure the cable in place. When inserted correctly, the cable should not slip out of the connector.
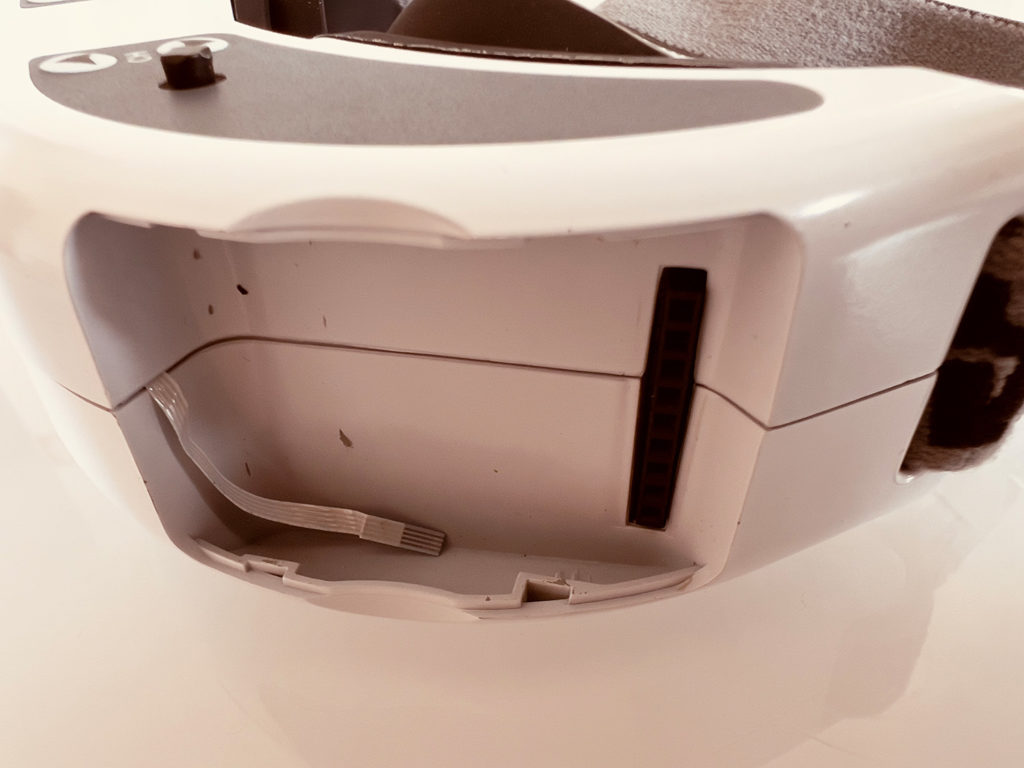
Next run the flex cable across the front of the goggles case and use electrical tape to secure it in place. The tape is just to stop the cable slipping out during reassembly.
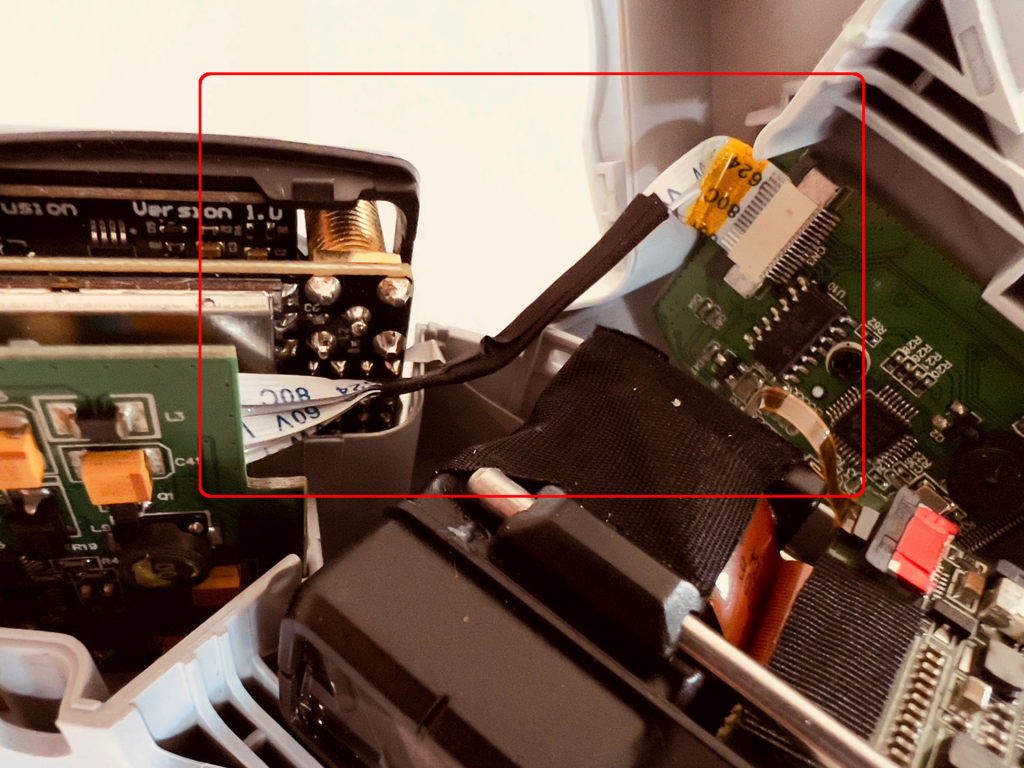
There is no need to cut or melt a hole for the flex cable on the Fusion side, simply fold it over the join between the case.
When you close the two halves of the case the flex is thin enough to sit between the join without preventing the case from snapping together.
It is acceptable to fold single layer flexible printed circuit boards in such ways so long as it is a permanent installation and the flexible circuit will not be unfolded.
When you reassemble the goggles, be very careful not to get flex cable that runs top to bottom on the Fusion side caught in the case.
If your case is not snapping together cleantly, it is tempting to think that it is due to the Fusion power mod flex cable.
However it is more likely to be this cable getting caught.
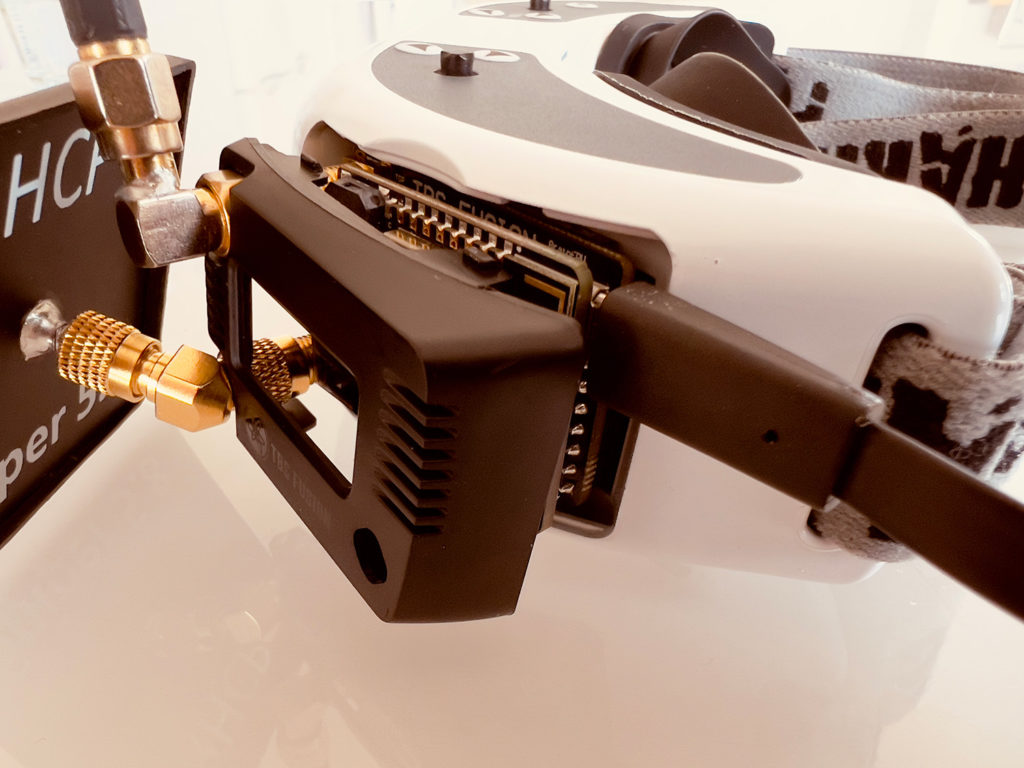
Once you have reassembled the goggles case it is time to install the Fusion module into the goggles.
First connect the ribbon cable to the back of the module using the labelled 2S power connector. Then plug the module into the bay.
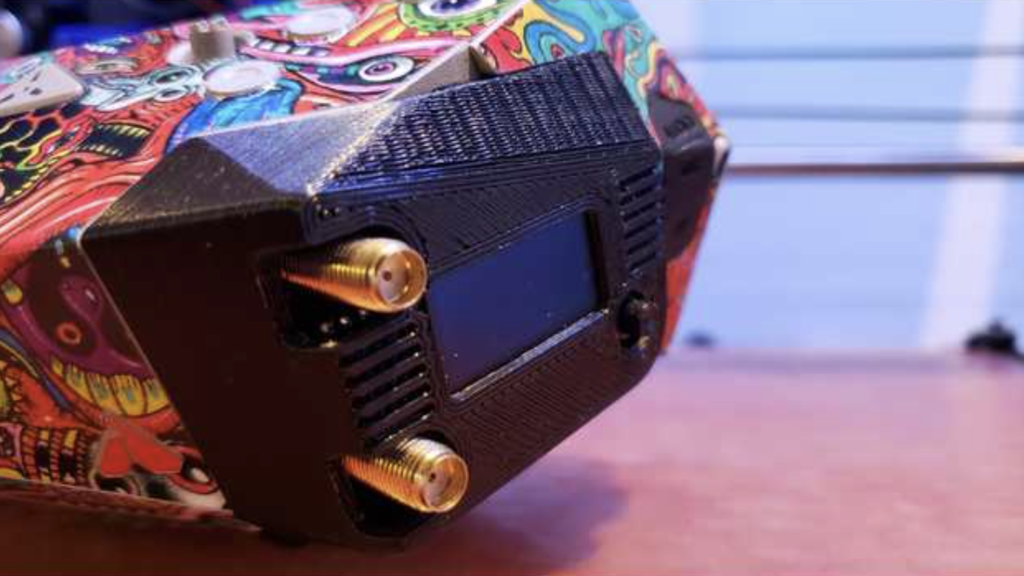
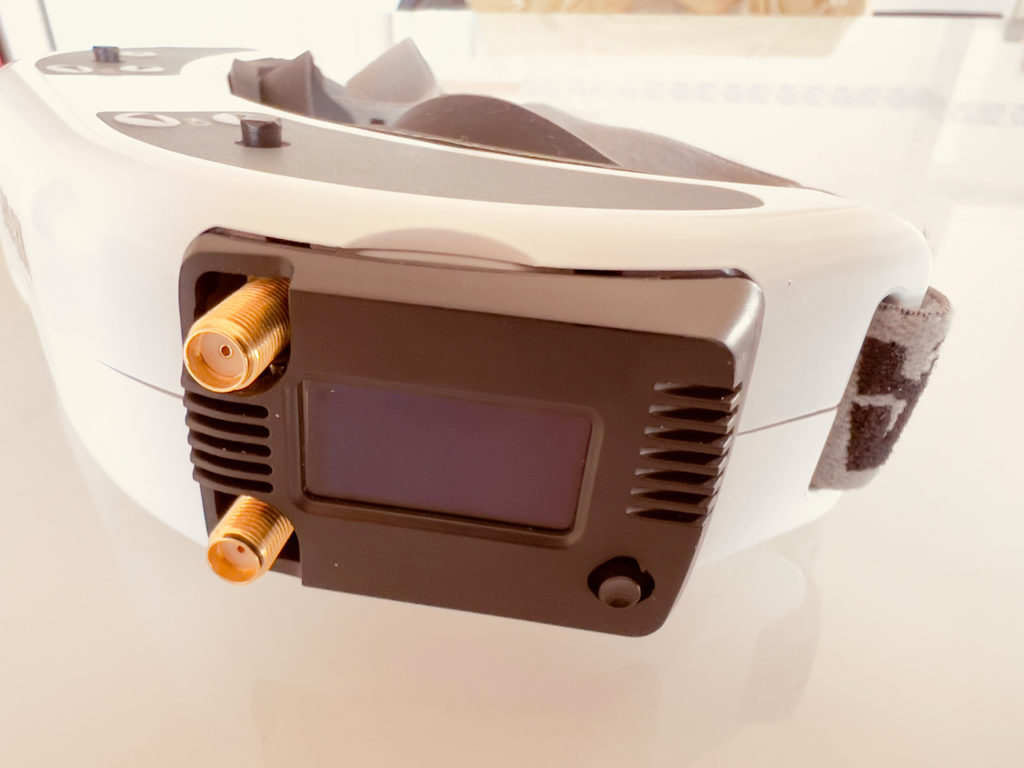
Finally attach the Fusion module cover and your chosen antennas and you are good to go!

How To Install TBS Fusion In DJI HD Goggles
It is possible to use the TBS Fusion with your DJI HD goggles in order to make them compatible with analog drones. There are several ways to do this.
The best way to do this is to use the BDI Digiadapter, which gives you an analog module bay compatible with Fatshark modules, although this is certainly the most expensive option.
Alternatively if you want to save a few bucks, there is a second option. You can use one of these adapters readily available from Amazon.
You can use this adapter standalone and it is much cheaper than the BDI solution. However the module is not very secure without a bay.
It would probably be wise to also purchase a bay for this board, making it a much neater installation. This is still a cheaper alternative to the BDI solution.


Alternatively if you have a 3D printer, you can print your own bay too. There are quite a number of models available include side and front mounted.
How To Use TBS Fusion
At this stage you should have your TBS Fusion module successfully installed, including the power mod if necessary.
Prior to powering up we need to install the antenna. If you already have antennas installed, you can skip to updating the firmware.
TBS Fusion Antenna Selection
As you have probably already noticed the TBS Fusion has two SMA connectors on the front. The first thing to understand is that these are SMA and not RP-SMA.
There is a subtle difference between the two antenna connectors and if you wish to better understand it you can check this useful article out.
However all you need to do is make sure that the antennas that you buy have an SMA connector to match the SMA connectors on the Fusion.
Diversity
The TBS Fusion has advanced software and hardware that allows it to seamlessly switch between the signal on each antenna, depending on which signal is giving the best reception.
You can mount any type of antenna on each connector, they do not have to be identical. The choice of antenna depends on the type of flying that you wish to do.
However in most cases it makes sense to have an omni-directional antenna on the top connector and a directional on the bottom connector for recreational and freestyle flying.
Alternatively if you plan to fly in very close proximity to yourself (for example, if you are racing exclusively) you might opt for two omni-directional antenna at 90 degrees from each other in order that one mitigates the dead spot of the other.
Omni-directional antenna
As the name suggests, this type of antenna can receive the signal from your drone in all directions.
Whether you are flying in front or behind yourself, this antenna can receive the signal evenly a full 360 degrees around its axis.
There is usually a ‘dead spot’ directly above the antenna but it is very unlikely to cause a problem even if you do fly directly over yourself for a moment.
Directional antenna
As the name suggests, this type of antenna only receives the signal when it is pointing towards the source of the signal, in this case our drone.
Different designs of antenna have different ‘beam widths.’ The more narrow the beam the longer the range of the antenna.
This is the benefit of a directional antenna; if the drone is behind the antenna then the signal will be very poor. However if the drone is within the beam width of the antenna, the signal will be very strong.
A directional antenna gives you a lot more range with the caveat that it must be pointing at the drone.
What polarization should I choose for my TBS Fusion antennas?
It is also important to match up the polarization of antennas. There are three possibilities available:
- Right-hand circular polarization (RHCP)
- Left-hand circular polarization (LHCP)
- Linear polarization
I won’t dive into the details of each of these as it is beyond the scope of this article. If you are the inquisitive type and want to learn a little more about this topic, check out this article.
Despite linear polarization being more common in general (for example your TV antenna), circular polarisation has become the standard for analog FPV video as it has some benefits that suit FPV.
There are no differences between using RHCP and LHCP, you simply need to make sure that the antenna on your drone matches the antennas on your goggles.
The benefit of having both RHCP and LHCP is that one somewhat rejects the signal of the other.
Therefore if you are flying with other drones in close vicinity, such as with friends or when racing, you can make use of RHCP and LHCP to mitigate video interference.
Note that your drone antenna and goggles antennas should all be the same polarization. If you are using RHCP on your drone, you should use RHCP on both of your goggles antenna.
What is the best antenna combination to use with TBS Fusion?
Unless you are doing ultra-long range FPV, which really gets into the science of antenna choices, it is likely that combining one omni-directional antenna with one directional antenna with a fairly wide beam will be the best choice.
The omni-directional antenna will allow you to fly a fair distance away from yourself in any direction. Suitable for most freestyle sessions.
The wide beam directional antenna will allow you to fly a further distance away when you are in front of yourself, which is often the case anyway.
If you are looking to get yourself some antennas, my advice would be as follows:
- Omni-directional: a periscope type omni-directional that rises above the head, so the head does not block the signal. I currently use the Menace Periscope, but the Foxeer Pagoda is also a great alternative.
- Directional: a fairly wide beam antenna such as 120 degree to give more coverage in front of yourself. I currently use the TrueRC Sniper II, although the VAS Crosshair Extreme would be a great alternative.
How To Update TBS Fusion Firmware
With your module installed and your antennas attached, it is finally time to power up the module and update the firmware!
In order to access the USB port you will need to carefully pull the Fusion cover away from the goggles.
You can remove the antennas to make this easier, but the cover will come off and reveal the USB port without removing antennas.
There are several tools that you can use to update TBS firmware on your TBS devices.
The most convenient is to use Agent M, which runs directly in the browser. However this only works with Chrome Browser.
Alternatively you can use Agent X, which is a dedicated desktop app from Windows or Mac. Simply download and install it.
It is also now possible to update via a Lua script, however this is a topic for a different day. More details can be found on the Agent page.
Personally I use Agent M, which is what I will use here. However the process should be the same for Agent X, if you would prefer a standalone app or don’t want to install Chrome.
Once you have signed into Agent M, you will see a list of your known devices if you have any. The following devices are everything used in my Kiss quad.
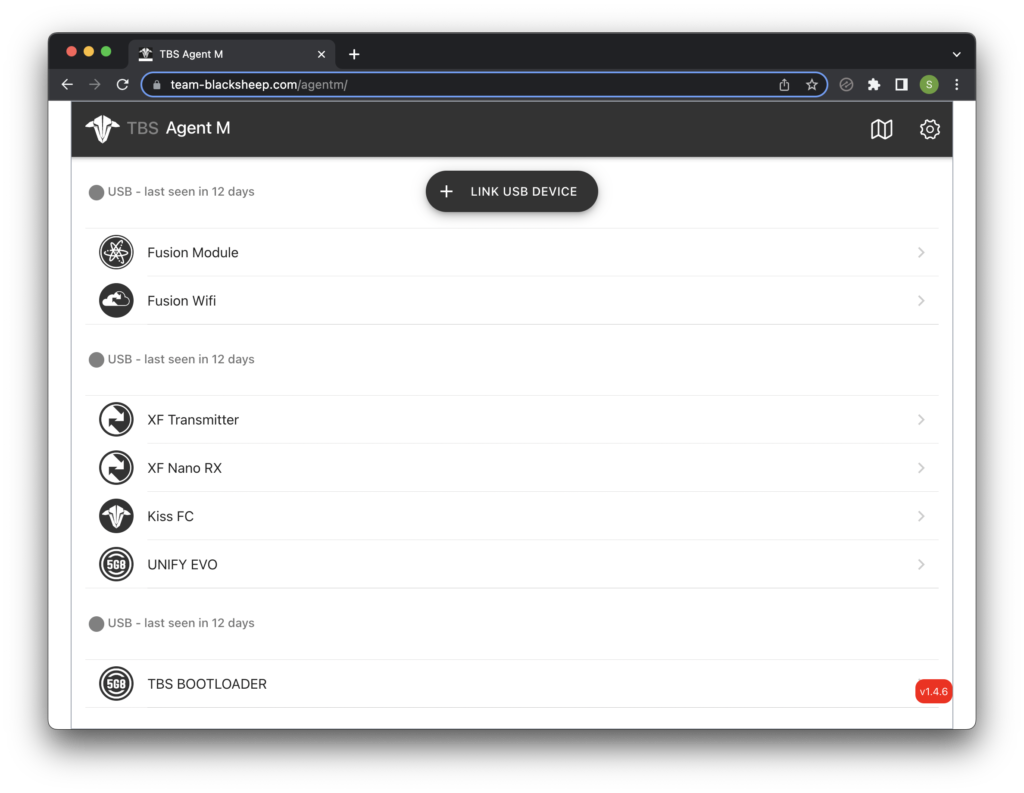
Go ahead and click the link device button. This will bring up a dialog allowing you to select your Fusion, assuming it is connected to the USB port and has been successfully recognised.
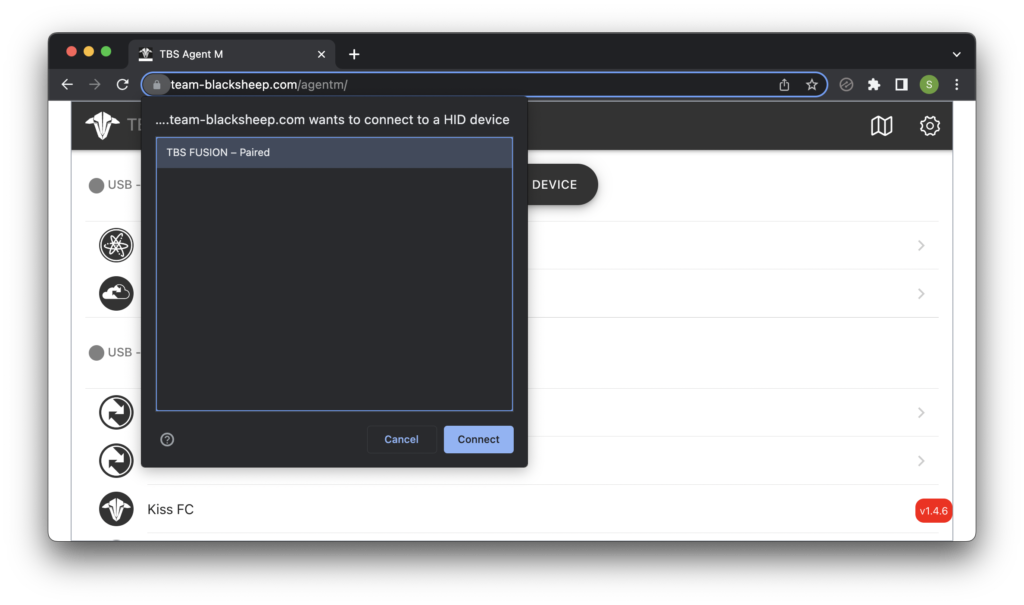
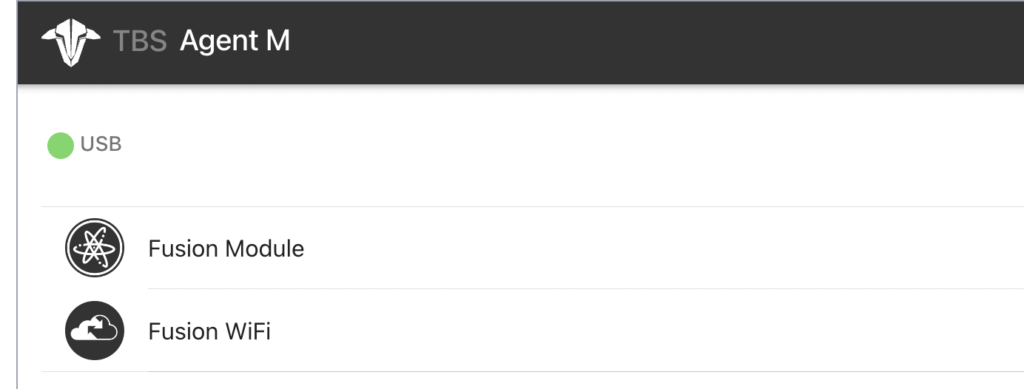
Go ahead and click connect to connect to the Fusion. Once connected the Fusion will appear in the list of connected devices, denoted by the green indicator.
In order to update the firmware, choose Fusion Module from the list of connected devices, then click the firmware tab at the bottom of the screen and find the version of firmware that you wish to use.
Here you can see that my crossfire is currently running v2.21 as highlighted by the blue ‘current’ label.
In order to update to the latest version at the time of writing, version 2.22, we can use the arrow next to ‘release notes’ to drop down the further details and reveal the update button.
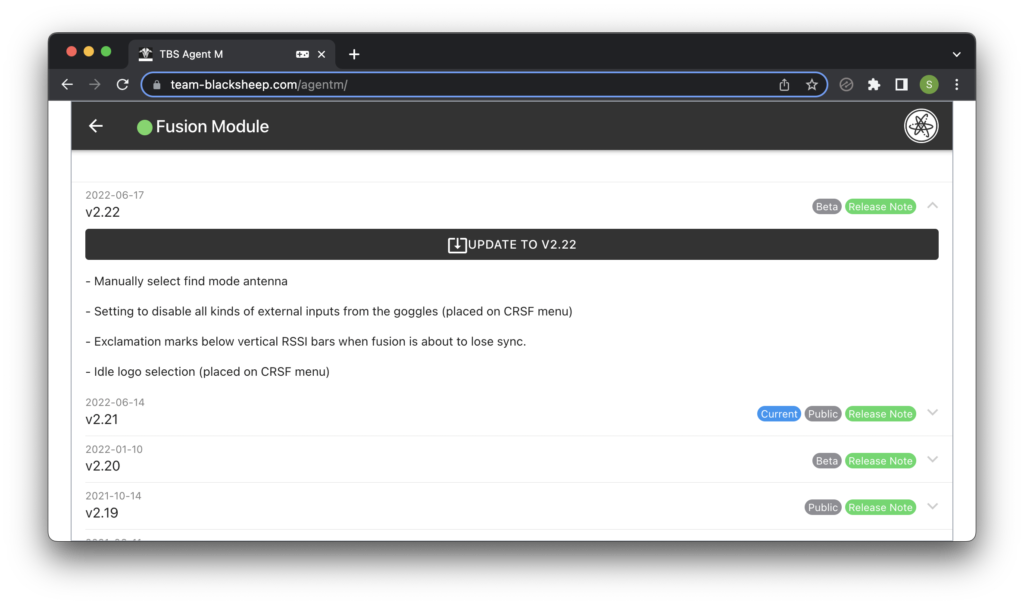
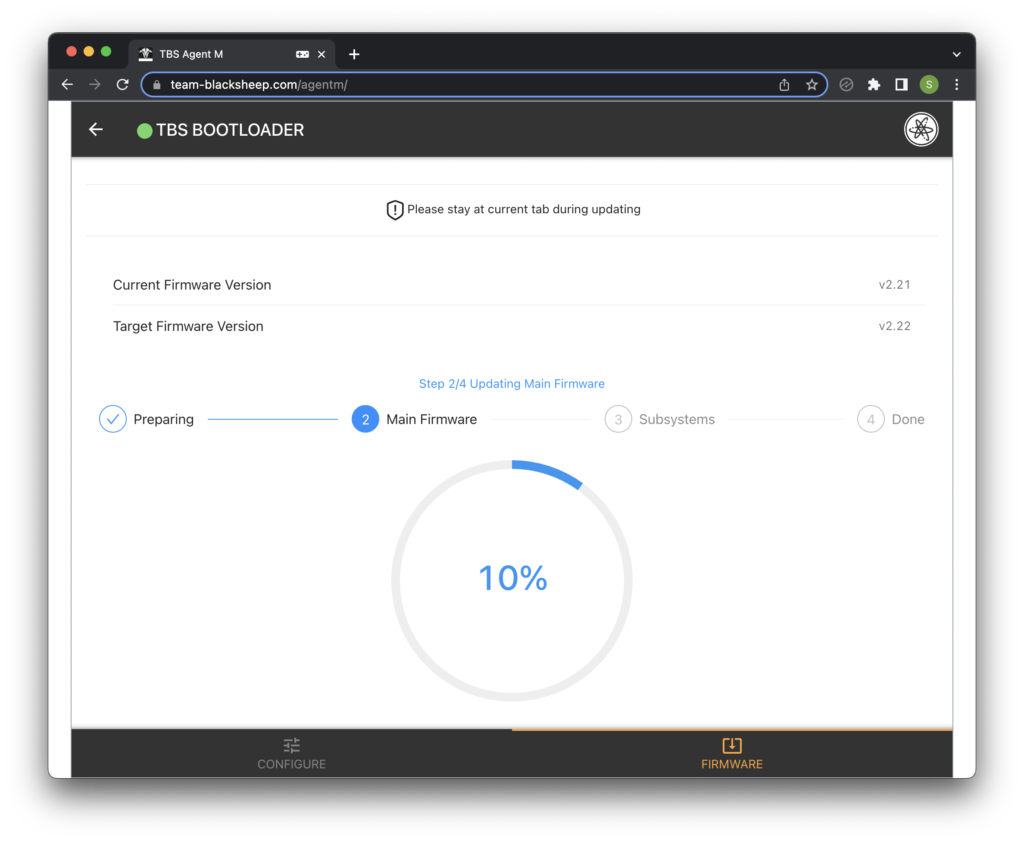
Click the update to Vx.xx button in order to begin the firmware update. This will begin the firmware update indicated by a progress bar.
It is important that you keep the browser tab in focus. Don’t open a new tab and start Googling Mr Steel videos whilst the firmware update is progressing.
If you do happen to absentmindedly navigate away from the firmware update, don’t worry. In most cases the update will not fail.
You simply just press the link device button again, select the Fusion and click the connect button again to continue the firmware update.
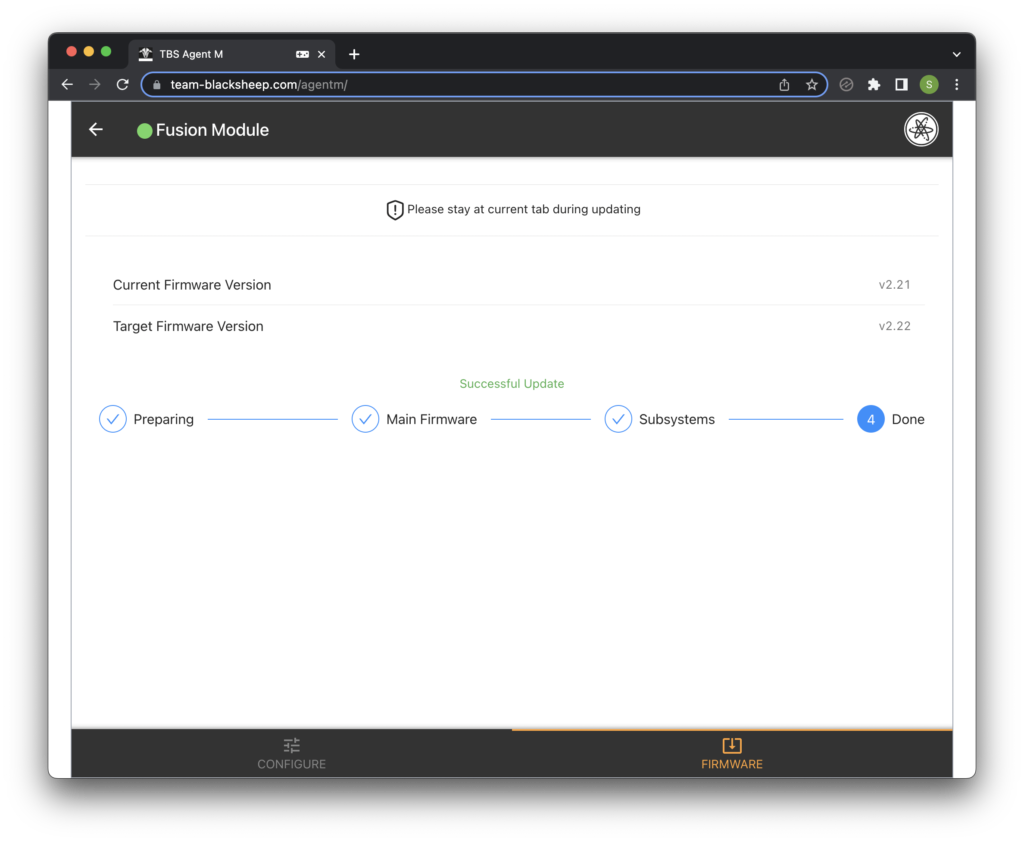
Once complete you will be greeted with the successful update message. Congratulations! The firmware update is complete.
TBS Fusion Getting Started
If you are using TBS Crossfire then I would certainly recommend linking it with your TBS Fusion so that the two operate smoothly together.
If you wish to link Crossfire and Fusion then I would recommend skipping ahead to this part of the guide whilst you still have the cover removed and USB connected.
If you just want to go out any fly then it is very simple to get started. First power up your goggles and wait until you arrive at the main screen.
If your quad is set to a particular channel and band, you can use the hat switch on the Fusion to select the matching channel and band.
However there is a more optimal way to choose a channel using Fusion. When you change the channel or band you will see a mini band scanner appear on the screen.
You can use this to select a band and channel with a minimum amount of noise.
If you see noise on a particular channel, select the channel that is furthest from the noisy channel. You can also change the band to a less noisy band if necessary.
Then simply change your VTx frequency to match the optimal frequency that you selected with the Fusion.
If you are using TBS Crossfire/Tracer then it is even possible to link the VTx with the Fusion so that the channels synchronize automatically!
This feature is definitely a game changer and one of the main reasons I chose Fusion as my goggles module.
How To Link TBS Fusion With TBS Crossfire, Tracer or Tango
Linking your TBS Fusion with your TBS Crossfire, Tracer or Tango is definitely worth the effort! This is the secret weapon that makes the Fusion the only choice for Crossfire/Tracer owners and TBS fans.
It unlocks some really cool new features, most notably the ability for your Fusion to sync with your video transmitter.
You can either get your Fusion to match the channel that your VTx is on, or you can get your VTx to match the channel that you set with your Fusion.
Another awesome feature is VTx dynamic power. Now your video transmitter can adjust its power automatically depending on signal strength. Awesome!
Assuming you have the gear, there are still two hardware requirements that you must fulfil:
- You must have a WiFi module in both devices. The odds are that you do and it won’t be a problem, but I have covered it in this guide anyway.
- You need to have your VTx connected either:
- Directly to the Crossfire receiver via CRSF or SmartAudio.
- To the flight controller, and then to Crossfire via CRSF or SmartAudio.
For wiring guidance and further information, see page 25 of the Fusion manual.
Methods for Linking TBS Fusion to Crossfire and Tracer
There are two ways that you can link TBS Crossfire/Tracer and TBS Fusion. Note that this includes TBS Tango and Tracer, but from here forwards we will refer to the transmitter module as Crossfire for simplicity.
You can either link your Fusion and Crossfire to the TBS Cloud or you can link them directly. The following diagram shows the two different connection methods.
Many other guides online focus on the TBS Cloud as the method of connection. However the issue with TBS Cloud is that it does not work without a hotspot and the internet.
Personally I do not want to worry about whether or not I have phone signal in order for my TBS synchronization to work.
Although I have an awesome mobile hotspot that would be ideal for this, I do not want to have to think about yet another device to charge if I want to go fly!
For me the simplicity of a direct connection is by far the more preferable option.
My Fusion is configured to connect directly to my Crossfire over WiFi, no internet, no access points, no problems!
I power up my Goggles, my transmitter and my quad. I wait a couple of moments and everything is connected and in sync, awesome!
Therefore in this guide I am going to describe how to link TBS Fusion to TBS Crossfire directly.
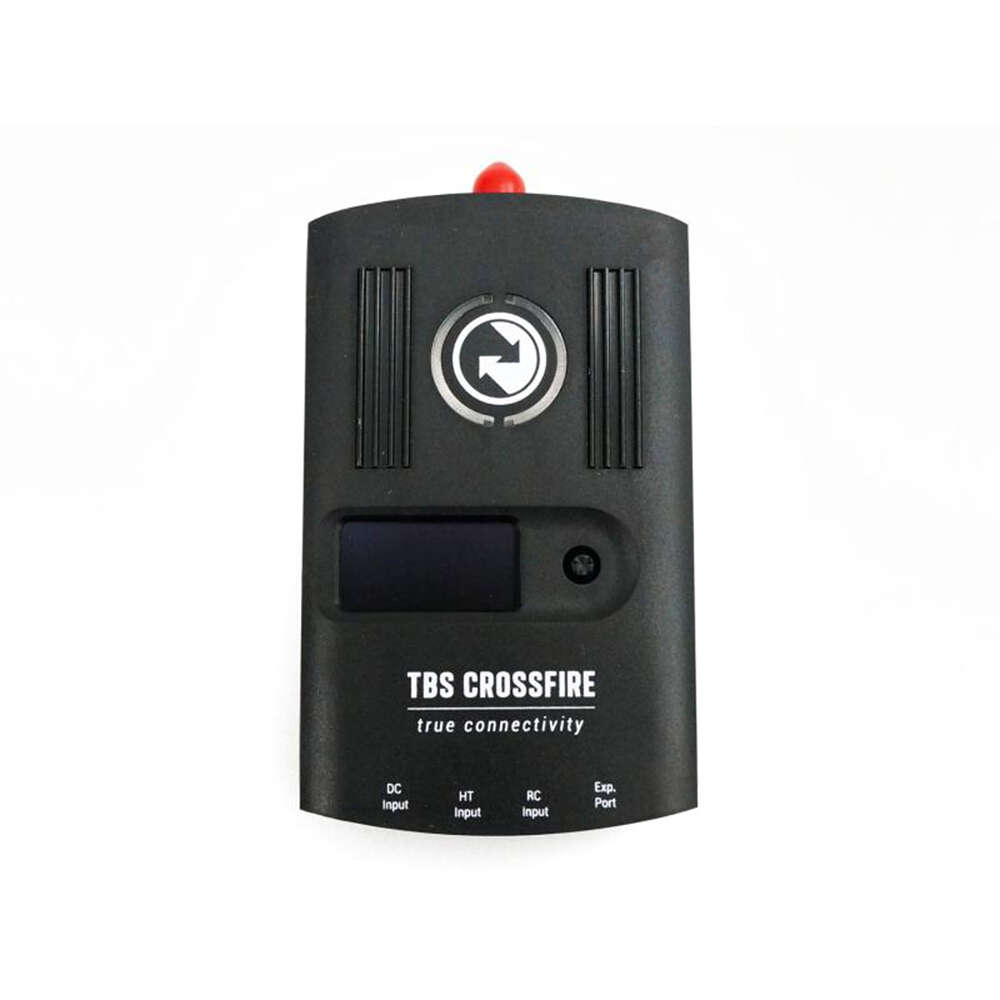
How to check if a full sized Crossfire has a WiFi module
It is worth noting that some of the older full sized Crossfire transmitters do not have a WiFi module installed.
Newer full sized Crossfire modules ship with a WiFi module already installed and all Micro and Nano modules have a WiFi module installed.

It is probably likely that you already have a WiFi module and that you can just skip to updating the WiFi module firmware.
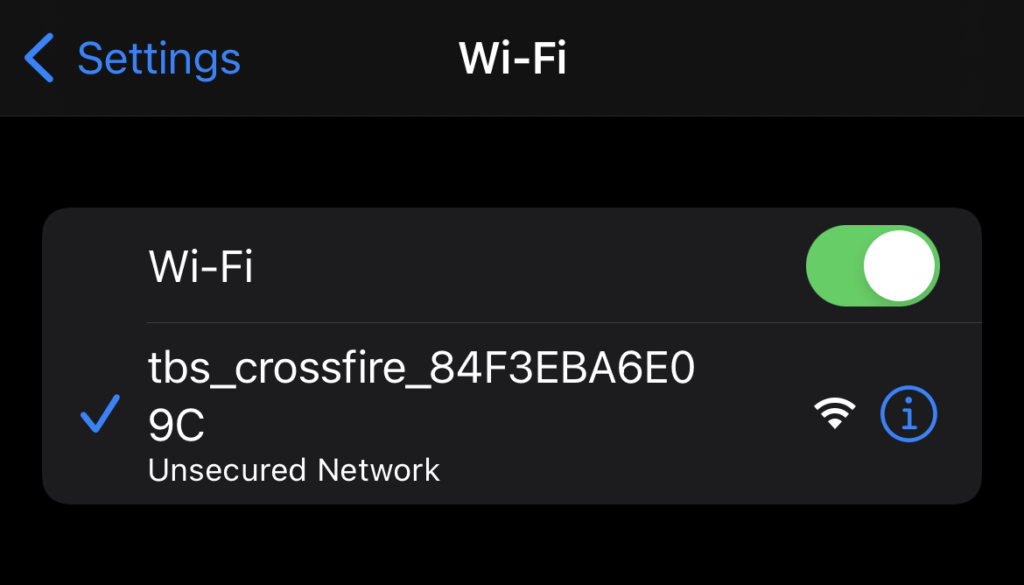
When you power up your Crossfire it should create a WiFi network called something like tbs_crossfire_xxx assuming that you have up to date firmware.
If you are unable to see this network then your it is likely that your Crossfire does not have a WiFi module installed.
You could also open your Crossfire module and check inside in order to be certain. The module used is the ESP-12, a very common model based around the ESP8266 chipset.
If Your Crossfire does not have a WiFi Module
If you are unlucky enough to have a full sized Crossfire without the necessary WiFi module, you can get an updated JR adapter which contains the WiFi module.
This means you can add the module without opening up your Crossfire and having to solder it to the PCB, awesome!
You can get one direct from Team Black Sheep, but they are also available on Amazon.
Updating the firmware on the WiFi module
In order to link your TBS Fusion and TBS Crossfire directly, first make sure you have the latest firmware installed on all devices.
The process for updating the TBS Fusion firmware is detailed earlier in this article and you can follow a similar process for updating Crossfire.
With both devices running the latest firmware, we also need to update the firmware running on the WiFi modules in each device.
The WiFi module is actually a seperate device, think of it like a WiFi dongle for the Crossfire. Just like a WiFi dongle for a PC, it needs to have its firmware updated separately.
The WiFi module firmware is actually updated over the air. This means that we must connect to it using WiFi in order to update the firmware.
The process is the same for both Crossfire and Fusion:
- Download the WiFi firmware from TBS and unzip the contents. This is a complete set of TBS firmware and contains the files for each device in their respective folders.
- Make sure the Crossfire / Fusion is switched on and wait until the wireless access point becomes available.
- Connect to the wireless access point, for example tbs_fusion_abcxyz.
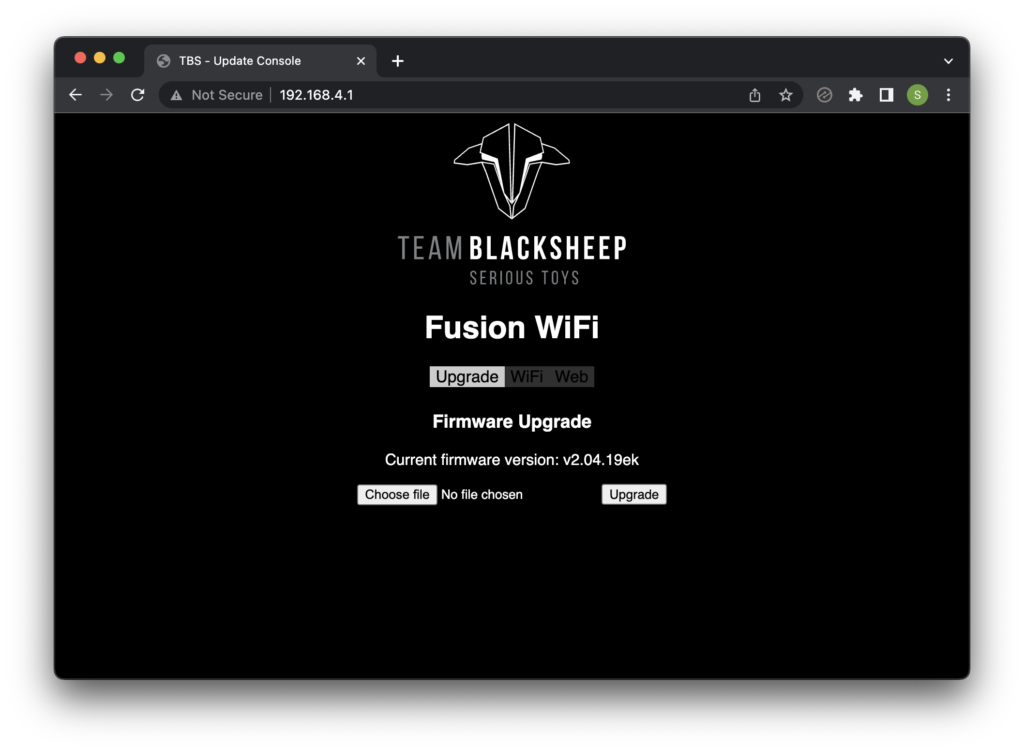
- Open a web browser and navigate to the address http://192.168.4.1/
- Click on the upgrade button. This will list the current firmware vision and make the upgrade button visible.
- Click on choose file and navigate to the firmware that you downloaded in step 1.
- Open the folder for the version you wish you install. Choose the latest firmware, unless you are downgrading for a particular reason. For example v2.04 is currently the latest at the time of writing.
- Within this folder there will be a folder for each device. Choose the folder for the device that you are updating, for example Crossfire or Fusion.
- In this folder there should be a single .bin file with some crazy name like 0x000350xx_0x0204.bin. Choose this file and click ok to install the firmware.
- Don’t forget to repeat this process for both the Fusion and your Crossfire / Tracer / Tango.
Configuring TBS Fusion
Once you have all of the firmware updated, we can finally link the Crossfire to the Fusion. You should have the latest firmware in all of the following:
First we need to power up both the Crossfire and the Fusion. Once done we will connect the Fusion to the AP on the Crossfire.
For this tutorial I will explain how to configure everything directly on the Fusion. However you can also use Agent M, in which case skip to step 4:
- On the Fusion main screen, press the ENTER button (joystick button down) to enter the main menu.
- Scroll down to settings and press ENTER.
- Scroll down to CRSF and press ENTER.
- Select Fusion WiFi > General
- Select scan in order to scan for networks and wait for the process to complete.
- Select SSID and press ENTER. Now use the UP and DOWN keys (on the joystick) to select the AP for Crossfire. Press LEFT to select and move back to the main options column.
- Select Connect to link Fusion to Crossfire.
That’s it! Now Fusion and Crossfire are linked. When you power up your gear in future, the devices should automatically connect.
How To Sync TBS Fusion with the Video Transmitter
One of the coolest features that is now available to you is the ability to sync your goggles with your video transmitter on your quad.
You can either get your Fusion to match the channel that your VTx is on, or you can get your VTx to match the channel that you set with your Fusion.
Follow mode
When the Fusion is in follow mode, it will follow the band and channel of the VTx.
If you change the channel or band of the VTx using a Lua script, via the Crossfire OLED display, via the flight controller or with the OSD menu (TBS Evo), the Fusion will follow the changes.
Lead mode
When the Fusion is in lead mode, the video channel and band selected on the Fusion will be transmitted to the VTx and the VTx will match the channel selected on the Fusion.
Auto lead mode will always follow the channel selected, whilst lead mode requires send to VTx to be selected in the Matrix menu.
Dynamic VTx power
When this is activated the Fusion will communicate with the VTx and tell it what power is needed to maintain a video link.
If you fly further away and Fusion detects a weak signal, it will notify the VTx over the Crossfire radio link and request that the power is increased.
This means the VTx is always switched to the optimum power output. Awesome!
Enabling The Sync Features
The new features are accessible from the Fusion module:
- From the main menu press the ENTER key to enter the main menu.
- Scroll down to settings and press the ENTER key.
- Scroll down to VTx Sync and press the ENTER key.
- Choose from the options; Lead, Lead Auto and Follow. Press the ENTER key.
- Scroll down to Dynamic VTx.
- Press the ENTER key and choose whether you want to enable or disable Dynamic VTx.
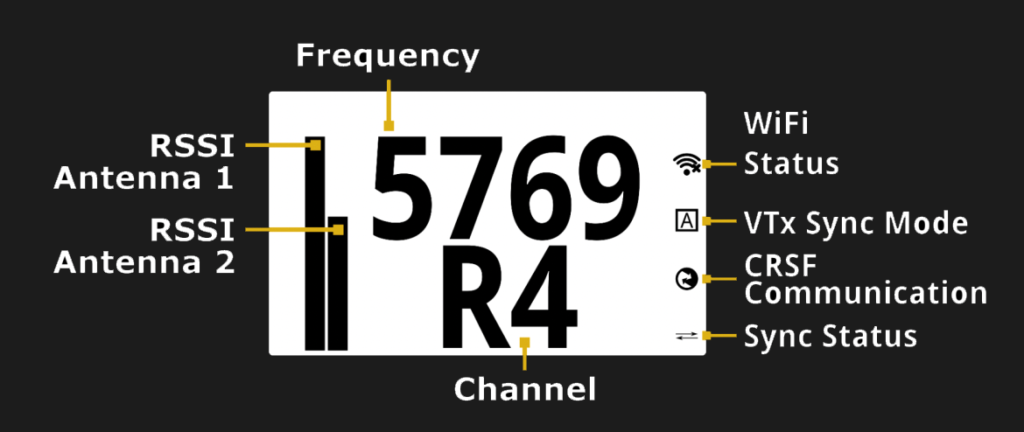
Once you have set everything as you prefer, go back to the main screen and observe the icons on the right-hand side.
It is worth knowing what each of the icons mean, as this tells you the current status of the link:
- WiFi Status : This will have a small cross in the corner when not connected. This cross will disappear when the WiFi is connected.
- VTx Sync Mode : Shows what mode the link is operating in. A means auto and L means lead.
- CRSF Communication : This indicator will blink when communication is occurring between the Fusion and Crossfire.
- Sync Status : Shows if the VTx and Fusion are synchronized. The icon will have a cross through it if there is no sync.
Conclusion
Setting up the TBS Fusion can be a little bit of a challenge as we a dealing with a technology that is at the cutting edge.
Setup can be a little time consuming and finicky in places, however it seems that once you have it set correctly, it performs very reliably.
If you read the whole guide then well done! Thank you for visiting and I hope you benefitted somewhat from the information here.
Don’t forget to check out some of my other awesome tutorials!


Hi there just wanted to give you a quick heads up.
The words in your content seem to be running off the screen in Opera.
I’m not sure if this is a format issue or something to do with web browser compatibility but I thought I’d post to let you know.
The design and style look great though! Hope you get the issue solved soon. Cheers
Thanks Nakliyat, I think this problem is being caused by the ads on the site, looking into it and will try get it resolved! Thanks for visiting!