If you have ever completed a task using the terminal or command line of your computer, you will know how it feels to be part of the elite.
Suddenly your friends and those around seem like mere mortals. You are at one with the hackers, you are a bonafide computer genuis, welcome to The Matrix, Neo…
There is something about using the command line that makes you feel special. With the GUI removed you can communicate directly with the computer and you feel… well, more connected…
In this article we will discover…
- What the Betaflight CLI is and why it exists.
- How and when we might use the Betaflight CLI.
What is the Betaflight CLI?
CLI is an acronym and it means command line interface. So what the hell is a CLI? Well, Wikipedia already explained this for us…
A command-line interface (CLI) processes commands to a computer program in the form of lines of text. The program which handles the interface is called a command-line interpreter or command-line processor
– Wikipedia
You are probably used to giving instructions to your computer by means of clicking buttons with a mouse pointer.
When using a CLI, rather than clicking buttons you are simply typing in the instructions directly.
So what is the CLI in Betaflight? Well, it is no different from any other CLI. It gives us a terminal whereby we can enter commands directly.
Why does the Betaflight CLI exist?
Betaflight is an evolution of something older, much older…
Not a history fan? You can skip to how to use the CLI.
Back in the day some super-brainy geeks who were tinkering around with drones developed MultiWii.
The goal of this software was to make use of the highly popular maker platform Arduino with the intention of utilising the gyros in a Nintendo Wii controller.
Sounds like science fiction, right?! Well if the history interests you, why not go ahead and check this out. It is an extract taken from the original MultiWii website, which still exists.
After some time the MultiWii project moved away from the Wiimote and became compatible with a multitude of sensors, making it simply a flight controller software.
MultiWii initially targeted an 8-bit processor but eventually evolved into CleanFlight, which was essentially a 32-bit version of MultiWii.
It is from CleanFlight that the modern flight controller software that we know today, such as iNav and Betaflight, has evolved.
Betaflight is in fact directly forked from CleanFlight and inherits the CLI from its origins.
So why was a CLI used in historical versions of this mashup of flight controller projects?
Well my opinion here is that in the past it was simply not necessary to have a graphical configurator.
These projects were managed by some very bright individuals and as they developed the systems, they were easily able to configure everything by command line.
It is easier to communicate with an embedded system/microcontroller using a computer and (serial) terminal. It would have been extra work to develop a GUI.
Betaflight is an evolution of something older, much older…
NoirFPV
As the projects grew in size and reached a wider range of people, drone enthusiasts and RC enthusiasts more than computer programmers, the need for a GUI became more apparent.
The CLI has always been there, it is the flight control software in its more raw form.
So why do we still have a CLI if we now have a more user friendly GUI?
Quite simply there are so many settings and parameters that can be changed, there are far too many to have in a GUI.
There wouldn’t be enough room on the screen for all of the buttons!
We only place the most commonly used settings in the GUI, which is fine for mostly all users.
For more advanced users or for commands that are seldom used, we still have access to them via the CLI.
That, my friends, is why Betaflight still has a CLI.
So now you understand what the CLI is and why it is part of Betaflight. Well done, you have taken the first step to becoming a CLI ninja.
How to use the CLI in Betaflight
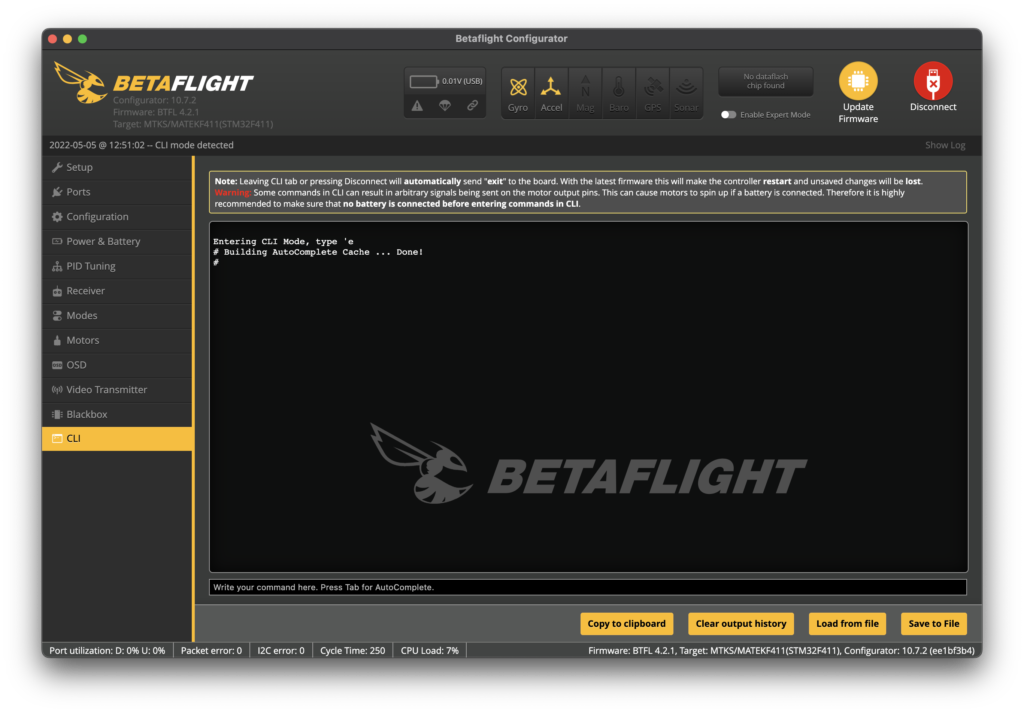
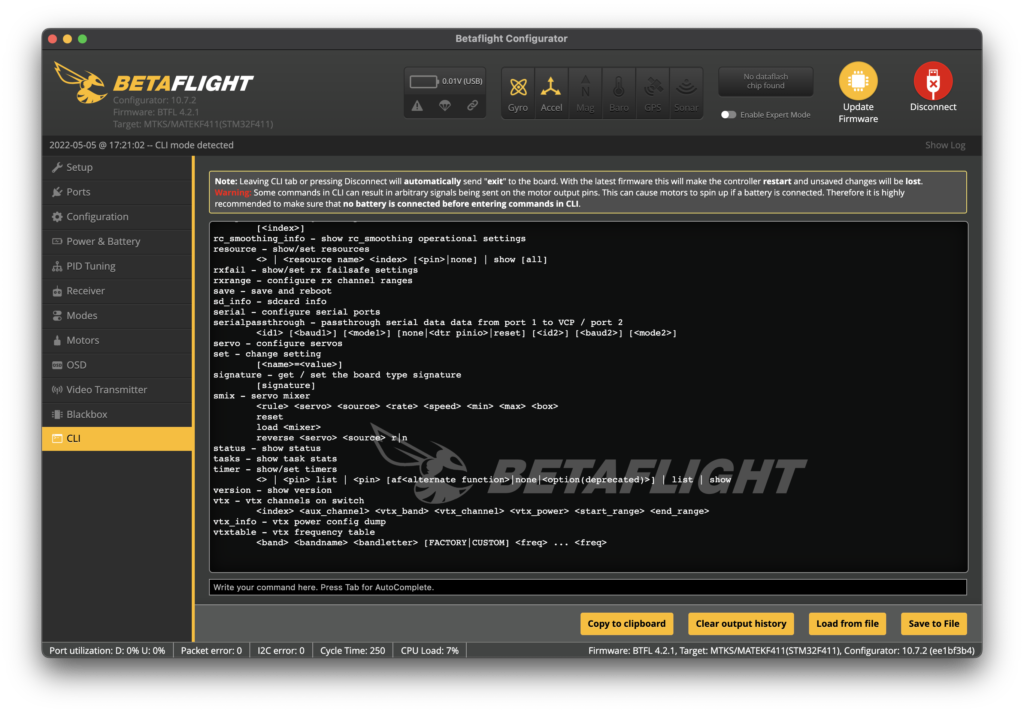
Once you have connected your drone to Betaflight you will be able to select CLI from the left-hand menu.
This will take you to the console. You can type commands in to the text input at the bottom of the page.
Go ahead and type in the command help, this will list all of the CLI commands.
User friendly CLI
CLIs tend to be for more experience users and developers. They are not always user friendly.
The CLI in Betaflight is actually very user friendly. Some of the common pitfalls with CLIs have been dealt with.
For example, you do not need to pay attention to the case. The Betaflight CLI is not case sensitive. For example…
set vtx_band = 1
is the same as…
SET VTX_BAND = 1
which is also the same as…
SeT VTx_BaNd = 0
It also does not matter about space. You can put as much space as you like or no space at all.
set vtx_band = 1
is the same as…
set vtx_band=1
which is also the same as…
set vtx_band = 1
Using the CLI to fetch information
Some commands such as the help command are just a single word and generally they simply return information.
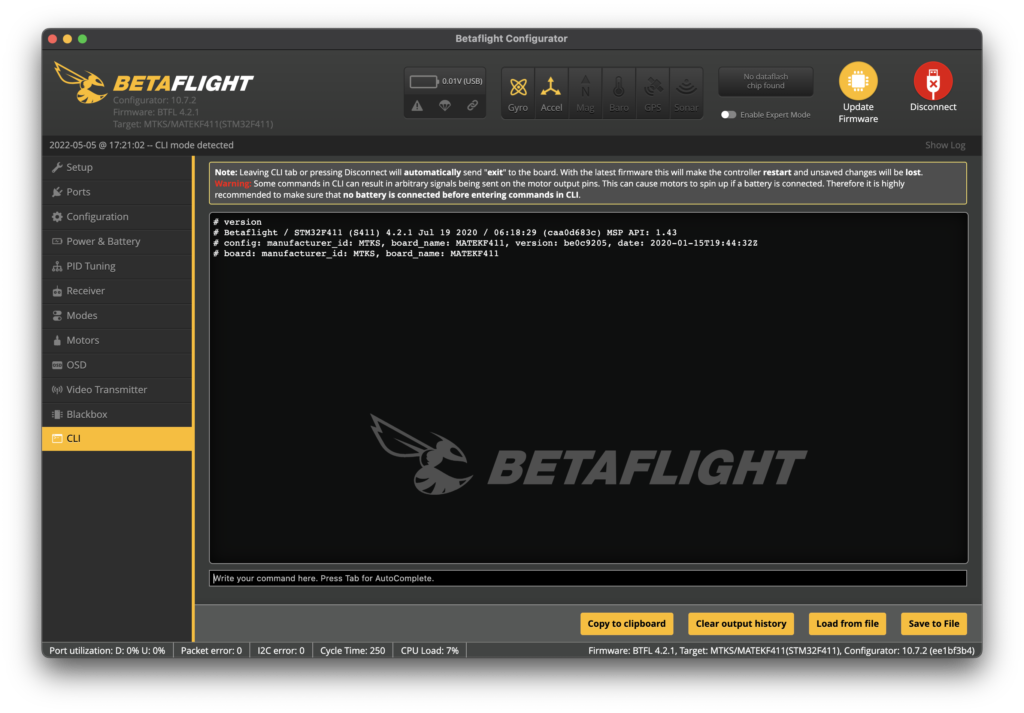
Another example is the version command. This returns details about the target MCU (the chip that Betaflight is running on), target flight controller board and software version.
Using the CLI to change parameters
Then there are the commands that can actually make changes. Be careful here, you can screw stuff up.
You can use the CLI to change Betaflight parameters. You can change parameters that are accessible by the GUI and also those that are not:
In general the meat and potatoes commands in the CLI are in the following format:
[command] [parameter] = new value
For example we can change the parameter vtx_band with the set command:
set vtx_band = 1
The CLI returns the following to inform us that the change has been successful:
vtx_band set to 1
Once you have finished making changes, it is necessary to execute the save command:
save
This will save all of the changes that you made in the CLI and reboot the flight controller with the new settings.
Note that you will be ejected from the CLI as Betaflight disconnects. You can always go back that after you reconnect.
Using the CLI to show all or some Betaflight settings
There are two useful commands in Betaflight that can be used to fetch all of the current settings.
The dump command will list all Betaflight settings. As you can imagine this list is quite long!
It can be more useful to use the diff command. This command lists all settings that are different from the default setting, and this list will be much shorter.
You can also use the get command to fetch individual parameter values.
Just type get [parameter] and the value will be returned.
Conclusion
In this article we have learned something about the historical roots of Betaflight and why the CLI came to be.
We have seen that it is not so difficult to use the CLI and that as far as CLIs go, it really is quite user friendly.
For further information, you can check out Betaflight on GitHub.
I hope you have enjoyed reading and that this article has helped you learn something.
Please feel free to drop me an email if you think there is something that would be good to add!