MEPS, a new player in the drone parts industry, has made quite an impression with their range of FPV components and has seemingly appeared from nowhere.
In this article we will explore the latest MEPS products and answer the question, are these products technically any good and should you buy them?
MEPS have provided me with a set of 2207 motors in blue, the 30×30 analog variant of their F7-based flight controller and their 20×20 ESC.
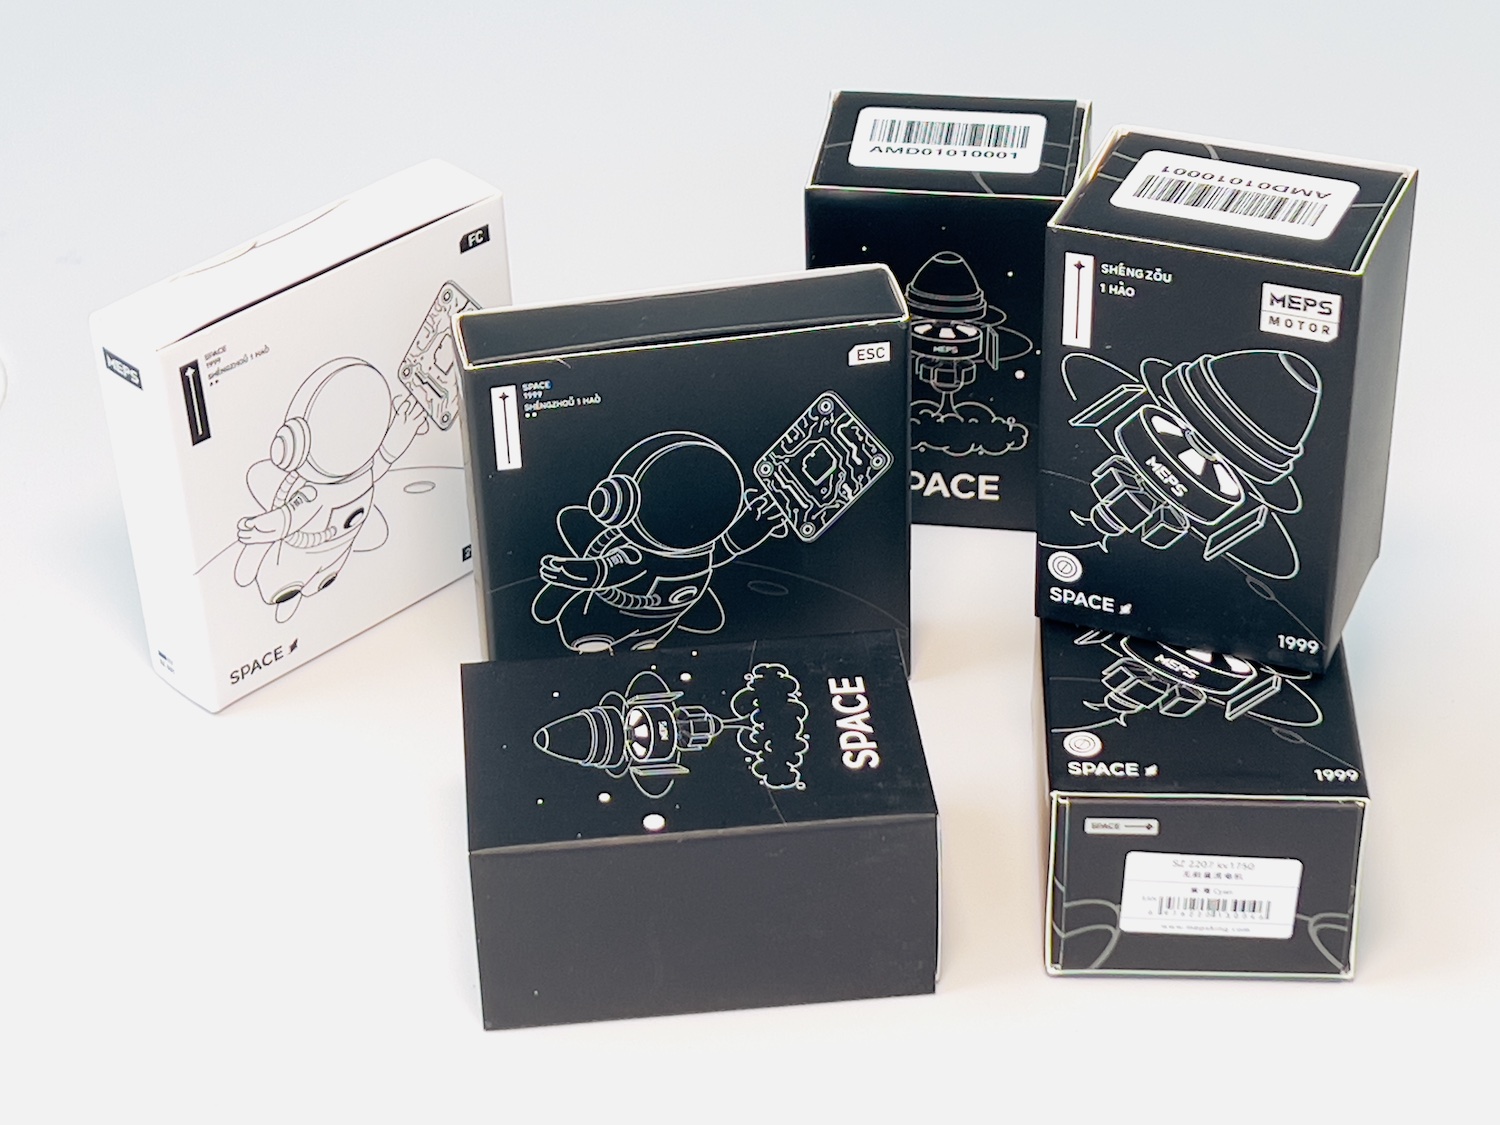
In this article we will be taking a look at all of these components and in order to review the performance, I have built a quad using everything supplied.
Behold! The MEPS quad!
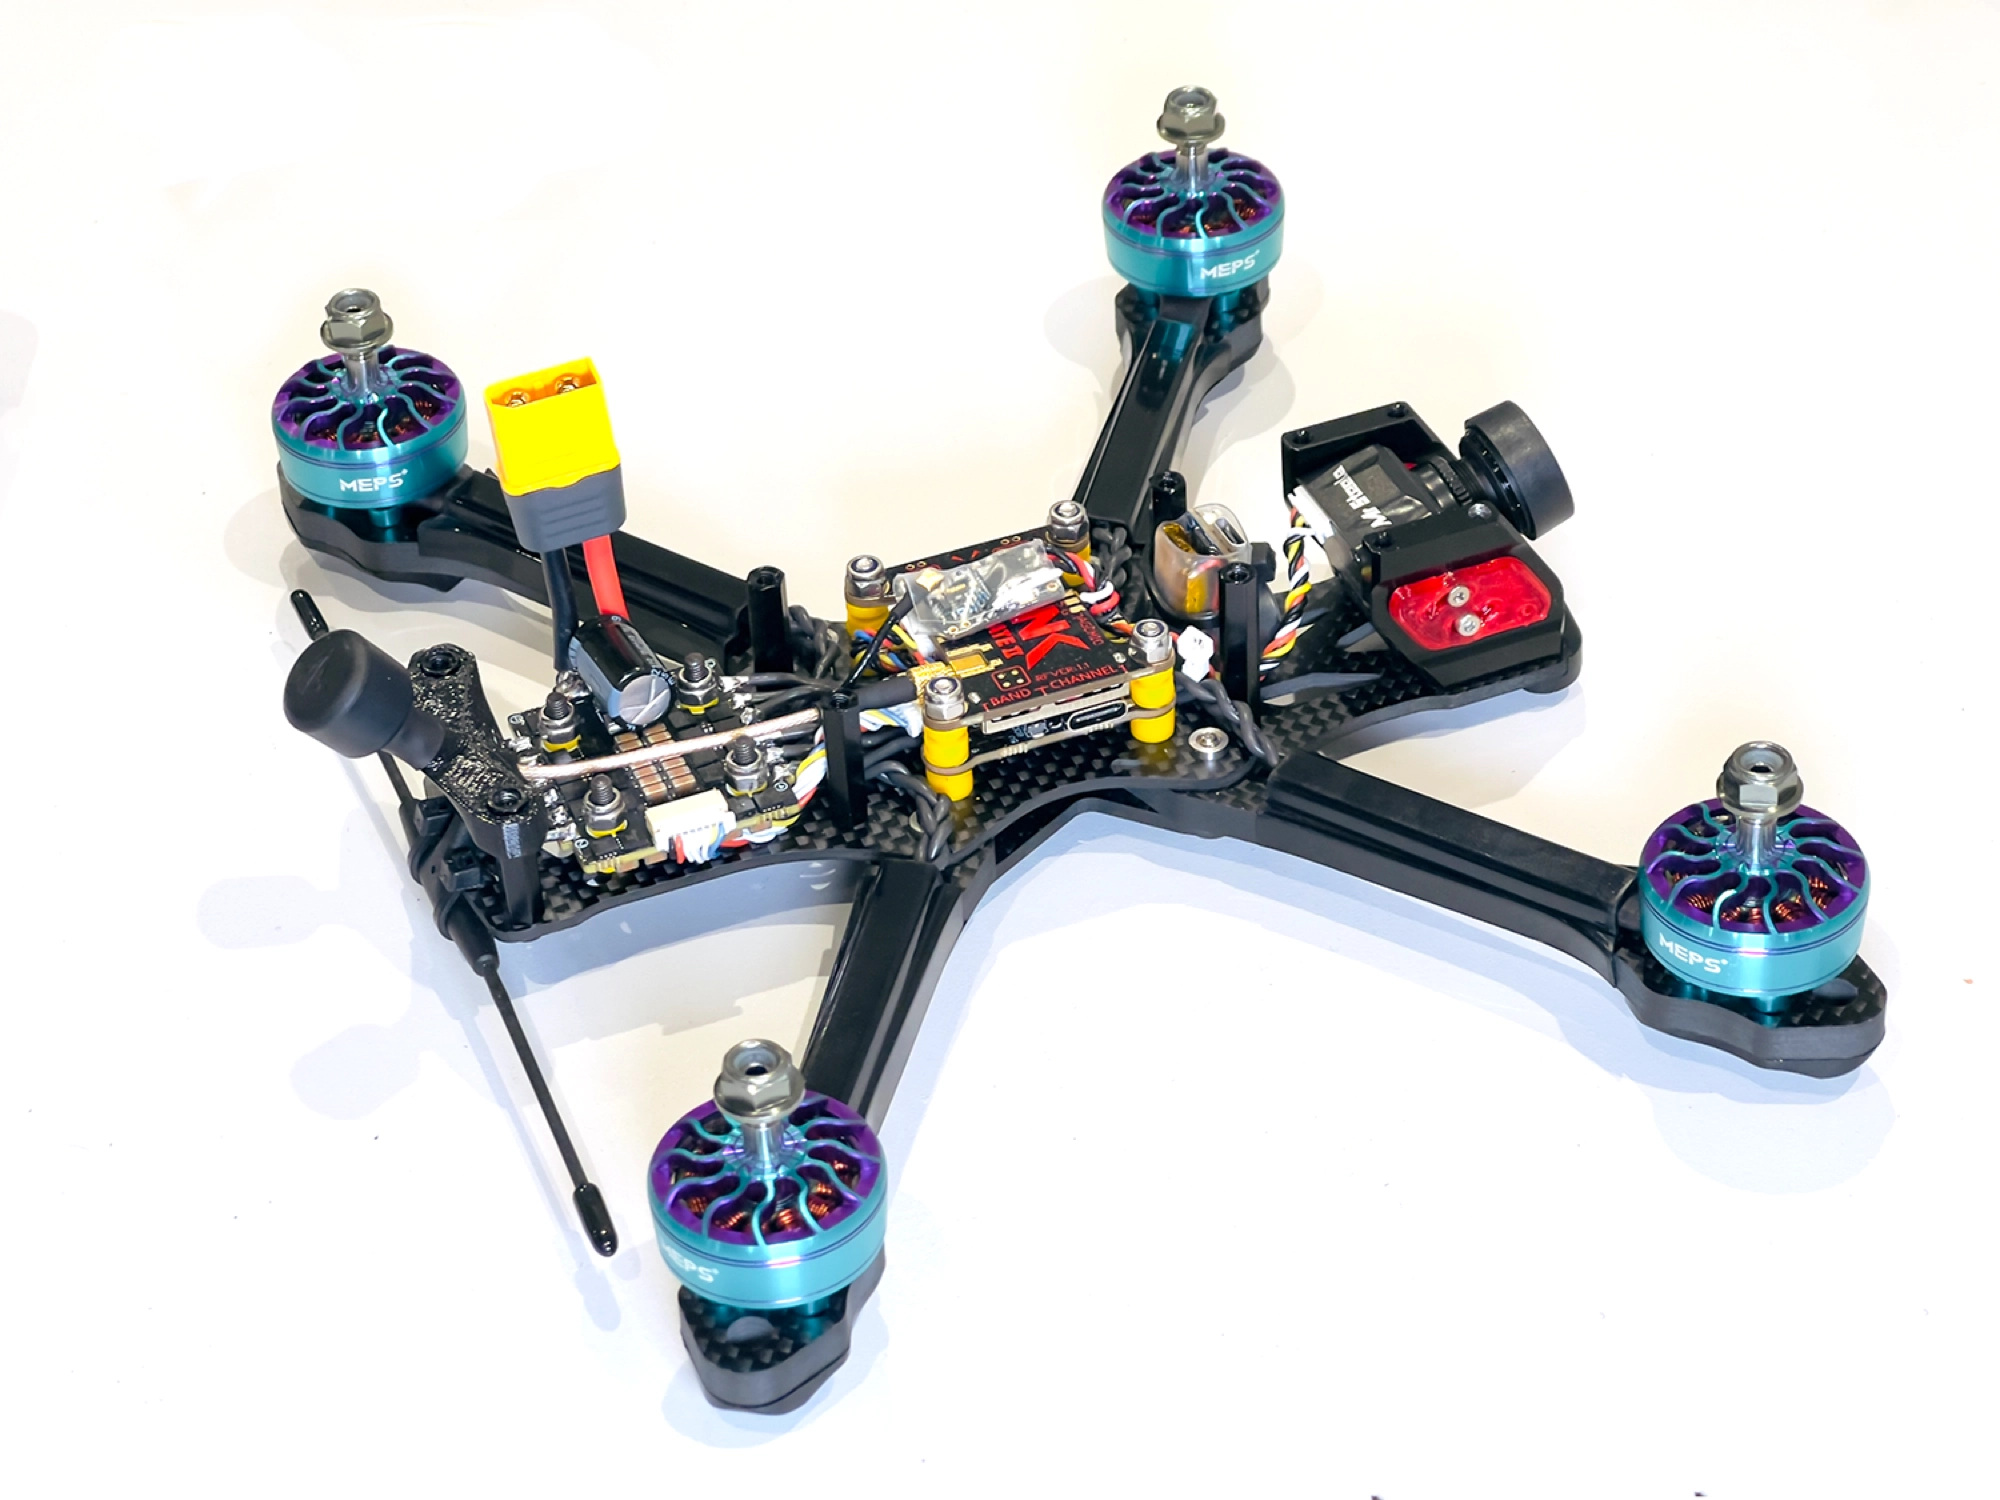
Those of you who have a little experience already will notice that the build is somewhat unorthodox, with the ESC towards the back.
Strangely, MEPS sent me their 30×30 flight controller and their 20×20 ESC, meaning that I was unable to build a flight stack with both components, at least in the traditional sense.
This meant I had to adopt a slightly unusual build, as I wanted to accomodate all of the MEPS products into one quad.
I opted to use an ImpulseRC Apex frame as I had been wanting to build one for a while and luckily, this frame had 20×20 compatible holes at the rear, which I decided to use for mounting the ESC.
Despite this quirk of the build, overall I am very happy with how this quad turned out! More on the quad later.
Disclosure
If you have been following the FPV scene and Googling for MEPS reviews, you will have almost certainly come across some heated discussion surrounding MEPS as company.
To ensure you’re up to date regarding the controversy, some content creators have been presented with a contract from MEPS that imposes restrictions on the extent of critique they can incorporate into their reviews.
To elaborate, the initial contract reportedly included clauses that restricted reviewers from sharing anything but positive feedback, alongside several other unfavorable terms.
The contract I received notably lacked such restrictive clauses, evidently revised in response to the controversy.
I would therefore like to make the following disclosure:
I want to be transparent about the fact that I am reviewing MEPS products as part of a contractual arrangement. However, it’s essential to emphasize that the contract I’ve signed does not include any provisions that limit my freedom to express my genuine opinions.
In addition, I also requested some further changes to the terms within the contract that was supplied to me prior to signing it (primarily related to the timescale for the deliverables). MEPS gladly obliged and adjusted the contract as per my requests.
In general my own experience of dealing with MEPS so far has been a pleasant one. They have been cooperative and flexible with regards to my requests.
Ultimately your buying decision should be based upon your own assessment of the company, using the information here to guide you with regards to the performance and technical specification of the products.
Where to Buy MEPS Products
In addition to the aforementioned disclosure, I would also like to point out that I have opted not to include any affiliate links in this review, in order to further demonstrate that the information in this review is unbiased.
At the time of writing, you can purchase MEPS products from the official MEPS website.
The products reviewed in this article can be found here:
The links above are for your convenience only and are not affiliate links. The affiliate link disclosure at the beginning of this article is a blanket disclosure, which is present on all articles on this website.
MEPS Flight Controller
At the time of writing, MEPS are offering three different flight controllers:
- SZ F7 Flight Controller – a full-sized 30×30 flight controller for analog builds based on the STM32F722 microcontroller.
- SZ F7 HD Flight Controller – a full-sized 30×30 flight controller for digital builds based on the STM32F722 microcontroller.
- SZ Mini F7 HD&Analog Flight Controller – a 20×20 flight controller based on STM32F722 microcontroller.
As you can see the 30×30 variant comes in two flavours. The analog version features the ubiquitous AT7456E chip used for generating the OSD overlay, where the digital version features the interface port for digital video systems.
Note that at the time of writing, the digital variant lists a “AT7456E/HD” chip in the specification, which seems incorrect as the chip is clearly not present in the pictures, nor is it really necessary for a digital build.
The sensible thing to do when designing a flight controller would be to replace the OSD chip for the voltage regulator necessary for powering a digital video system.
Interestingly the SZ Mini seems to have both the capability to interface to digital video systems, whilst also featuring the AT7456E in order to provide an OSD for analog builds.
MEPS Flight Controller Specification
Let’s take a closer look at the specification for each of the flight controllers:
| Features | 20×20 | 30×30 Analog | 30×30 Digital |
|---|---|---|---|
| Mounting Hole Size | 20x20mm | 30.5×30.5mm | 30.5×30.5mm |
| Input Voltage | 3S-6S | 3S-6S | 3S-6S |
| Processor | STM32F722 | STM32F722 | STM32F722 |
| Gyro | BMI270 | BMI270 | BMI270 |
| BEC | 5V 2A / 10V 2A | 5V 2A | 5V 2A / 10V 2A |
| OSD | AT7456E/HD | AT7456E | AT7456E/HD ? |
| Black Box | 16MB | 16MB | 16MB |
| Compatible with DJI HD | No | No | Yes (plug-and-play) |
This information is taken directly from the official MEPS website. I have marked OSD under the 30×30 digital variant with ‘?’ due to the possible mistake in the specification.
It is clear from the specification that the three flight controller variants are almost identical. The only variation aside from the mounting hole dimensions is whether or not the variant is targeting analog, digital or both types of build.
I must admit at this stage I was curious as to why MEPS had opted to seemingly make their 20×20 the flagship model!
Usually I would expect/guess that a 30×30 flight controller variant would have more features and thus be slightly more expensive.
In the case of MEPS, they have seemingly made the 20×20 variant more feature-rich and given it a slightly higher price, albeit by just $2 at the time of writing.
Unboxing the MEPS SZ F7
MEPS sent me the analog version of their 30×30 SZ F7 flight controller, as per my request. What can I say, I am still oldskool and despite fully intending to switch to digital, I am still using my original Dominator HD V1s! 😅
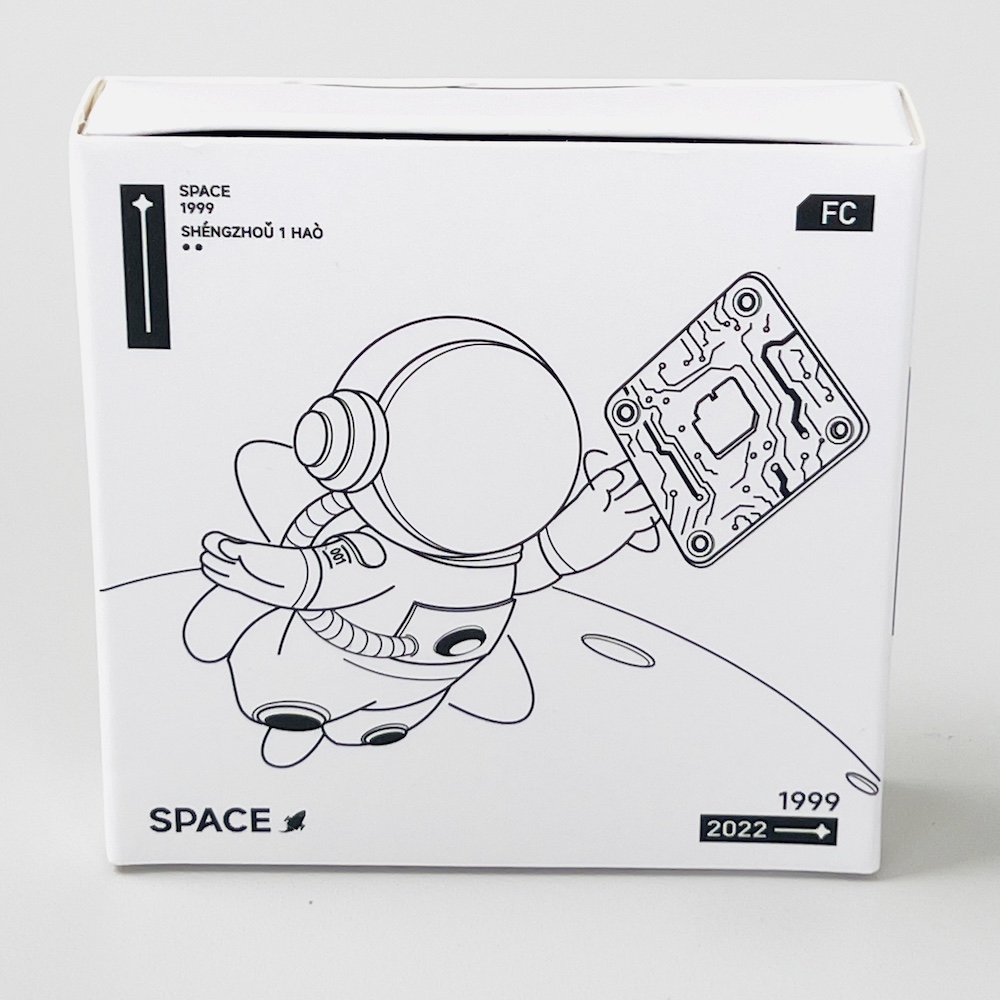
The flight controller was fairly well packed, supplied securely in a foam insert. The insert was encapsulated within a branded cardboard box, which was sealed with a plastic wrap.
The flight controller variant was supplied in a white box with black marking, in contrast to the ESC that was supplied in a black box with white markings.
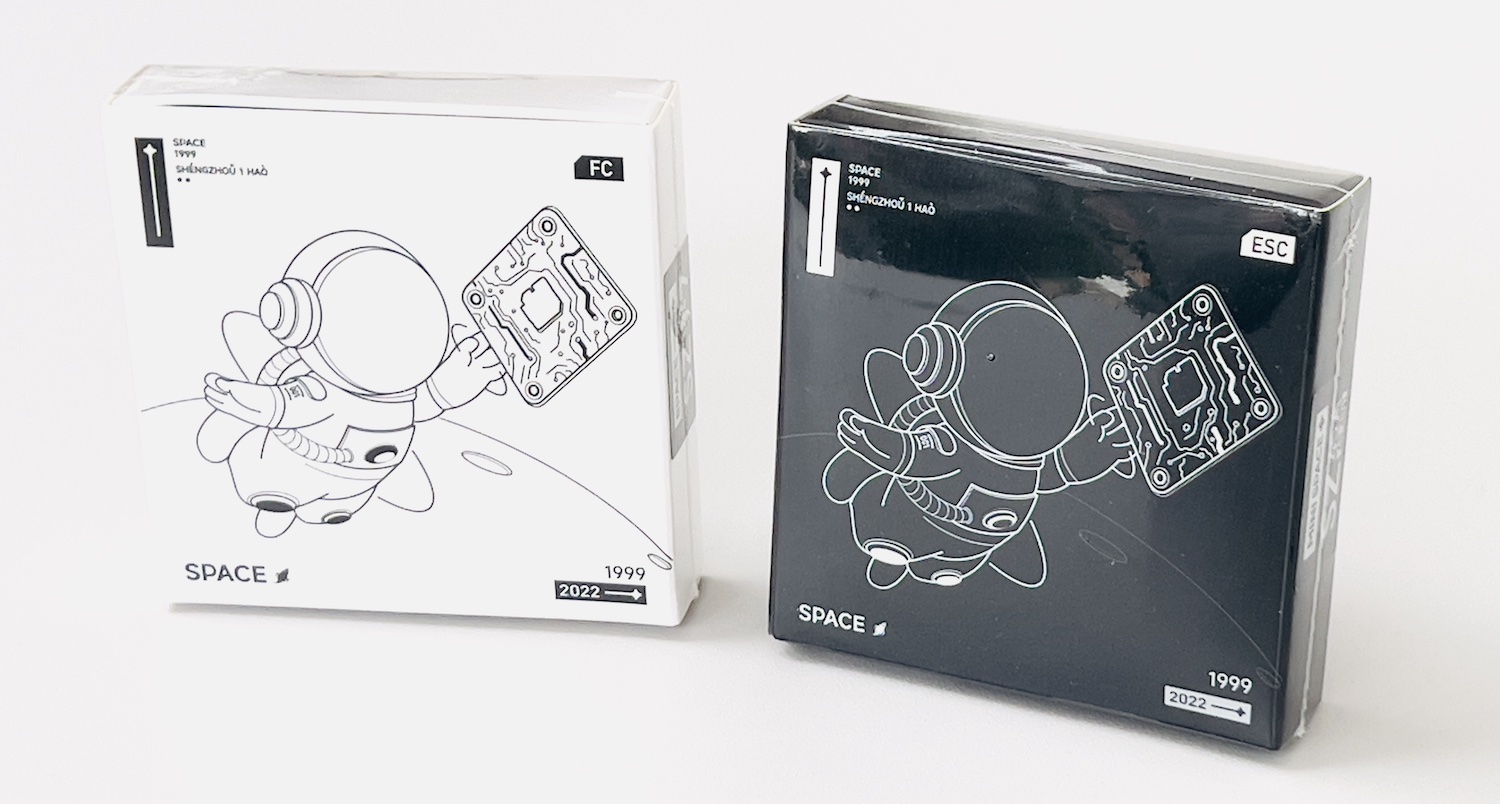
The packaging was perhaps not quite as high quality as a premium offering such as the SpeedyBee V3, however it was certainly good enough and the branding is pretty cool too! (I am a BIG space fan)
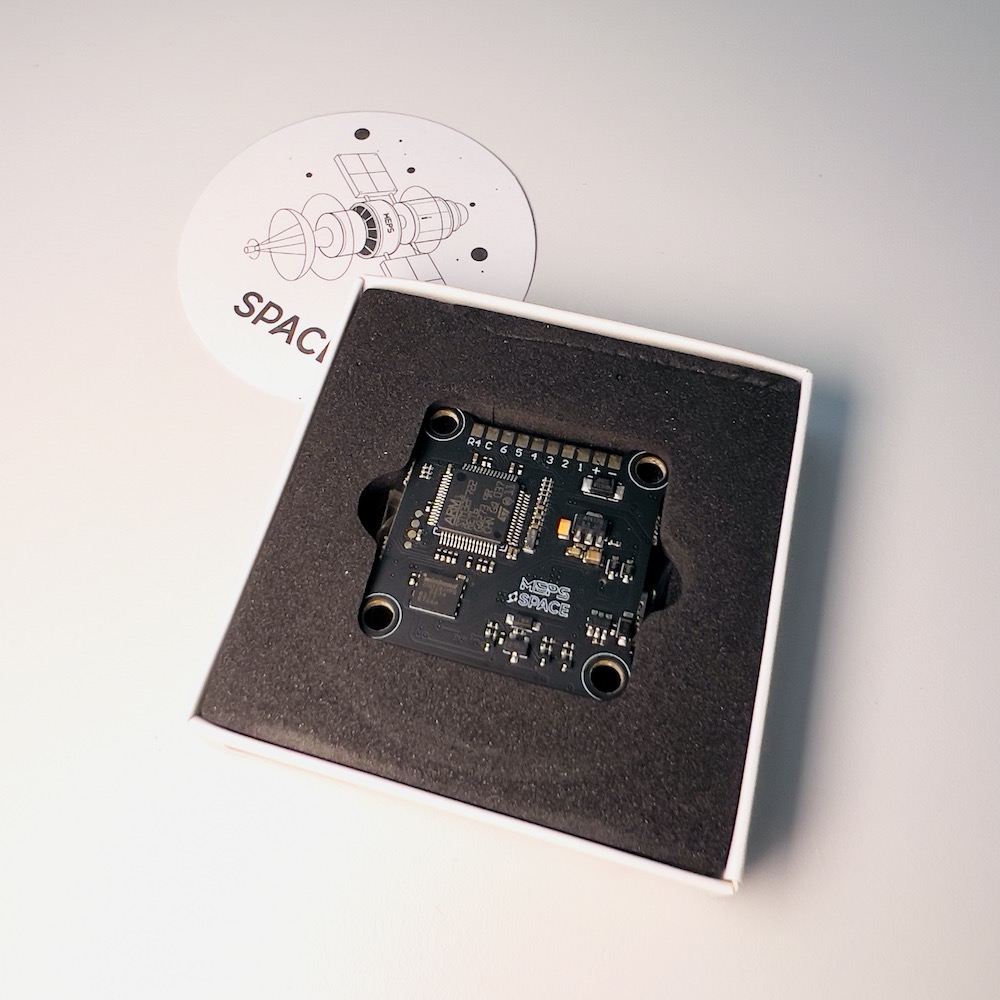
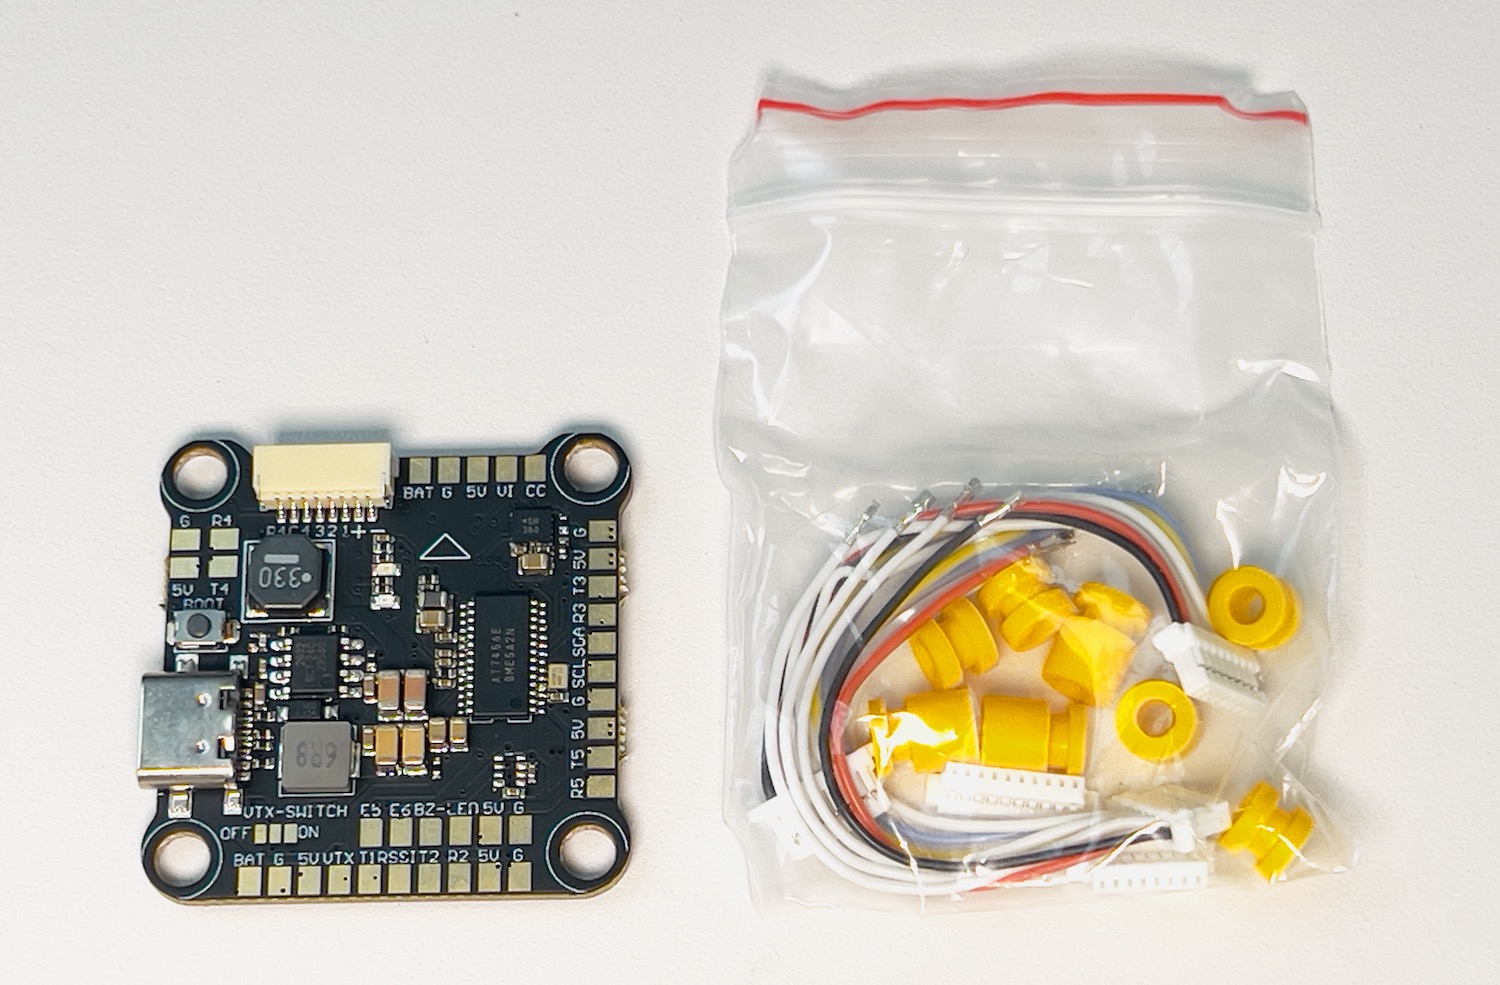
Removing the foam insert containing the flight controller revealed a small plastic bag containing the necessary accessories for integrating the flight controller into the build.
The flight controller itself seems like a solid build, solder joints look good and PCB quality looks as you would expect.
MEPS SZ F7 Notable Features?
To be honest it is really difficult to set apart the variety of flight controllers available today by anything other than the features that they offer.
I have builds running Betaflight, INAV and Kiss, all with completely different flight controllers, and my experience building and operating them has been almost the same, aside from some differing features.
The SZ F7 gave me no trouble during the build. I found the solder pads were a nice size to work with and the layout was pretty sensible.
The analog version of the SZ F7 does introduce the ability to assign a transmitter switch the function of switching the VTx power regulator on and off.
This feature is not unique to the SZ F7, however it is the first time I have used with this function and it is really useful!
I ended up configuring a 3-way switch so that the first position completely powered down the VTx, the second position powered up the VTx but set it to pit mode (reduced power output) and the third position switched to full power.
This is possible by combining a USER function, provided by the S7, and SmartAudio control of the VTx, which in this case is a Rush Tank Ultimate 2.
I can also say that this feature was very easy to set up in Betaflight and worked first time! Kudos to MEPS for getting this right!
In conclusion, it is hard for any flight controller to stand out in a sea of great options and the SZ F7 probably does a better job at blending in with the other options, rather than really standing out.
With that said, if you are looking for seemingly reliable VTx power switching as an additional feature, the SZ F7 might be a solid option for you.
If you are planning on getting MEPS motors, it might also be worth considering the SZ F7 as you can order it all together from their store.
For more insight into the installation of the flight controller, be sure to check out the MEPS quad build towards the end of this article.
MEPS 4-in-1 Electronic Speed Controller (ESC)
MEPS sent me the 20×20 variant of their ESC, the Mini SZ45A, which at the time of writing, seems to be their only offering despite their marketing material showing a 30×30 product too.
This proved a little frustrating, as I needed to find a workaround in order to use it with the 30×30 flight controller that they provided.
However I did find a suitable layout that ended up working well, more on that later.
MEPS Mini SZ45A Specification
Let’s take a closer look at the specification for the SZ45A 4-in-1 ESC:
| Features | 4-in-1 ESC |
|---|---|
| Mounting Hole Size | 20x20mm mounting holes |
| Features | – Onsemi High-end MOSFETs |
| – Low junction temperature | |
| – Capable of carrying more current | |
| – Support telemetry data return | |
| Input Voltage | 3S-6S |
| Continuous Current | 45A |
| Peak Current | 55A |
| Firmware | BLHeli 32 |
| Package Included | 1 Pc SZ45A FPV ESC |
The specification mentions that Onsemi High-end MOSFETs are used. I think this is probably a bit too much ‘over-hype’ for a relatively common brand of electronics component, although still a very reputable manufacturer of semiconductor.
To quote a ‘low junction temperature’ is also marketing jargon that really makes no sense when taken out of context.
In theory you could make the junction temperature of the MOSFETs almost nothing by using a massive heatsink and a fan, but would you really want all of that extra weight on your quad?
Arguably it would be better to optimise the junction temperature to be as high as would be acceptable, whilst minimizing the amount of weight and design expense necessary for cooling the junction.
Ok, I get what they are trying to say. They want to say that the MOSFETs are adequately cooled and are not likely to burn out.
Really though, the SZ45A needs to pass some real world tests in order to determine just how reliable it is.
Unboxing the MEPS SZ45A
The ESC was supplied in a black box with white marking, in contrast to the flight controller that was supplied in a white box with black markings.

The ESC was fairly well packed, supplied securely in a foam insert. The insert was encapsulated within a branded cardboard box, which was sealed with a plastic wrap.
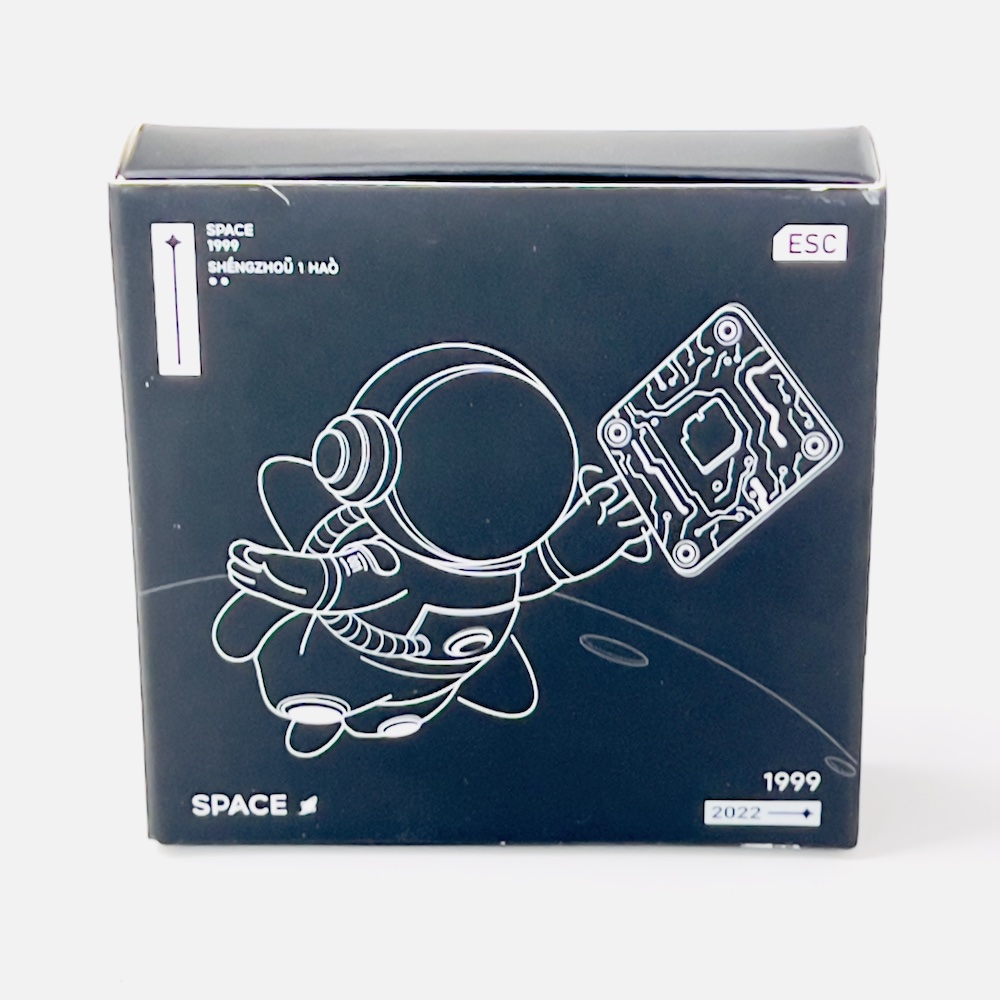
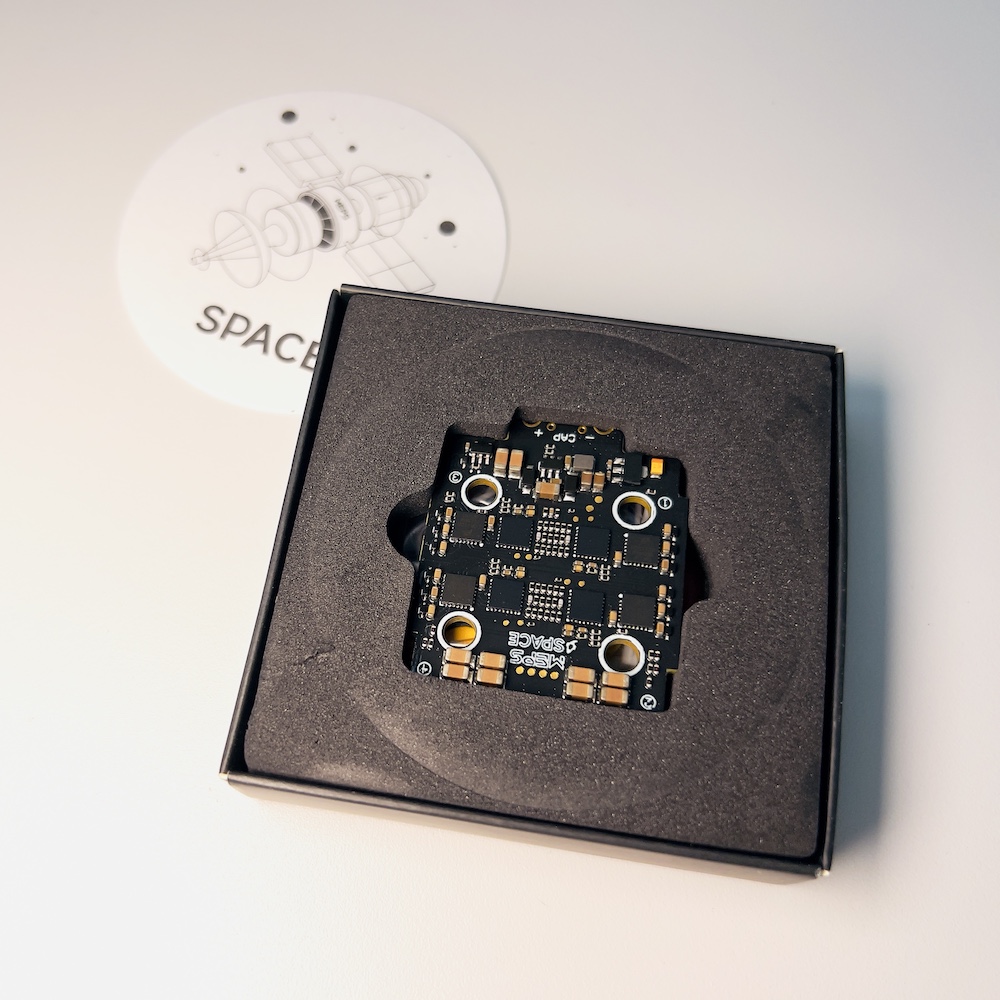
Upon removing the foam insert and the ESC, a small plastic bag can be found containing everything that you need for the build.
Between the ESC and the flight controller, I actually found myself with quite a surplus of accessory parts!
I tend to be quite adverse to wastage, however on this occasion I was grateful to have everything that I needed, without having to order additional parts.
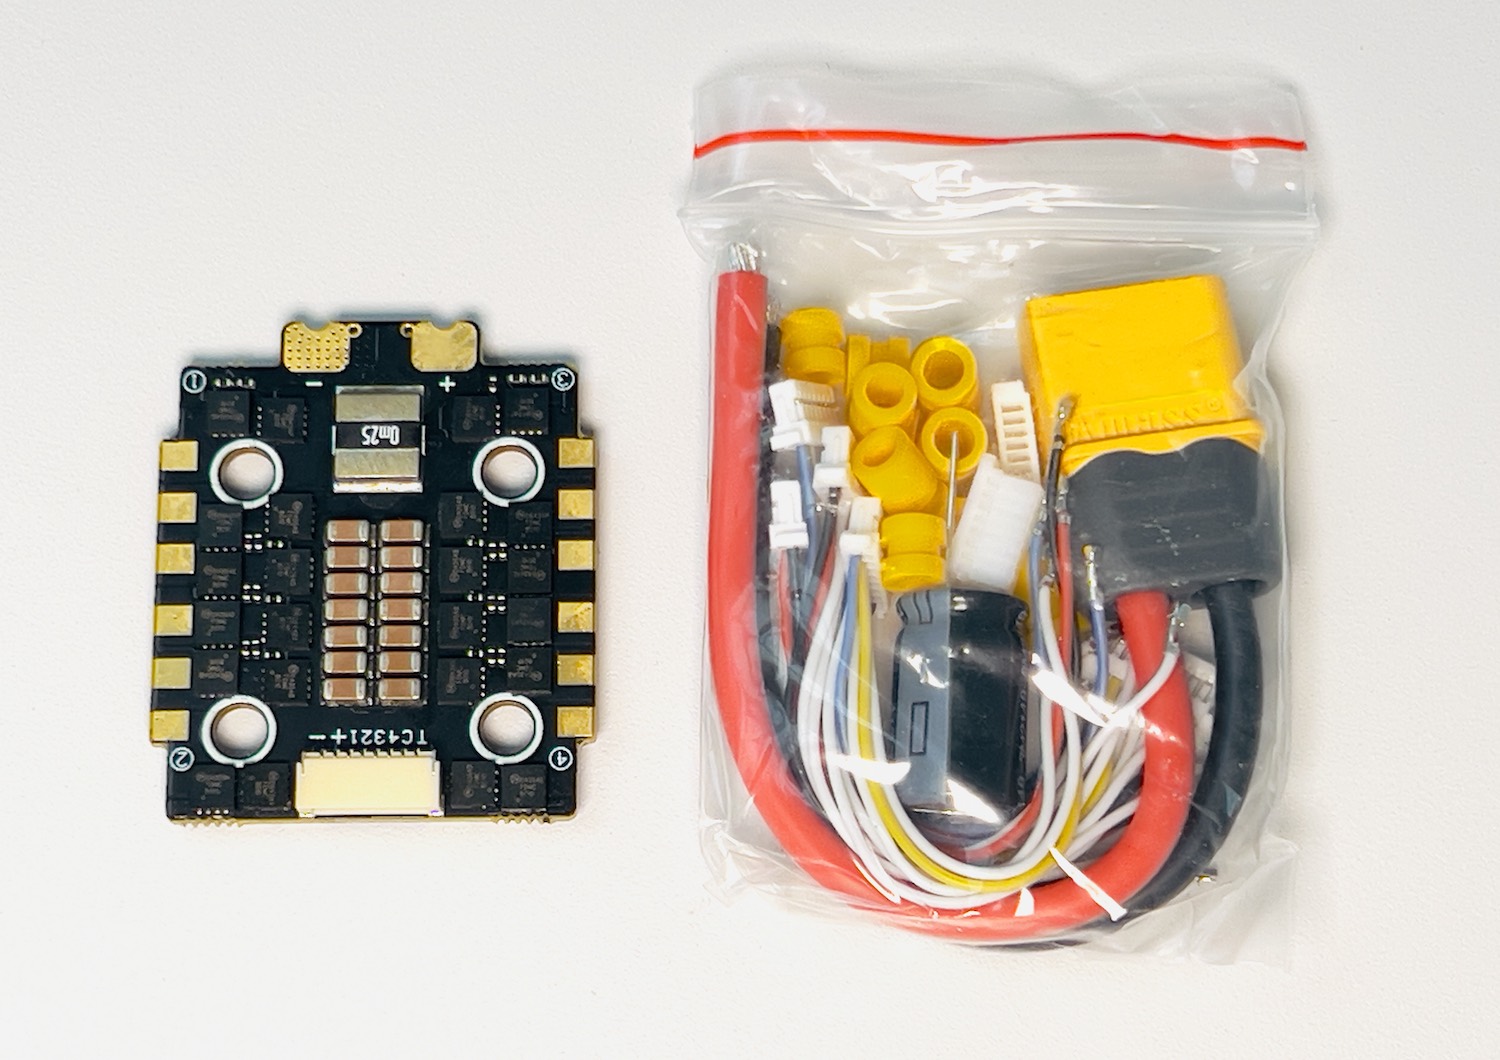
The MEPS Mini SZ45A overall seems like a solid build, similar to other products manufactured in the far east.
Overall I found the Mini SZ45A easy to install within the quad. Soldering the power lead and capacitor proved to be very easy and I had no trouble installing the “gummies” for soft mounting so hole sizes seemed good.
One thing I will point out is that the solder pads for the power lead proved very easy to tin and solder compared with other ESCs, which is in fact a double edged sword.
On one hand, easier soldering is an obvious benefit for those who don’t have a high-end soldering station and the skills to use it.
However on the other hand, the reason that the solder pad proved easier to solder is likely due to there being less copper used in the PCB manufacturing process.
Usually the solder pads for the main power leads on the ESC prove to be the most challenging. This is due to the sheer amount of copper in the PCB, which is required in order to handle the high currents drawn from the battery.
This means that more heating is required in order to get the solder pad up to a high enough temperature in order to interact with the molten solder and form a good solder joint.
I cannot be entirely sure on the construction without performing some destructive testing, but a decade of experience working in PCB fabrication facilities (the ‘day job’) tells me that some “cost saving” has been employed in this design, with regards to copper thickness.
I would speculate that thinner copper has been used in the PCB design in order to reduce manufacturing costs.
This may or may not result in a finished product that has a lesser amount of current carrying capacity than what would be optimal due to a higher amount of resistance.
Don’t get me wrong, there is nothing wrong with optimising cost, especially if it yields a cheaper product for the end user, so long as the end product is fit for purpose.
With all of that said, in practice the Mini SZ45A seemingly has no trouble handling the current draw when paired with the MEPS 2207 motors, bearing in mind that my flying skills are nothing close to Mr Steel level!
After several spirited freestyle flights in the 90°F Cypriot sun, the Mini SZ45A did not seem too stressed.
Therefore what we have here is potentially an ESC that is easier for a beginner builder to solder, whilst still performing well enough to throw a freestyle quad around in the middle of the summer heat.
In conclusion, one might argue that this ESC might not be the best choice for a top spec racing quad that pulls extreme current.
However when paired with the MEPS 2207 motors, it does perform well without any problems in a simple freestyle build, making it a good contender for a first time builder and casual FPV enthusiast.
For more information regarding the installation of the ESC, be sure to check out the MEPS quad build towards the end of this article.
MEPS Motors
MEPS sent me four of the 1750KV variant blue and purple 2207 racing motors to test, which I opted to pair up with their Mini SZ45A ESC.
The motors are offered in a variety of colors and I was a little disappointed that I couldn’t get my hands on the dark grey and gold variant as this would have totally matched the NoirFPV branding!
However, some people are going to love the the design of this motor. If you like to brighten up your quad with fluorescent 3D prints, the design of these motors will certainly be appealing to you!
If I was going to go for flamboyant colors, personally I would go for the fluorescent green variant. A very nice looking motor!
Despite my personal reservations with the color scheme, I am pleased with how these motors both look and perform on the quad considering the current price point of $12.99.
Unboxing the MEPS 2207 Motors
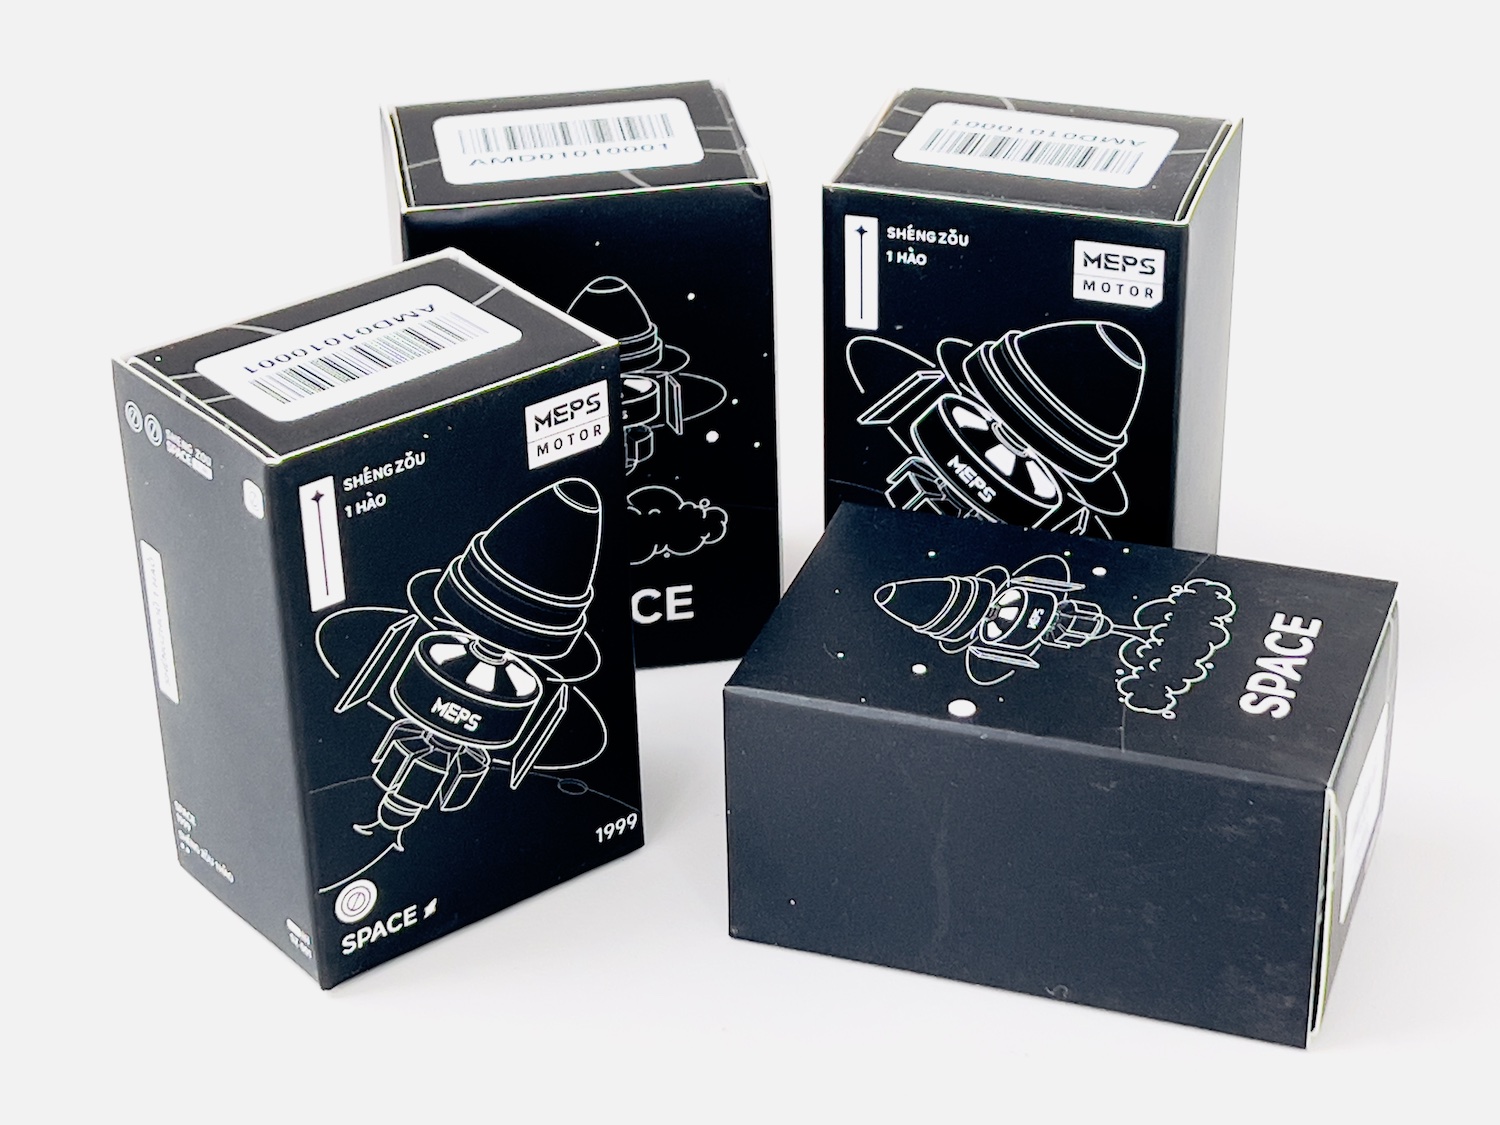
The MEPS 2207 motors were supplied in branded cardboard packaging, much the same as the flight controller and the ESC.
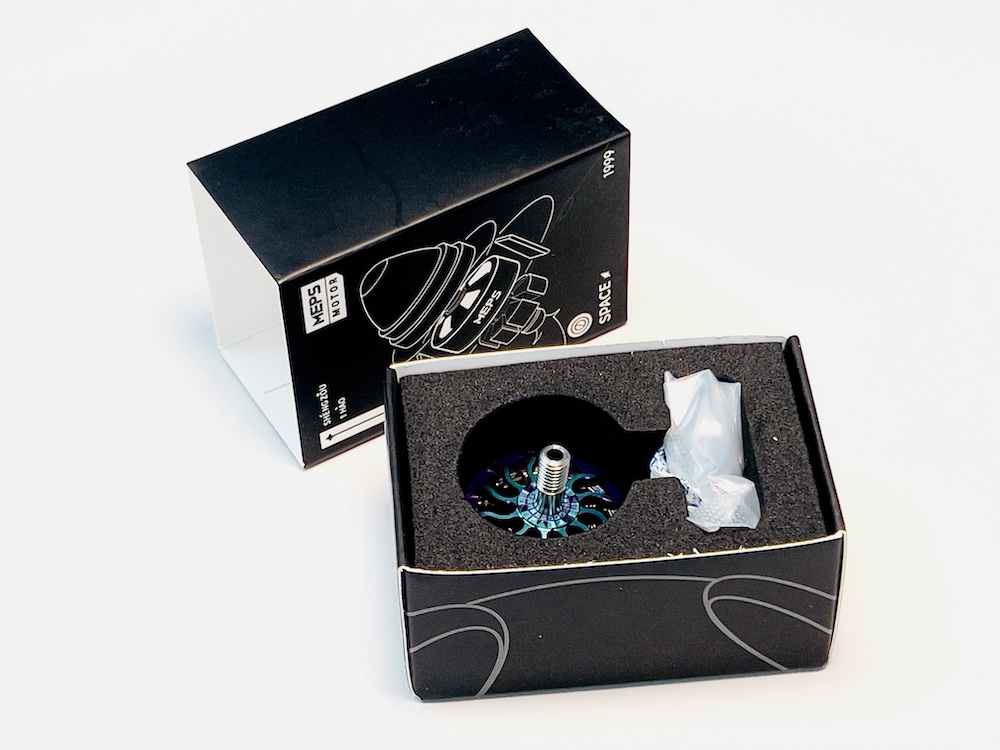
Opening the box reveals a foam insert containing the motor and a plastic bag containing mounting screws and the prop nut.
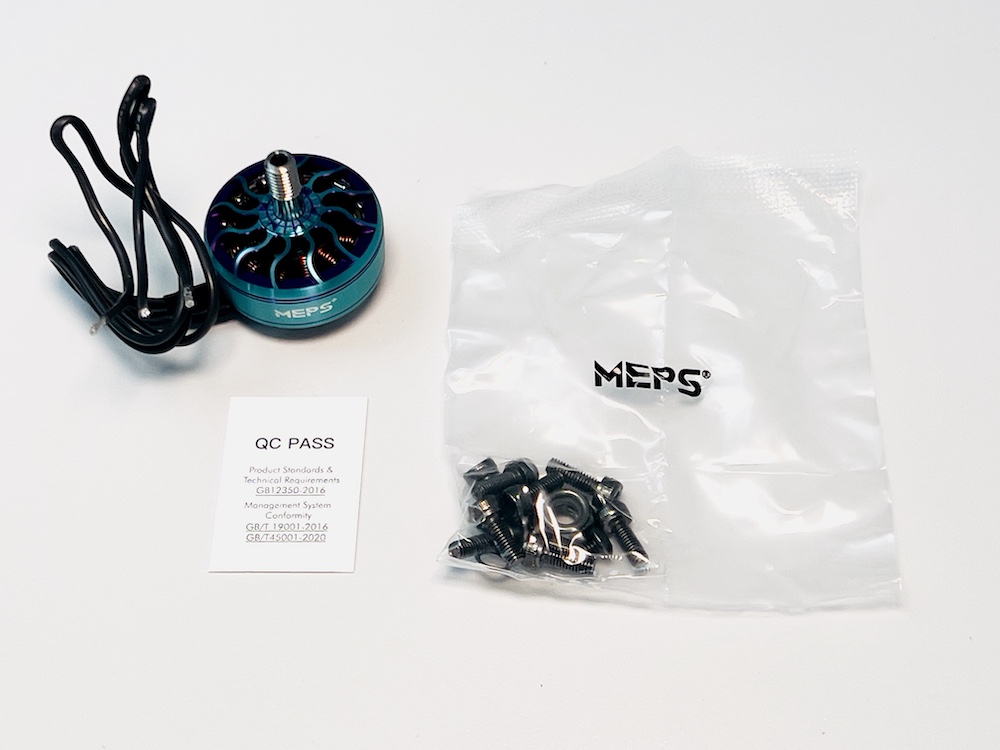
The motors themselves seem like a good quality build, much like you would expect from a decent FPV motor. I was pleased to see that the motor bell is secured in place with a 3mm bell screw.
The motor bell looks like it is a unibell design as stated in the marketing material and the rounded top looks somewhat resistant to denting.
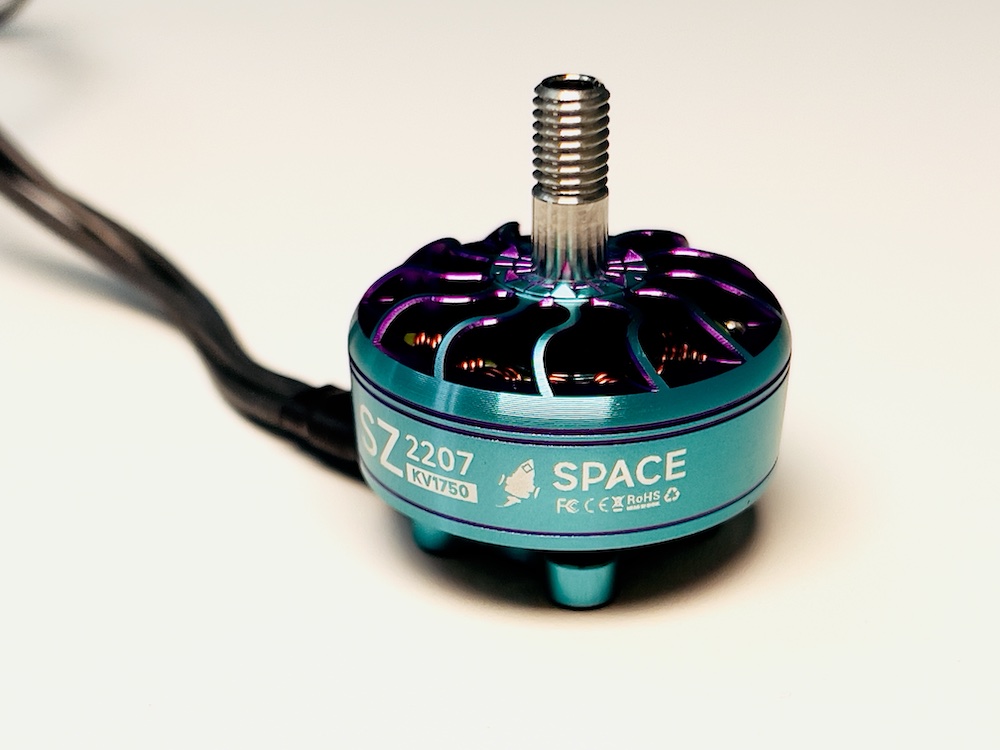
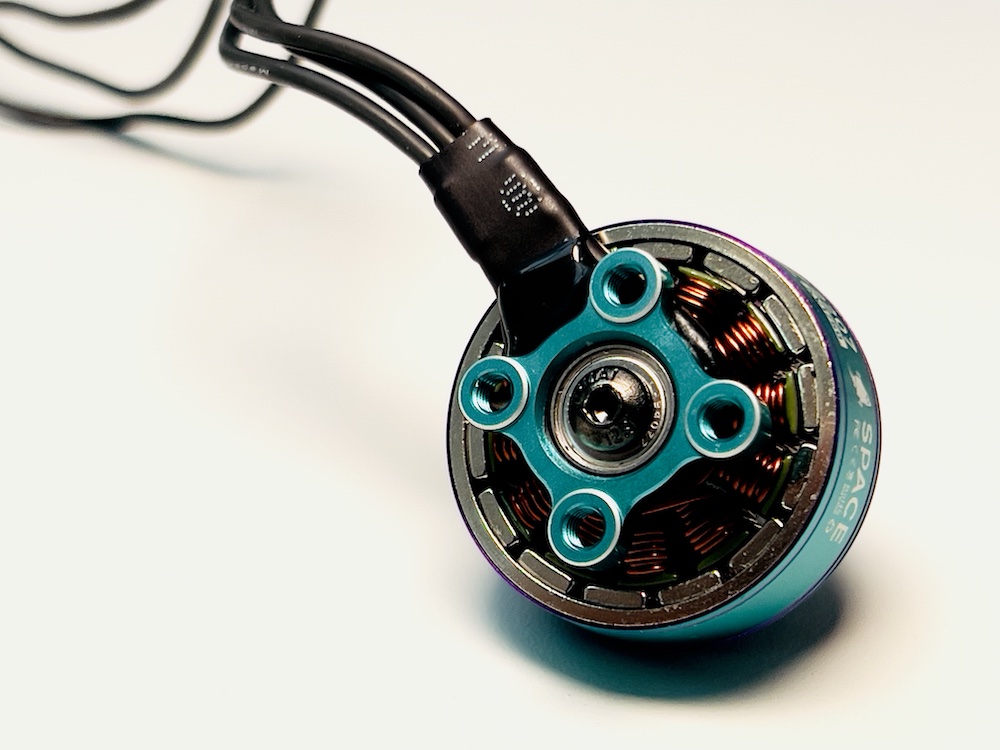
On completing the unboxing I cannot say that there is anything particularly that stands out these motors, neither in a positive or negative respect. They are very much like other similar motors at this price point.
Since the initial release, MEPS have reduced the price of these motors to $12.99, with further discount for buying a pack of 5.
Had they kept them at the original price, I might have been suggesting that you go for a more well-known premium alternative! However the current price makes them a possible option for those who fall in love with the design.
MEPS 2207 Motor Performance
Before we strap these motors to a quad and take them for a real-world test, let’s take a look at how they perform on the bench and compare with other options.
In order to answer this question, I am going to refer to the brilliant work of Chris Rosser.
Chris has painstakingly bench tested a whole bunch of FPV motors in order to see how they compare, including the MEPS 2207s.
I would highly recommend watching his video which showcases the results, noting that he provides this information under no contractual obligations with MEPS and therefore you can be sure that his findings are completely unbiased.
I had actually flown the MEPS quad on several tests flights prior to seeing his video and as a result, I found his results very interesting as the correlated with my real world testing.
My initial first impression of the MEPS 2207s from flight testing was that they were seemingly achieving a very good flight time.
It was therefore very interesting to see that Chris’s bench testing also suggested that these motors had high levels of efficiency.
I can certainly confirm that Chris’s findings seem correct! The MEPS 2207 motors could be a good choice for an efficient build!
This really helps shape my final conclusion on who these motors might be best suited to. Sadly, MEPS are still billing these motors are “racing” motors. A fail for their marketing team.
These motors would be better suited to long range / efficiency builds, rather than for racing quads.
I am even curious about how they might stack up against the T-Motor F40’s on my Source V long range build. Perhaps test for another day.
The MEPS Quad Build
With all of the components unboxed and an initial opinion discussed, it is finally time to build a quad and see how these parts perform!
I have been wanting to build an ImpulseRC Apex for a while, so I opted to get the Evo frame for this build. I have a whole bunch of opinions to discuss regarding this frame, but i’ll save that for another article!
I sourced most of the other necessary components from my spare parts box, making this build very cheap!
Building a MEPS quad
As previously discussed, MEPS sent me a 20×20 ESC and 30×30 flight controller, so I had to adopt a slightly unorthodox build.
The Apex frame has 20×20 compatible mounts at the back of the frame, so I decided to mount the ESC towards the rear and the flight controller in the usual position.
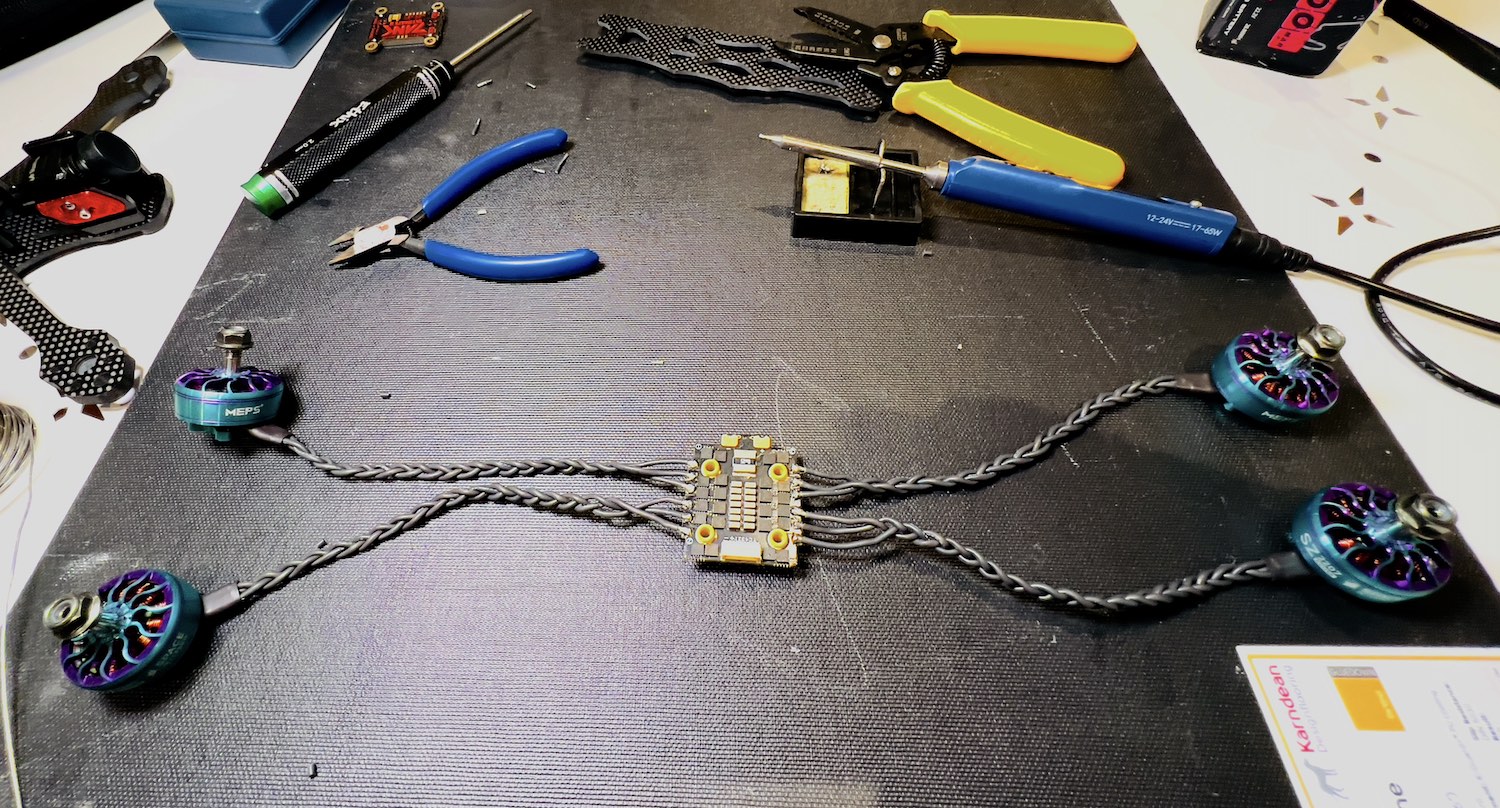
The following picture shows the ESC position with the main power solder pads pointing to the rear. I actually ended up rotating the ESC 90° so that I could make the build a bit neater and optimize the placement of the XT60.
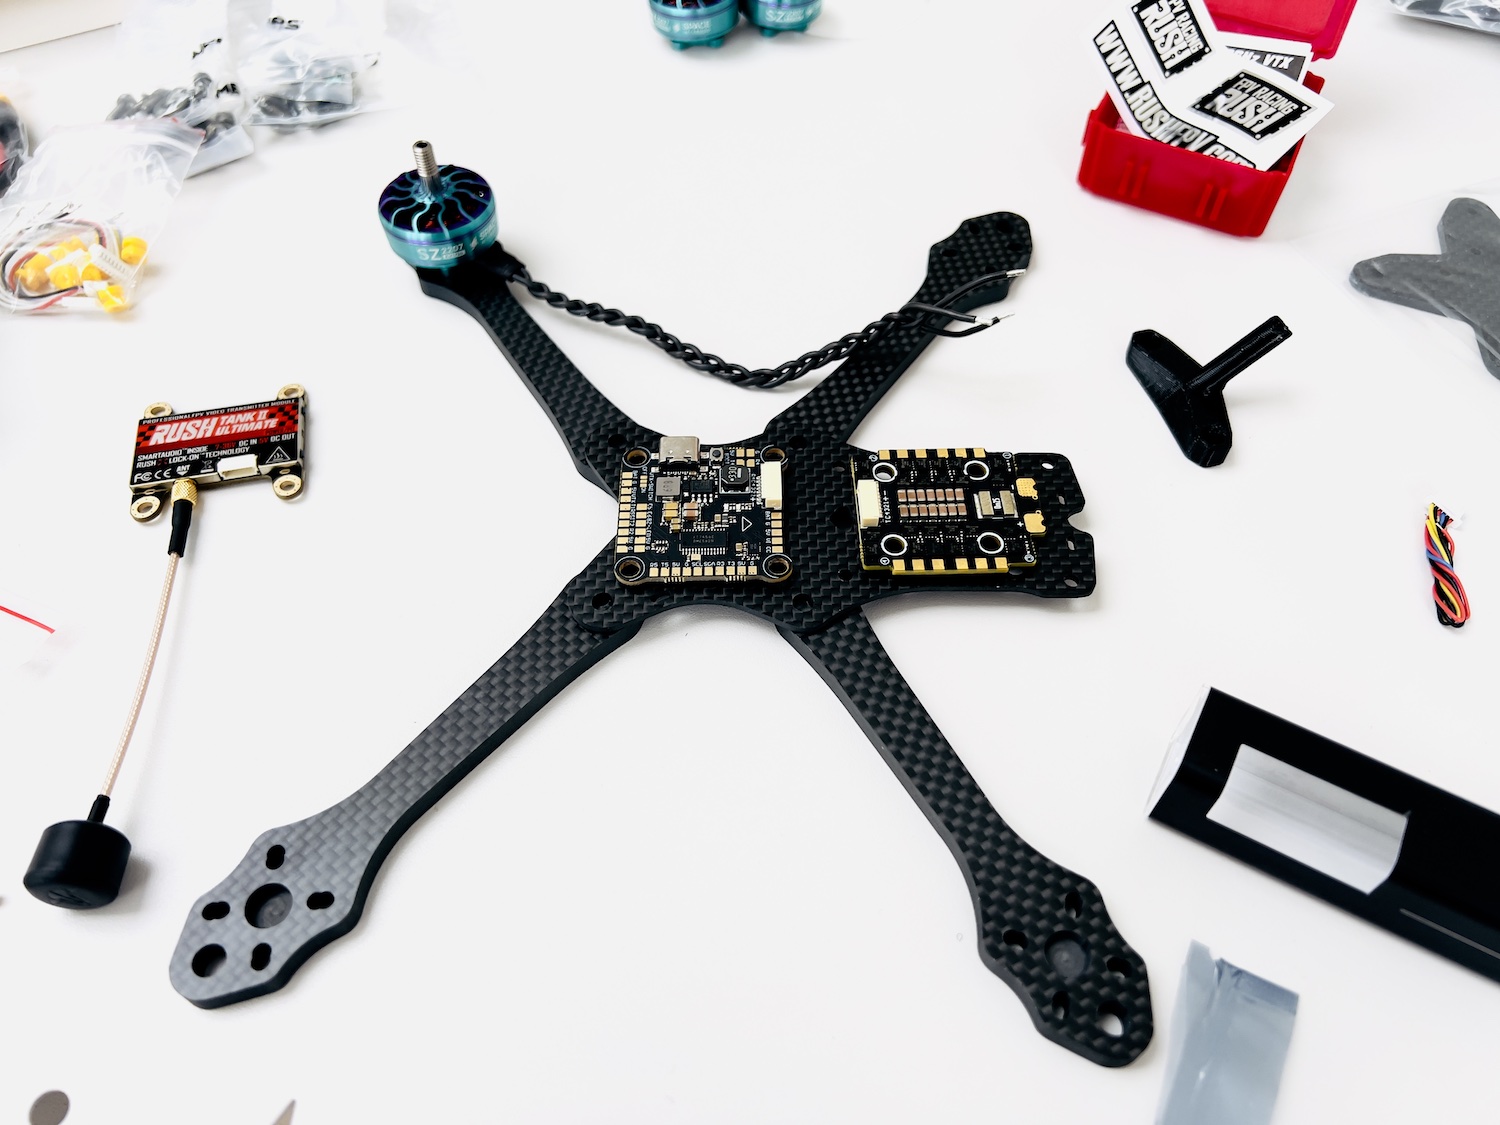
By chance the length of the MEPS motor wires was just about perfect after I completed my usual braiding of the cables.
I was able to run the front motor wires under the flight controller to the pads at the front of the ESC. The rear motor wires could then be placed under the ESC and routed to the pads at the rear.
This left the main power solder pads slightly protruding from the side of the frame, what I thought would be perfect for a nice neat and tidy power connector…
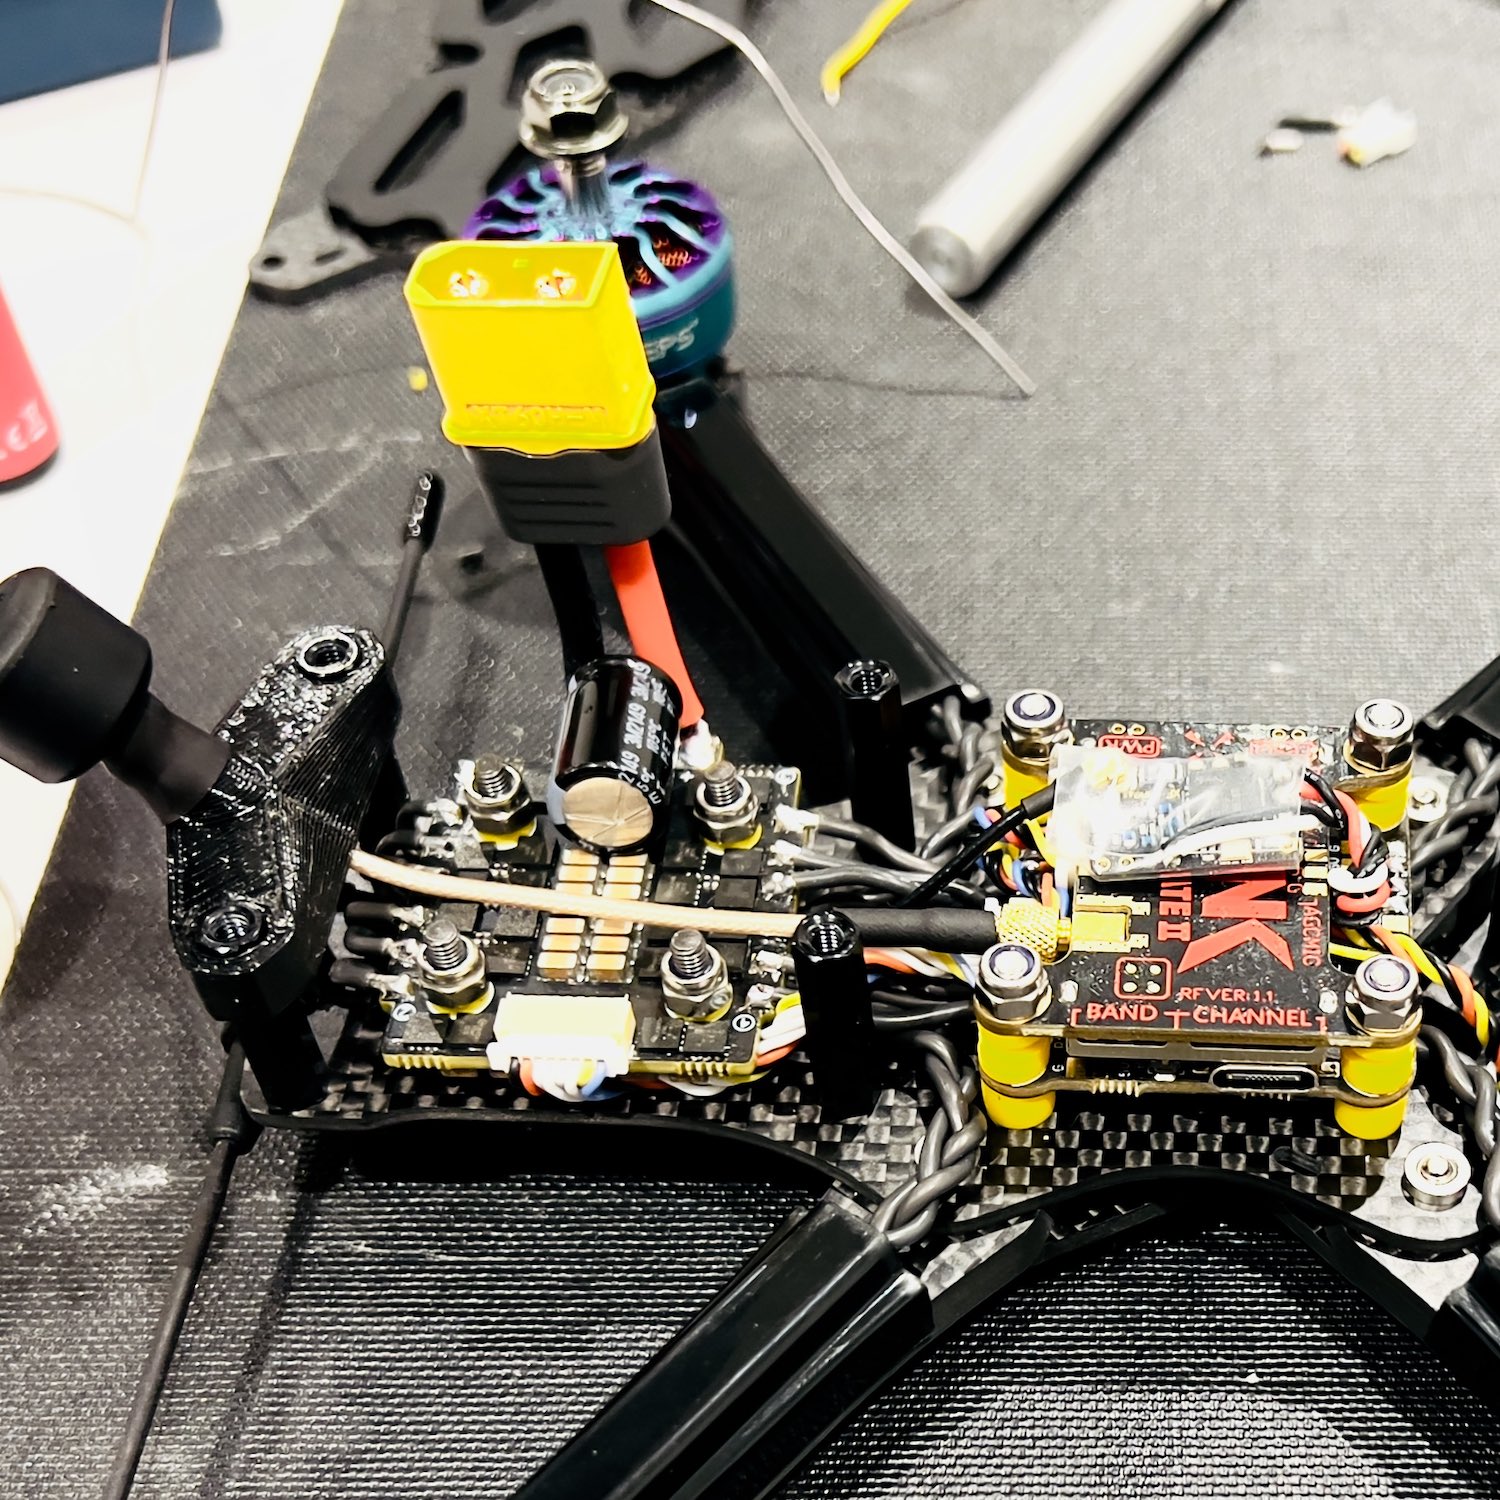
This worked perfectly on the bench, but in practice the rear prop blades came far too close to the wires with 5″ diameter props. There’s no chance I would have put 5.1″ diameter props on!
I ended up using slightly longer cables on the power connector and routing it out of the rear of the frame.
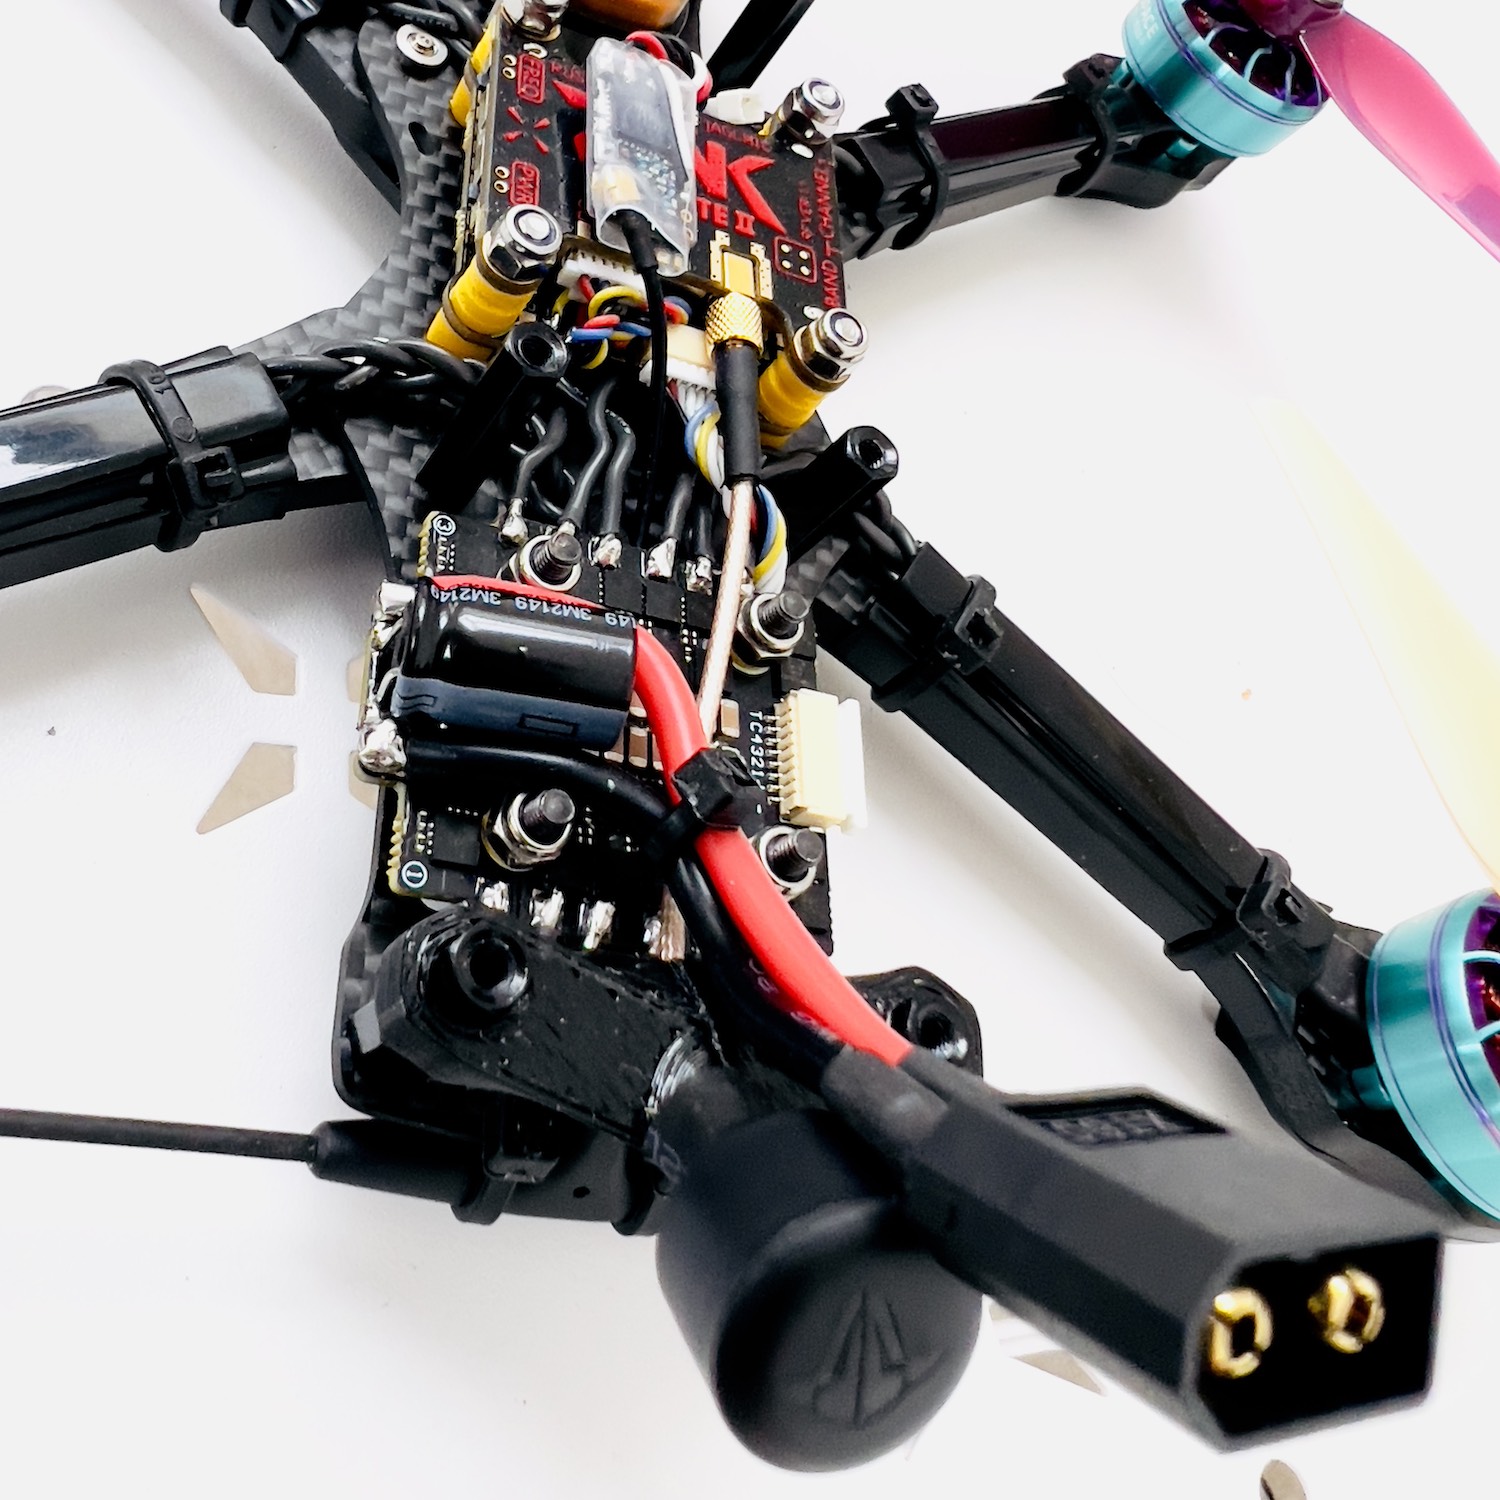
I already had a Rush Tank Ultimate 2 VTx ready to go into a quad, so I mounted this above the flight controller as it has 30×30 mounting holes.
Unfortunately the choice of VTx antennas was a little limited during the time I was buying parts for this quad. I opted for the TBS Triumph antenna, which I know to be a good choice.
However I misjudged the cable length and ended up having the trim the antenna mount a little in order to get the cable to reach.
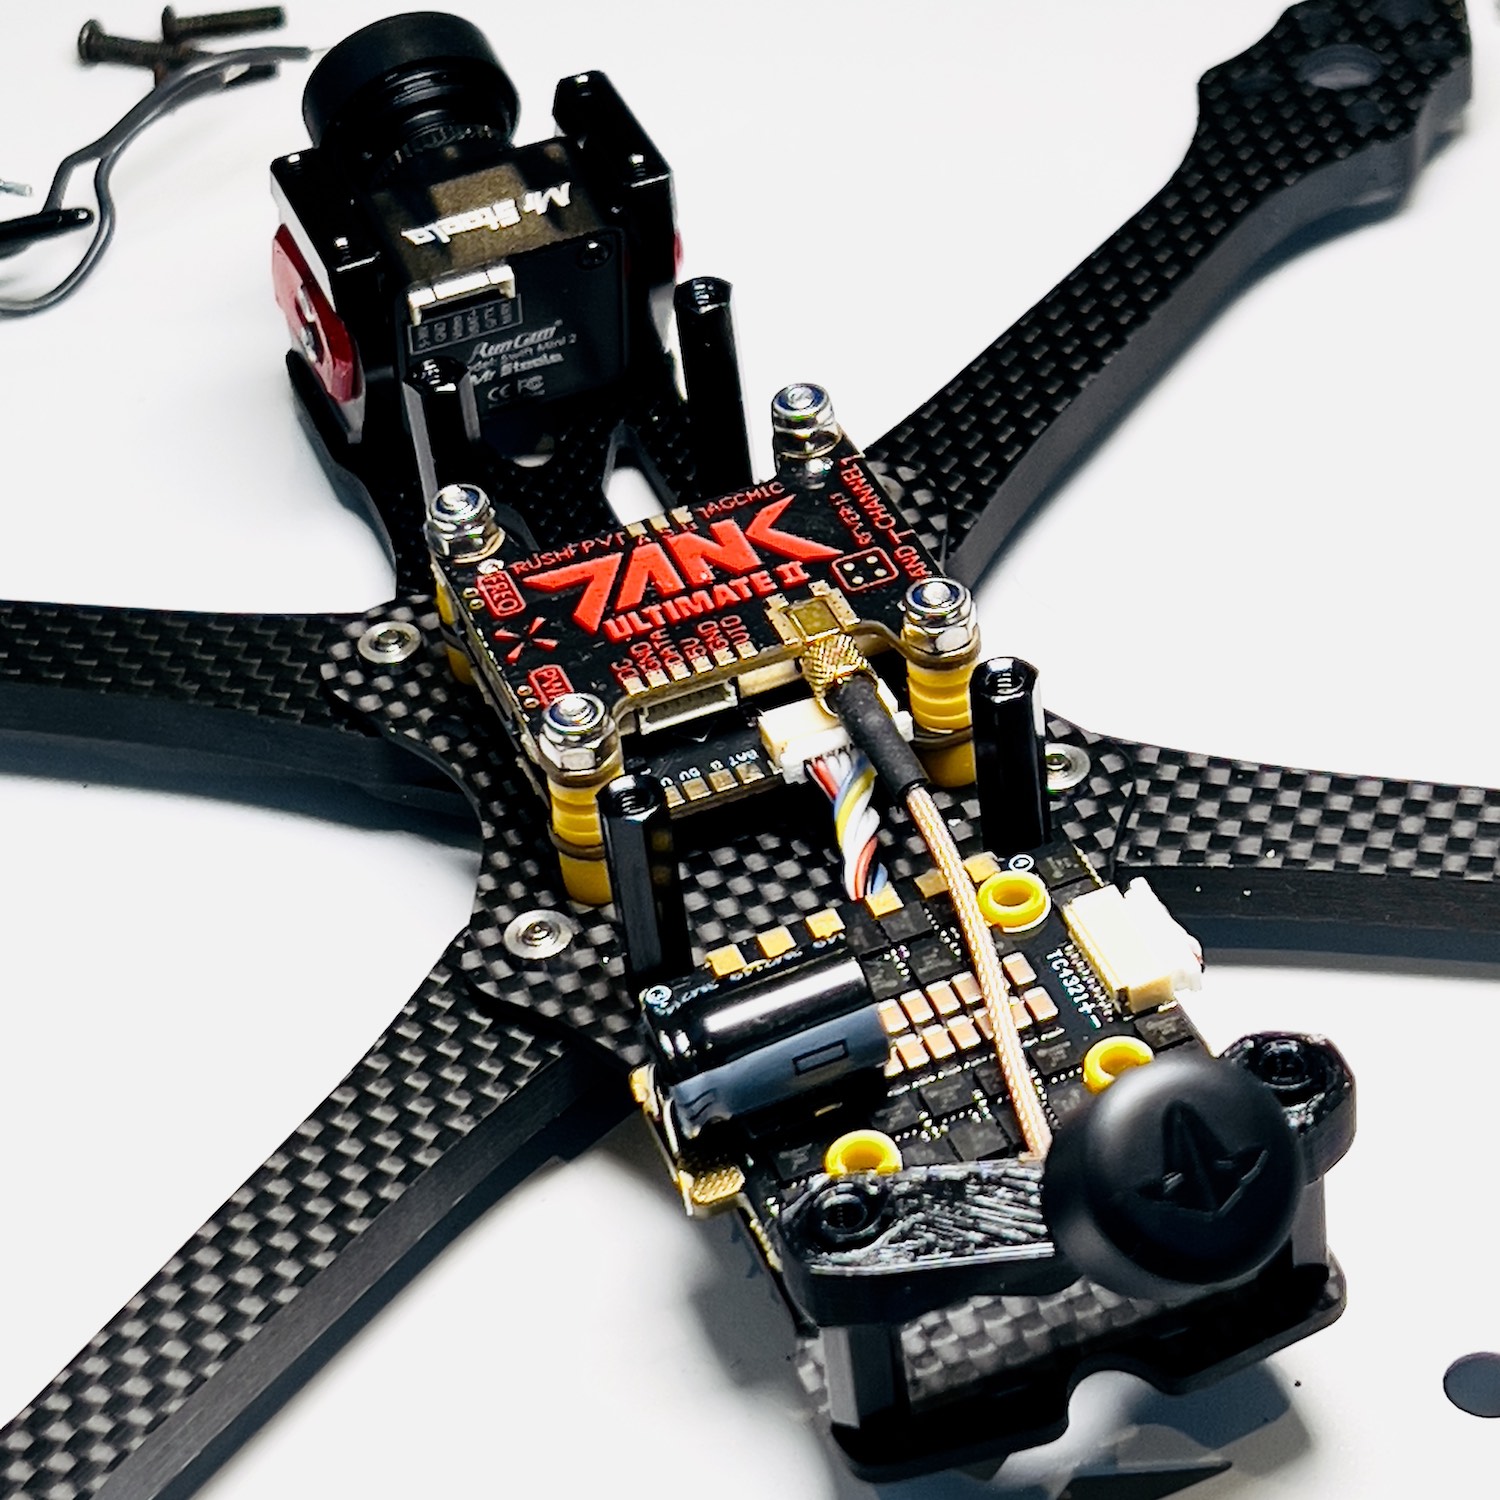
I must admit that I was a little concerned about running the VTx antenna cable so close to the ESC due to the potential noise that might propagate from the ESC.
However much to my surprise, the video signal was rock solid! I am sure some credit must be due to the Rush Tank Ultimate 2 for performance here and also to TBS for using quality coax!
To complete the build I used a RunCam Mr Steel edition camera and a TBS Nano receiver that I had in my spare parts box.
I also included a ViFly buzzer between the camera and 30×30 flight stack, but was a little disappointed that this particular buzzer cannot be wired to the flight controller, again a topic for another review post.
With all of the electronics installed on the frame and a fresh set of watermelon props on, I was ready to make some test flights!
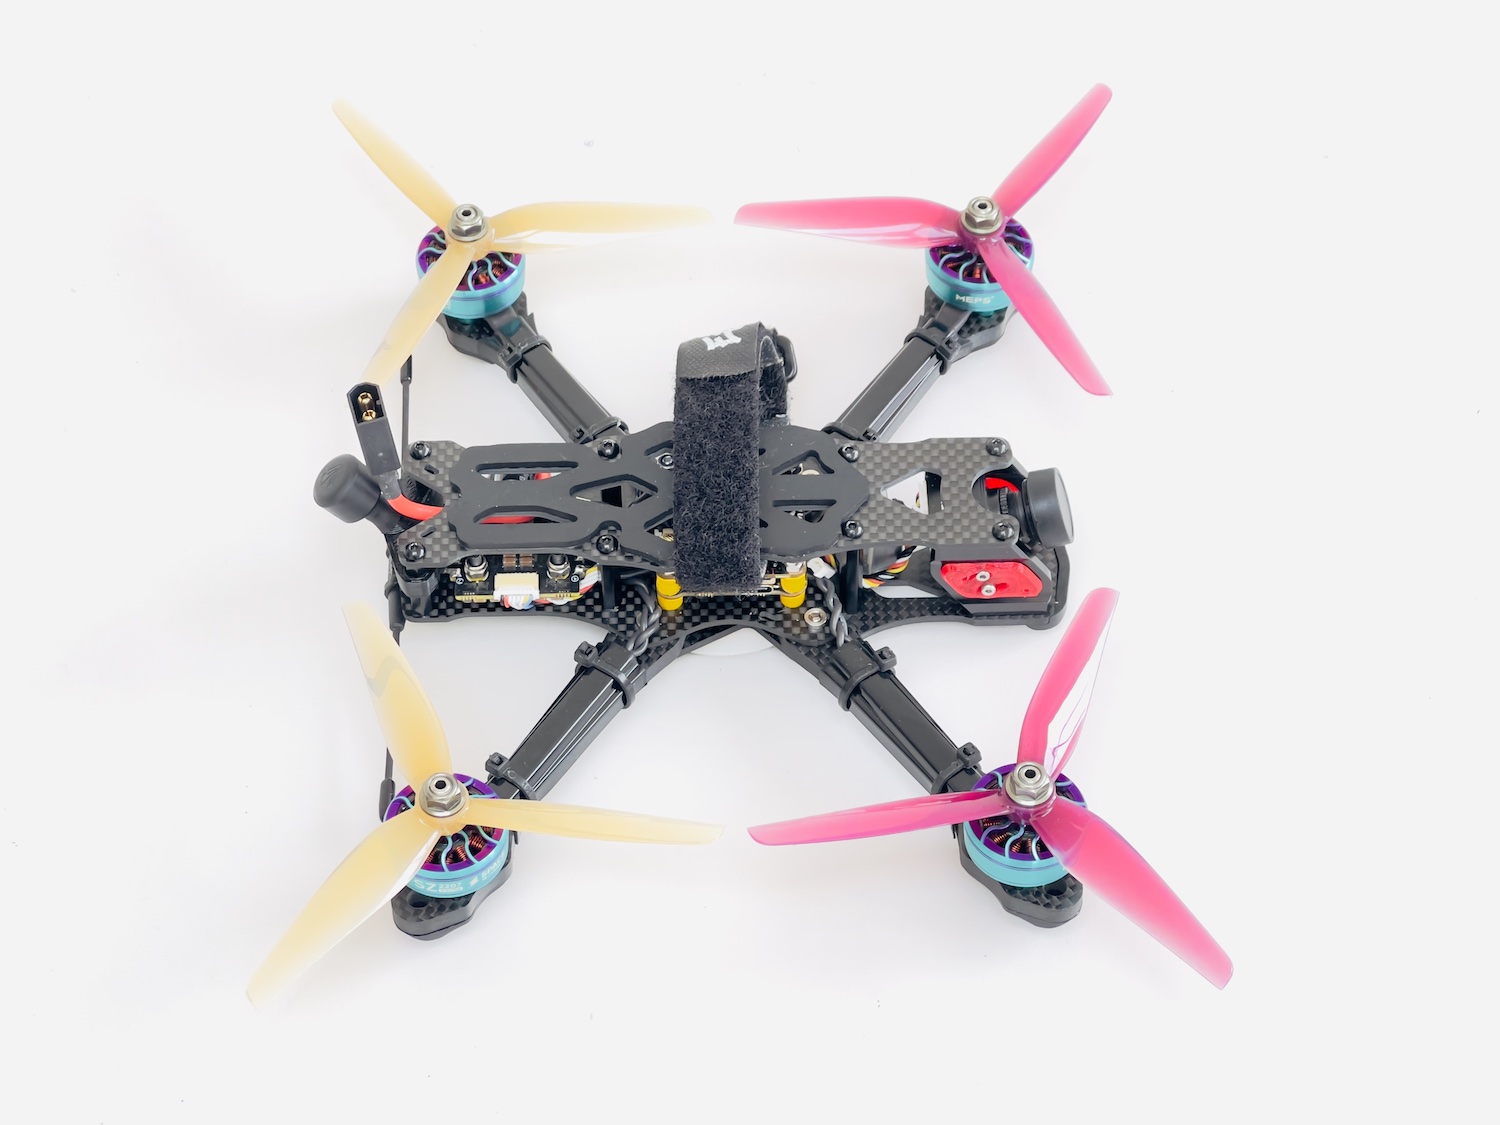
MEPS Quad: The Result
Well I must say I was quite pleasantly surprised by how this quad performed!
I must admit that I am far from the best pilot, so I am not really in a position to discuss the nuances of tuning the build to within an inch of its life.
However as a beginner-intermediate level pilot myself, I can certainly say that beginners will be pleased with the results.
Comparing this to my other quads, which all feature the most premium and high quality parts, this quad felt extremely tight and responsive, even on a stock tune.
I think some credit needs to go to ImpulseRC and the Apex frame. Those guys know what they are doing, despite a few quirks with building the frame, which should be discussed in a seperate post.
Aside from that, overall I think that the MEPS products performed well!
The motors felt perhaps ever so slightly lacking in power when compared with my Vert V2, which is rocking Xing Cyber 2207s and using a FETtec Kiss stack, especially considering that there is no HD camera on the build
Although with that said, lately I have been flying my super-light long range Source V a lot, so it might just have been me switching back to a chonky freestyle build.
After the first test flight I tweaked the rates to something more suitable. I had to go a touch higher than expected to get the feel right, but I think this is more down to the fact that the frame is a compressed X.
I strapped a 1300mAh on for the second test flight and ripped a good 6 minutes, landing with around half of the battery capacity, proving that Chris Rosser’s bench testing results translate to real world application. This build seems efficient!
Upon landing, the motors were definitely quite warm but certainly not too hot to touch.
Although the motors were perhaps a little warmer than expected, I would certainly not call it a problem. We should also consider that these test flights were done on a very hot day so the ambient temperature was very high.
Likewise the ESC seemed to have no problem handling the current. Long term reliability remains a question mark, however I can’t say that I had any initial concerns.
Conclusion
Commenting purely from a performance perspective and noting that I am far from an expert pilot, overall I was pretty happy with how the MEPS quad performed. I certainly had some fun flying it!
I found the MEPS products fairly easy to install, in terms of their design. The solder pads were a decent size and all products came with the suitable accessory hardware.
I do have one outstanding query regarding the ESC copper thickness and it remains to be seen whether or not this could cause reliability issues. However a couple of test flights did not produce results that would be cause for concern.
I can’t say that I really found any “stand out” features on any of the MEPS products, however all of the features that you would expect are there, which is enough to build a quad that performs well!
The ability to control the VTx power regulator from the transmitter is certainly an awesome feature that I found to be very useful in practice, but I found it to be more of a simple but useful feature, rather than something that is totally innovative.
With that said, the motor designs are rather striking and you may lean towards MEPS if you envision these designs on your next build.
Overall MEPS products slot in well with the existing offerings, seem perfectly fit for purpose and are probably quite suitable for beginner builders.
They might have not yet produced anything that really shakes up the industry, but they are a very new brand. I am interested to see what their second generation of products might bring after they take what they have learnt from this first generation of products.

